W-Trek Patagonia, Chile🥾
The W-Trek is a very popular multi day trek in Patagonia, Chile, and was the first trek of this kind we had ever taken on. It can be quite expensive depending on what accommodation/food options you go for. However, we highly recommend doing this trek, because the views and experience are one of a kind and completely worth the price.
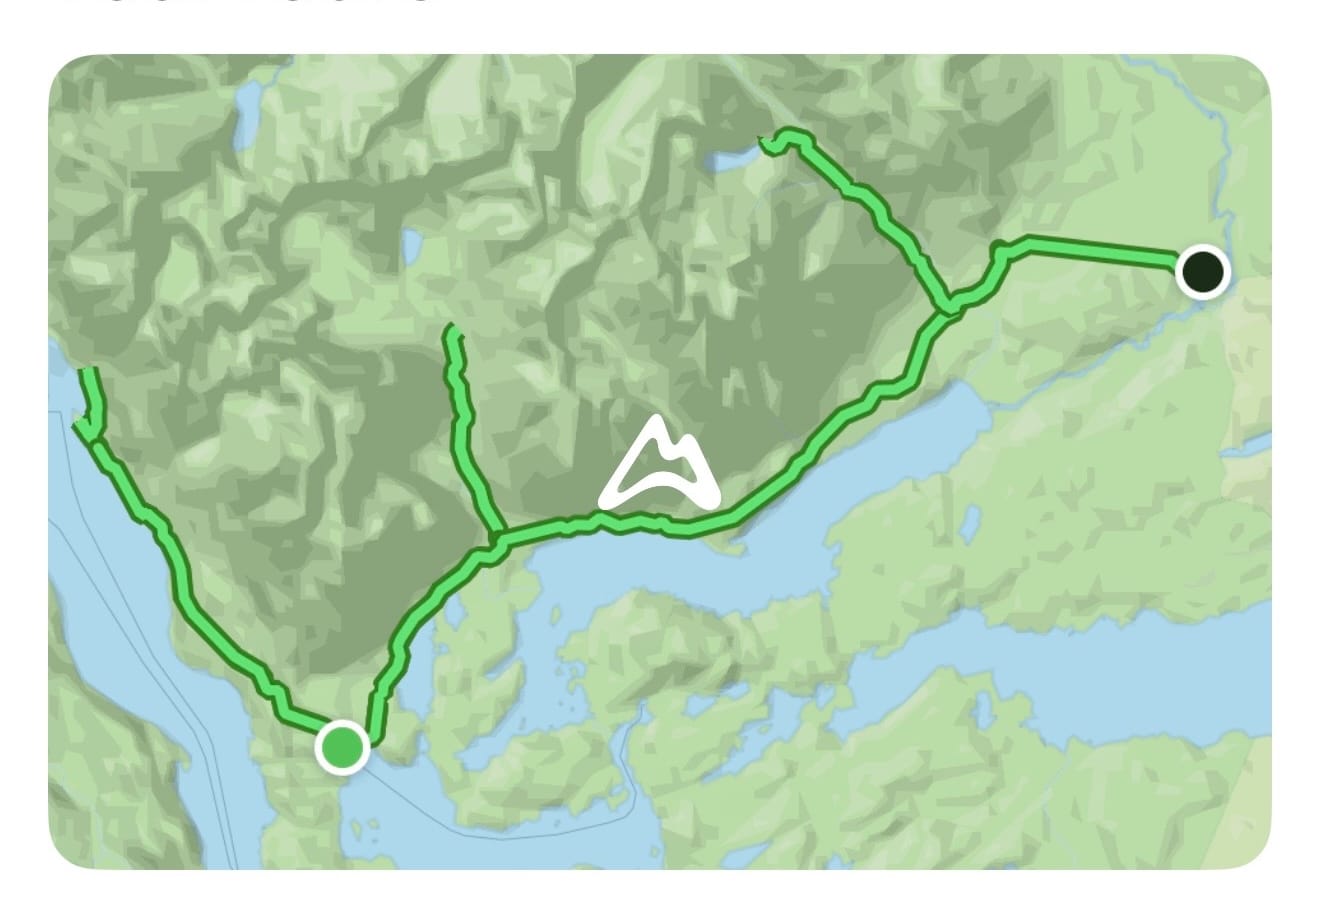
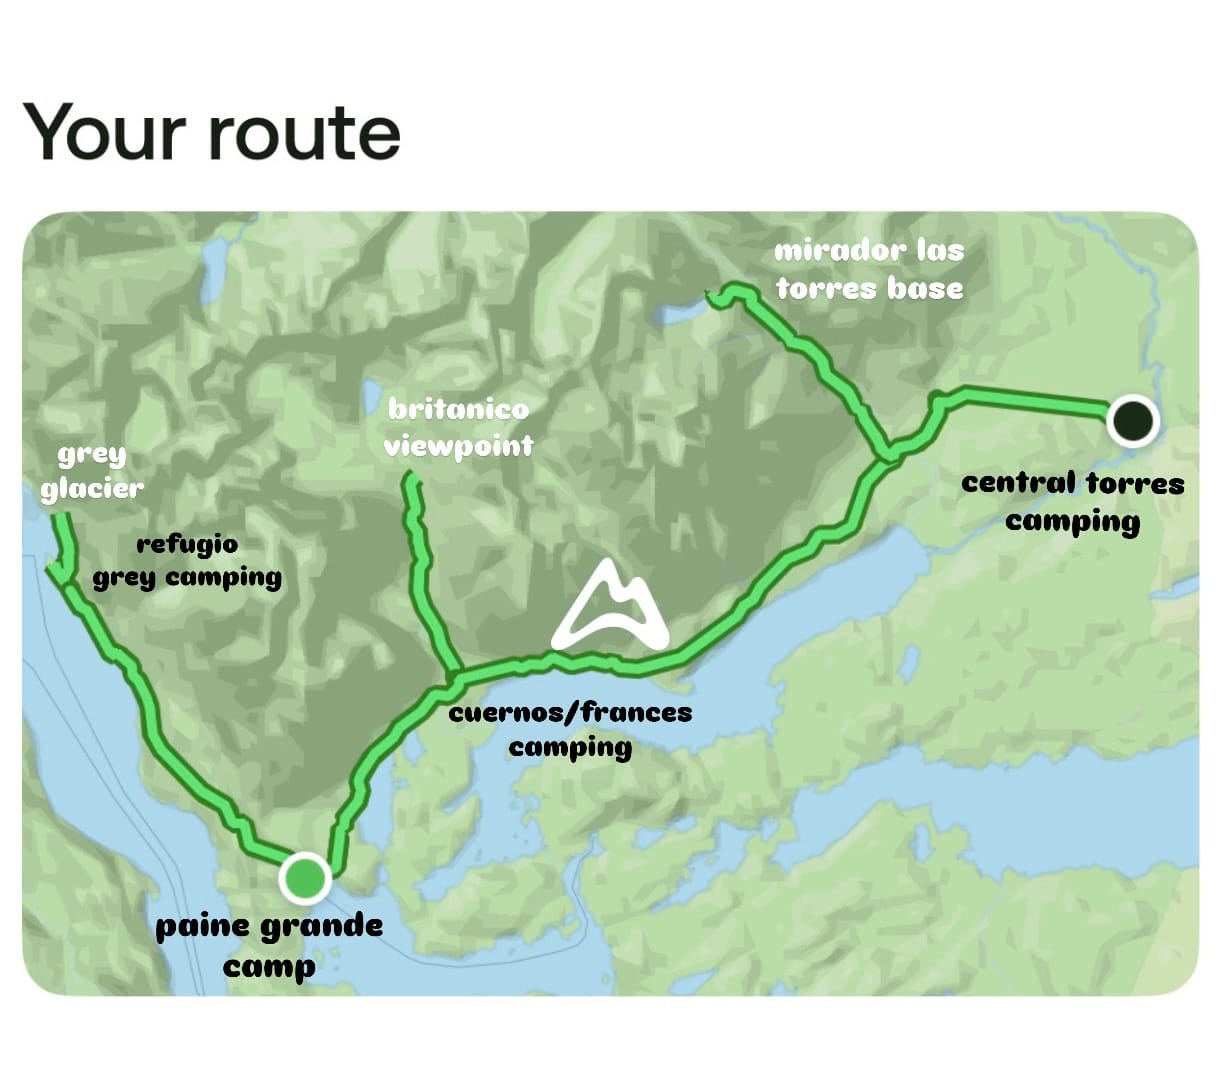
The route of the trek takes the shape of a W when you visit the three main highlights, Grey Glacier, Britaníco and the Torres Towers (seen below). The O-Trek is the more advanced hike, which can take up to 8 days to complete, and connects the two sides of the W together into an O shape.
WHAT TO BOOK & PLAN
You need to book months in advance because the hike is that popular and everything can get booked up very quickly. We decided to go with the cheapest option possible, bringing our own camping gear and food supplies, and just booking a campsite every night. This still cost us over $700 USD all together for two people. To plan the trek, you will need to do the following, preferably in this order:
- Plan your route.
- Book your campsites.
- Organise hire equipment.
- National Park Pass (1, 3, 3+ day passes).
- Organise additional transport.
Route
The conventional route goes West to East, which is the route we did, and it took us 5 days to complete. You can do more or less days depending on your fitness and how long you want to walk each day, but 5 days in our opinion, was the perfect amount of time to avoid having to rush.
We started in Paine Grande and ended at the Torres Towers. After completing the trek, we believe this is the better route to take, for a couple of reasons. Firstly, you end with the best views (The Towers), saving the grand finale for the last day. Británico and The Towers viewpoint are the more challenging hikes, with higher elevation gain, so it’s nice to warm up to these slowly with easier hikes to Grey Glacier and back. In addition, we found that going West to East from Paine Grande to Central, there is generally more downhill sections compared to uphill, so it would be more tiring if you were coming the other way. There are pros and cons to both, so plan your route to suit your needs best, but in our opinion West to East is better!
Campsites
Once you have decided your route, book your campsites as soon as possible! Try to avoid what we did and make sure there is availability for each of the camps for your dates. If there aren’t, you might want to change your dates or route, but that’s up to you! We suggest booking your campsites first because you are not allowed to free camp anywhere, you have to stay in a campsite.
From the photo in the Route section, going West to East; normally, you would do one night in Grey Refugio, a night in Paine Grande, a night in Cuernos or Frances and a night in Central. However, for us, there was no availability at Cuernos or Frances for our dates, which are the camps at the middle part of the W. This meant we had to have two nights in Paine Grande, meaning we had to go back on ourselves after Británico and also walk 25km all the way to Central on our fourth day.
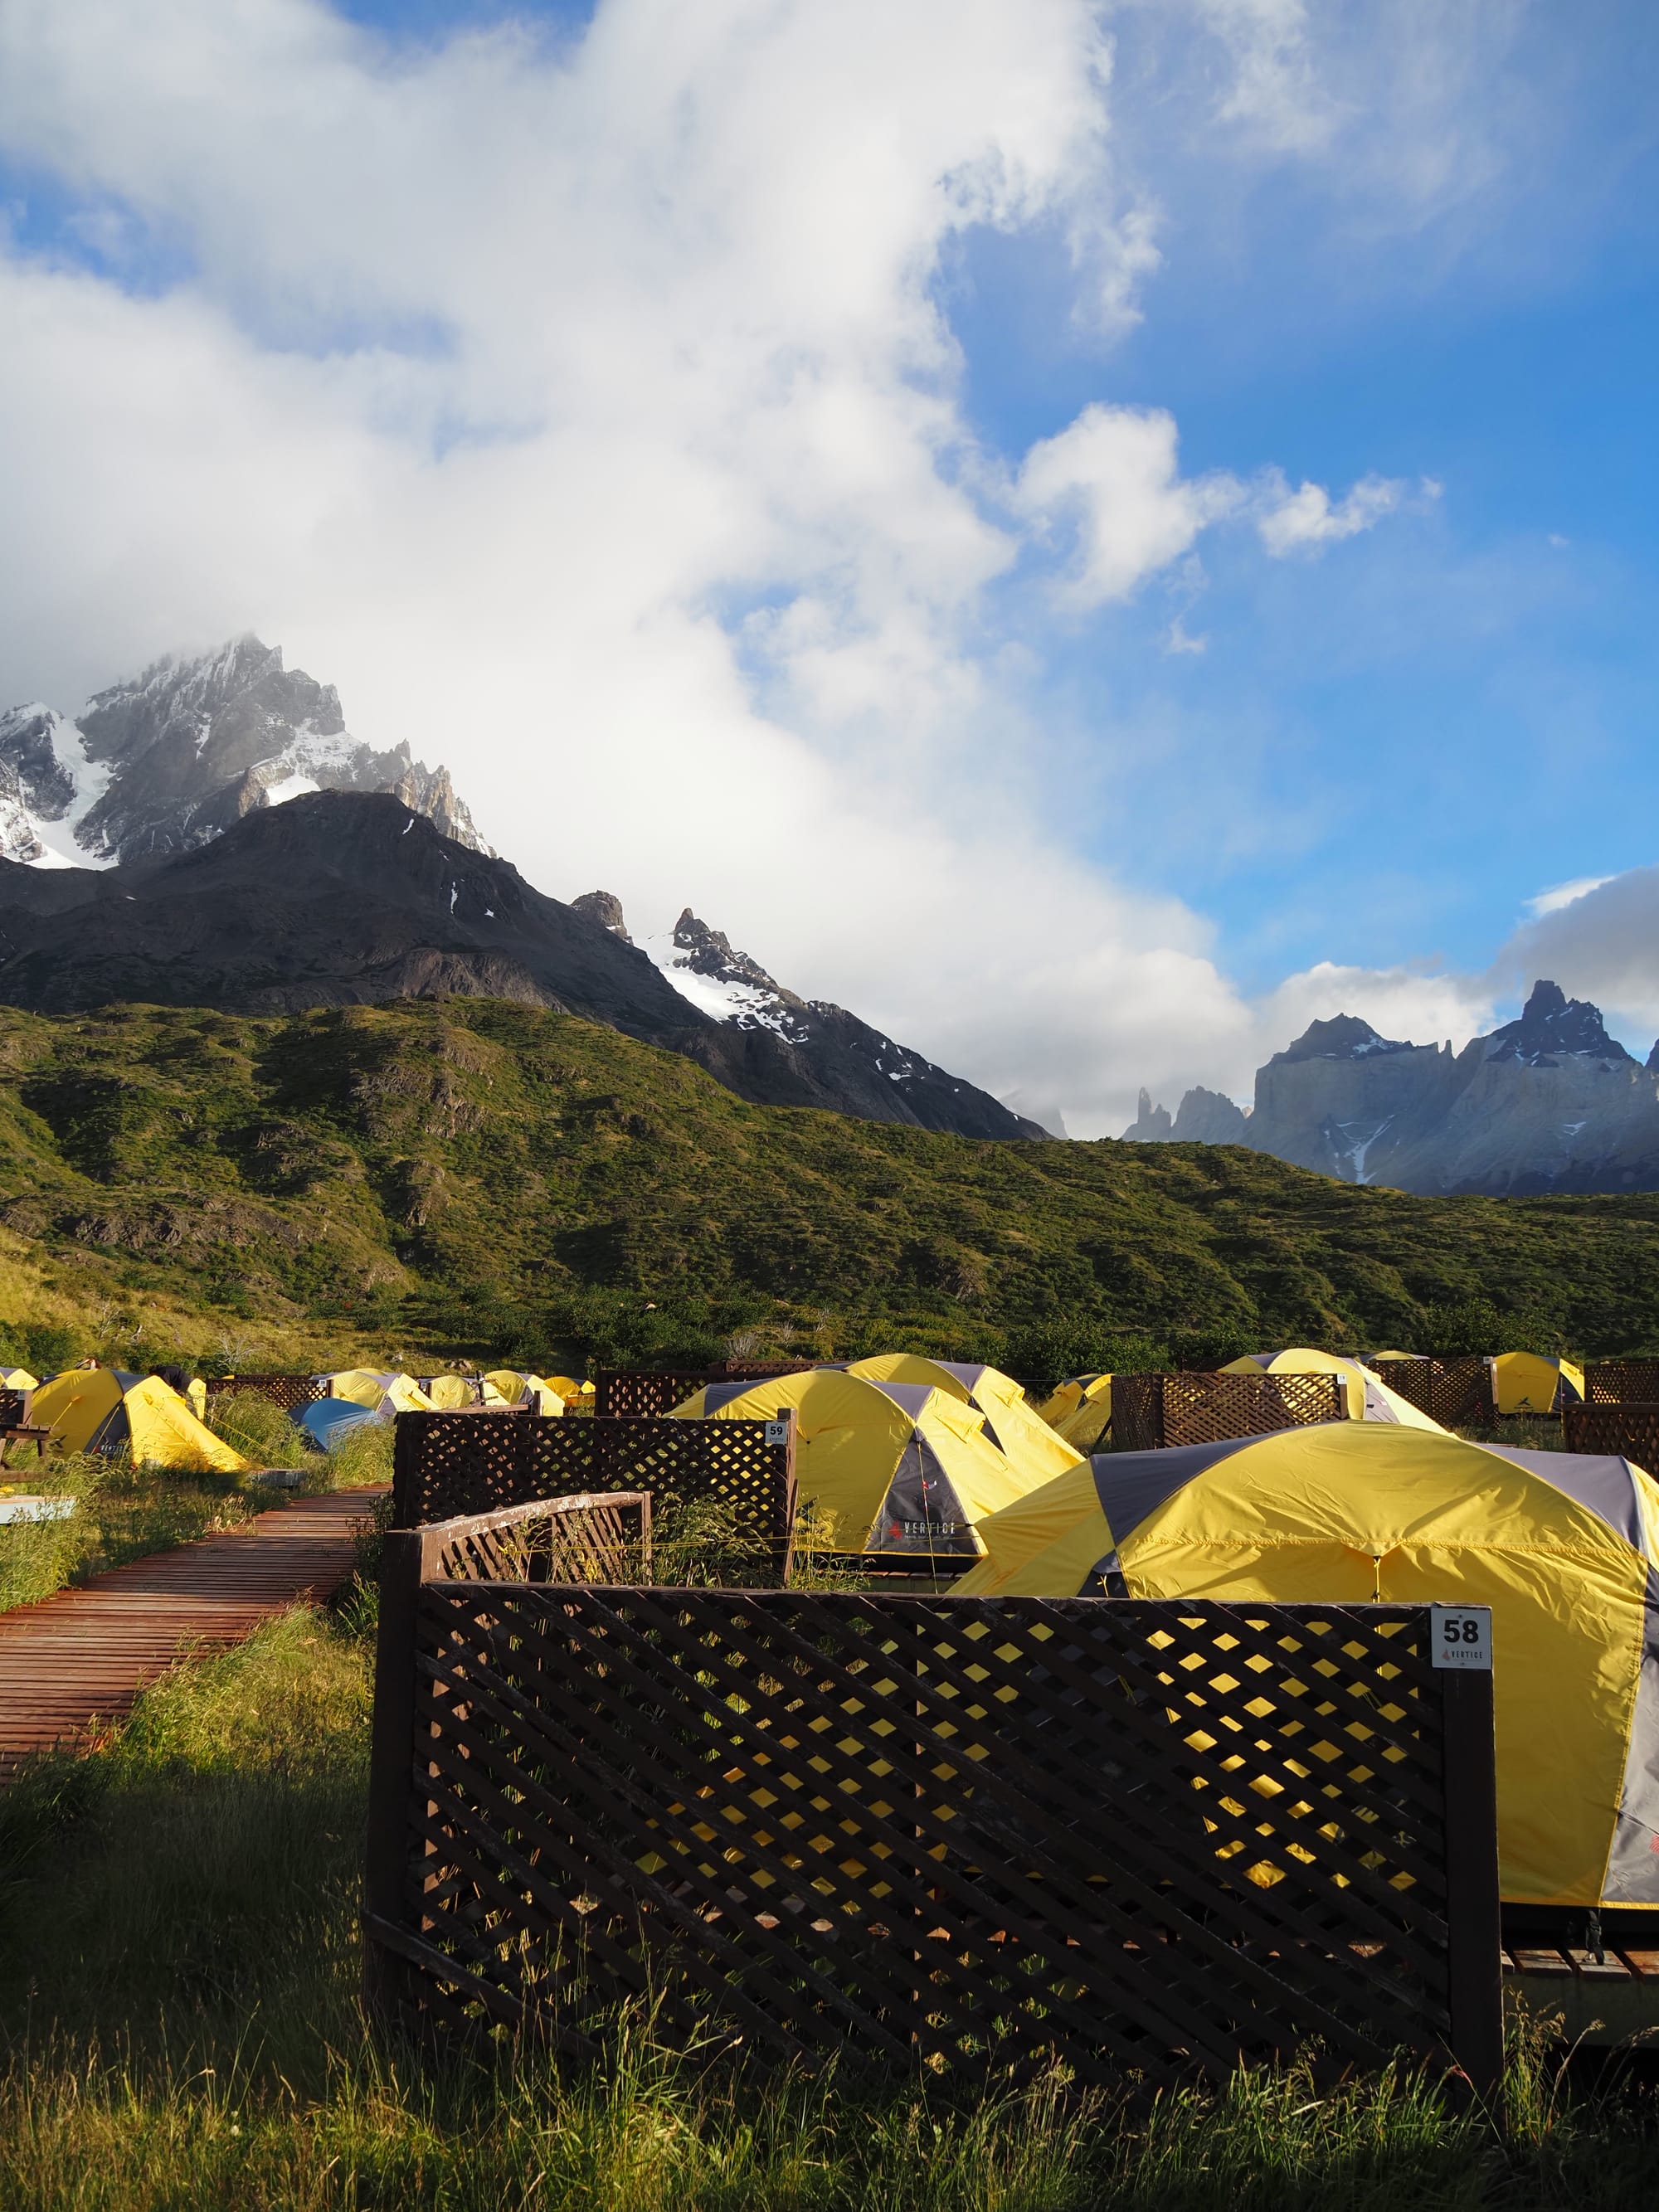
Book your accommodation directly with Vertice or Las Torres Patagonia. There are different accommodation options to choose from. First option, is you bring everything yourself, your tents, sleeping bags, kitchen stuff, etc. Doing this is the cheapest option and means you will need to book a space at the camp to set up your own tent.
The second accommodation option is a pre-made tent. These are considerably more expensive (up to $290 USD per night), but allow you to travel light and save money on renting camping gear. The third option is staying in the refugios themselves, either in a dorm room or a private (only available at some camps), prices vary but in general this is the most expensive option. We chose option one, and we paid:
- Grey Refugio Camp: 2x people, 1 night = $24 USD
- Paine Grande Camp: 2x people, 2 nights = $56 USD
- Central Camp: 2x people, 1 night = $100 USD
Total: 2x people, 4 nights = $180 USD
Equipment
We hired all our equipment with Niko II Adventures, which is a hostel in Puerto Natales. The main company to hire equipment with is Rental Natales, but it was over double the price of our quote from Niko’s ($550 USD). For all our equipment it cost us $250 USD for the both of us, for 5 days:
- Tent for two: $12.000: $12.000 x 5 =
$60.000 - Sleeping bags: $6.000 × 2 = $12.000 x 5 =
$60.000 - Sleeping mats: $3.000 × 2 = $6.000 x 5 =
$30.000 - Backpacks: $6.000 × 2 = $12.000 × 5 =
$60.000 - Stove + cooking kit: $8.000 x 5 =
$40.000
Total for 5 days: $250.000 USD
Deposit: $200.000 CLP or $200 USD (cash only)
- Walking poles (from our hostel): $6,000 x 5 = $30.000
Although our gear was much cheaper than the main rental company, we cannot recommend using Niko’s. This was because the gear they gave us was very old and worn. Our tent actually broke on our second night, meaning that the majority of the trek, sleeping was pretty uncomfortable.
Food
Food is so important when hiking, especially for multiple days. There are a few options on the W-trek on how to feed yourself as you go. The first and cheapest option is to bring your own cooking supplies. The second option is to buy food and snacks from the refugios and restaurants along the way, this is considerably more expensive as food prices are extremely high in Patagonia in general. The third and final option, is to pre-book meal tickets when you book your accommodation. Buffet style breakfasts and dinners are offered, as well as pre-made packed lunches to take on your hikes. This is obviously the most luxurious and expensive option.
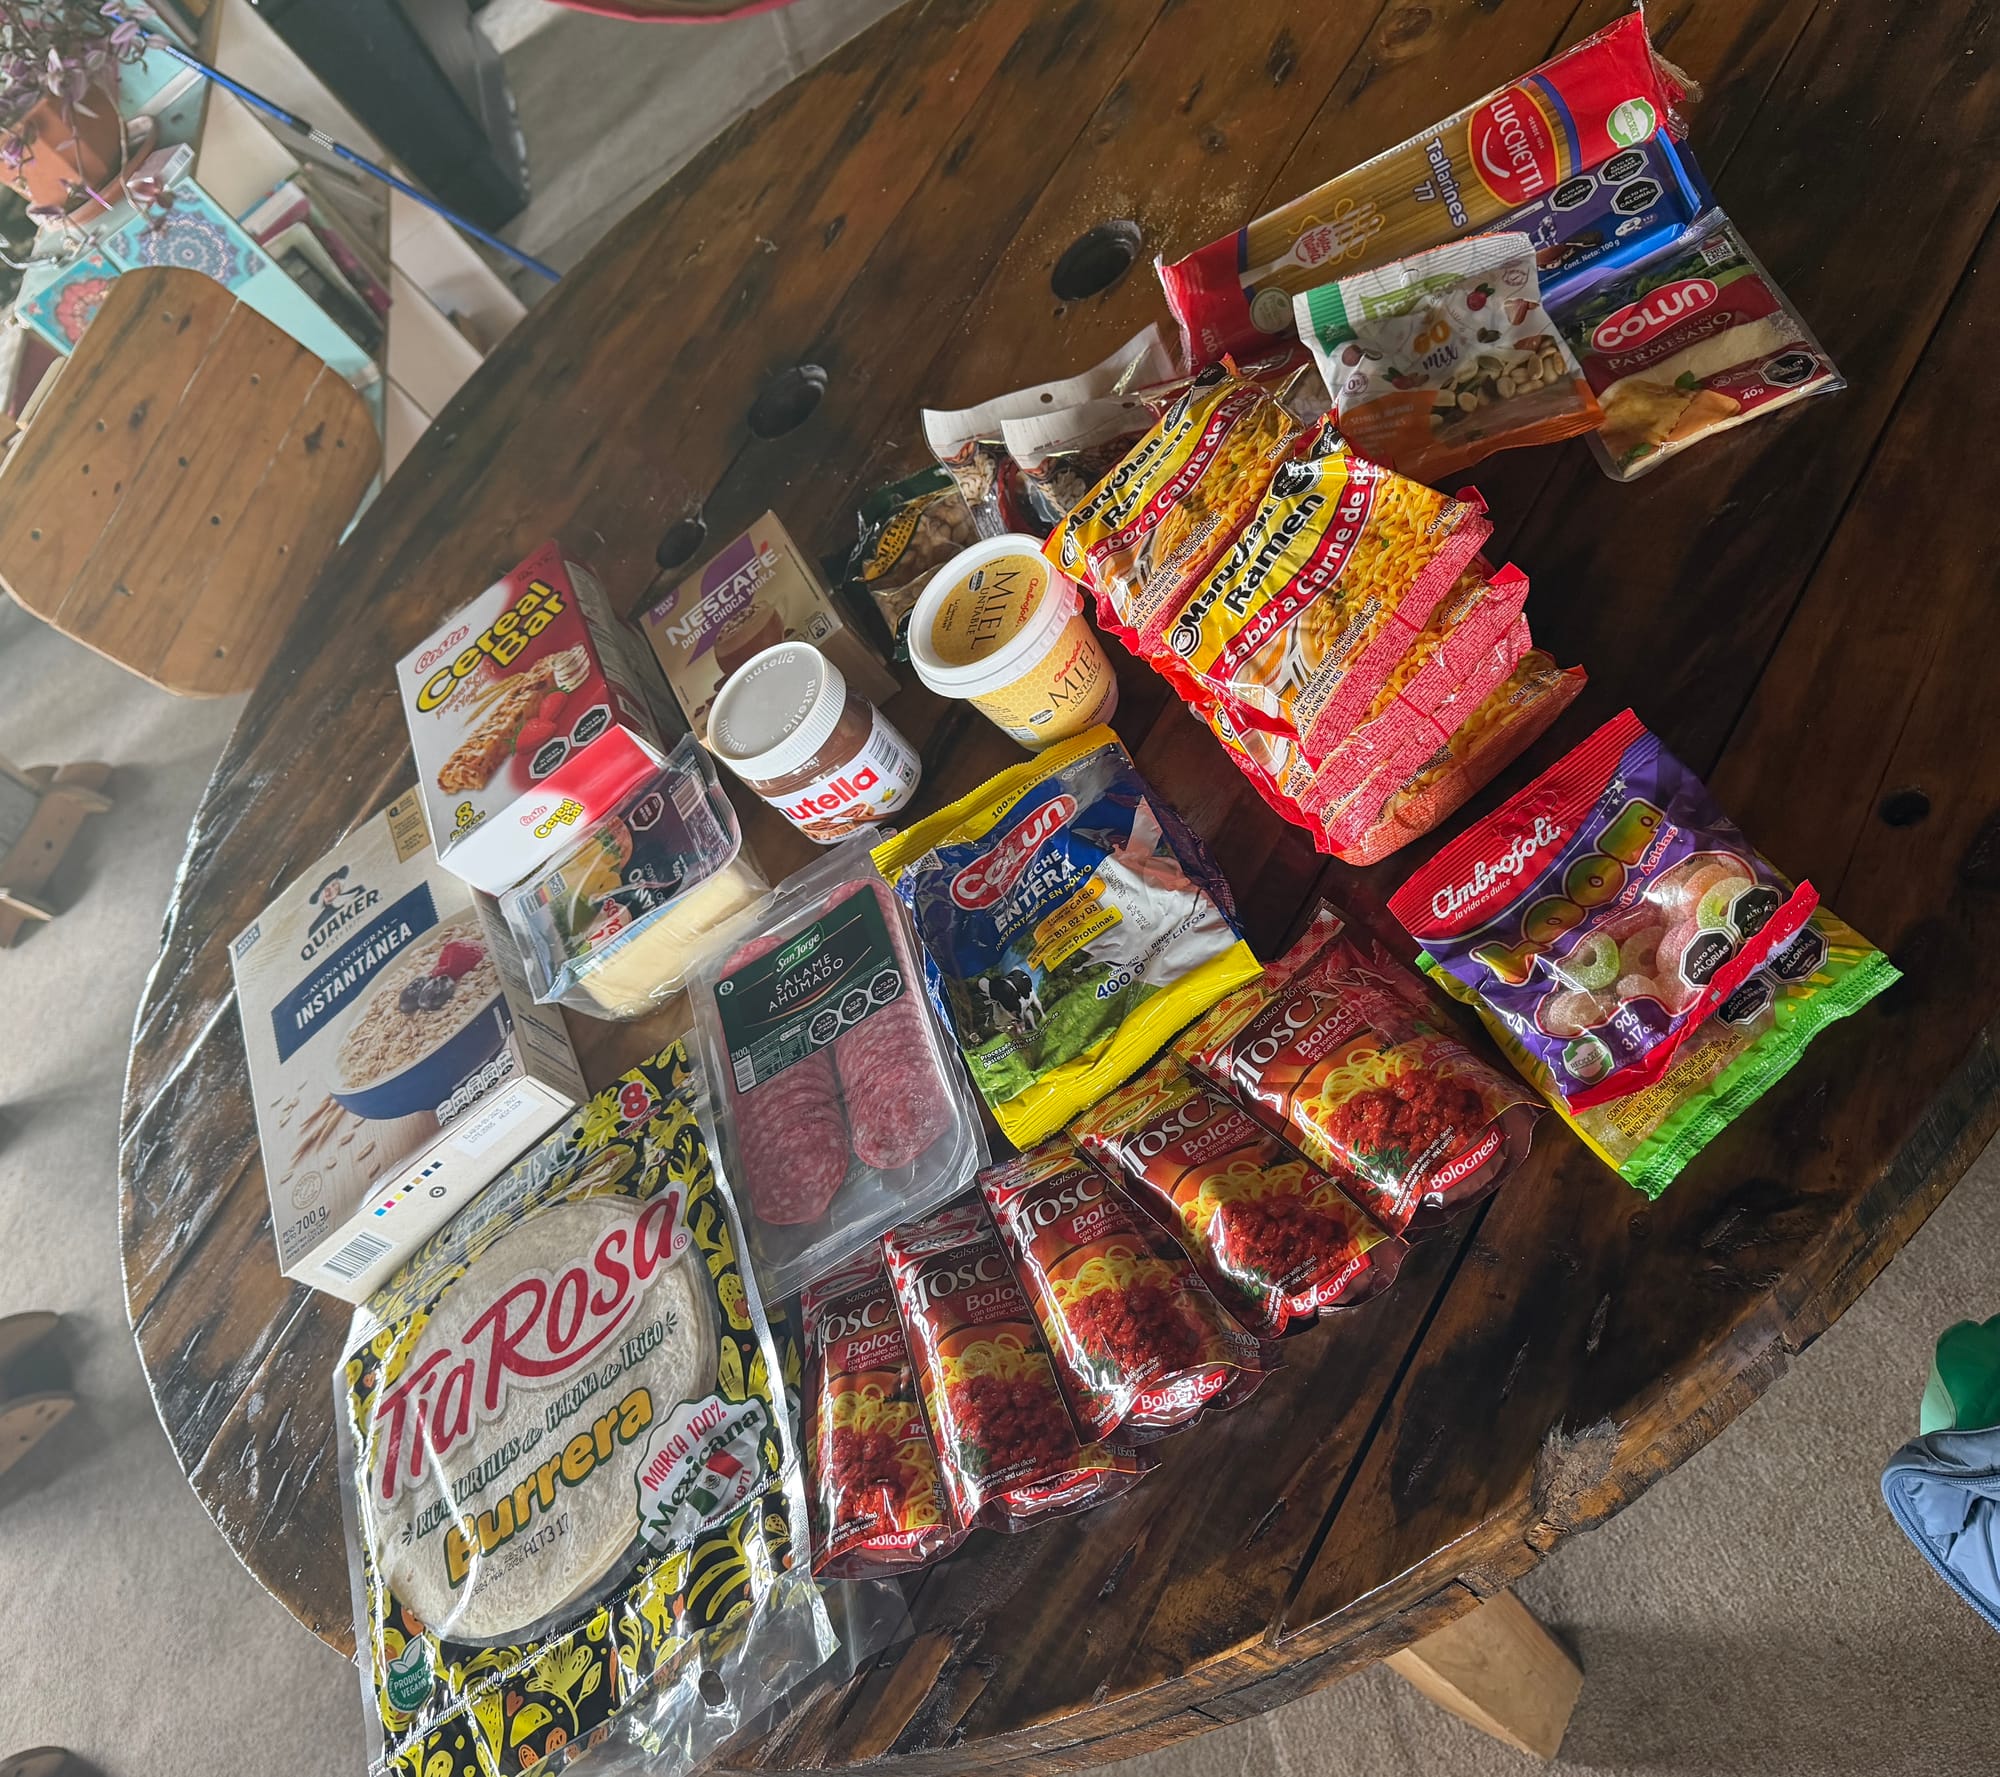
If, like us, you want to go for the cheapest option of bringing your own food, you want to make sure you bring light weight foods that are high in calories, to give you energy throughout the day. Don’t bring anything heavy, as you will have to carry it for the five days. Plan it so that you eat the heavier items on the first couple days to make your bag lighter as the trek goes on. There are stores that sell freeze dried foods in Puerto Natales, however they are also very expensive, so we planned to just take lightweight food. To give you a rough idea, we brought the following :
- Breakfast: Instant oats, powdered milk and honey. Coffee/hot chocolate sachets.
- Lunch: Wraps with cheese and salami.
- Dinner: Pasta and sauce with cheese for two nights. Ramen packets/soup sachets for two nights.
- Snacks: Trail mix (we bought different nuts and dried fruits and combined them), chocolate, sweets, cereal bars, Nutella and extra wraps for dessert.
Also consider bringing hydralyte tablets, as we used them every day, and felt like they helped us with energy levels and hydration.
Cost: £62 (74,240 CLP)
National Parks Pass
You need to purchase a National Parks Pass for your trek. Make sure you get the correct one as there are 1 day passes, 3 days or 3+ day passes. We got the 3+ day pass, and it cost us 46,200 CLP per person (92,400 CLP for two).
Transport Costs
There are a few other transport costs you will need to organise and pay for. First is the bus from Puerto Natales to Torres Del Paine, for the beginning and end of your trip. We booked both trips with BusSur.
As you head into the National Park, if you haven’t bought your parks pass, you do have the opportunity to pay for it on the day as well. This is the stop where people going from East to West or just a day trip to the Torres Towers get off the bus. They will then get a separate shuttle bus to Central Camp to start their hike, this shuttles costs 4,500 CLP and it is cash only! If you don’t have cash you will have to walk the extra hilly 5km to Central. If you are going West to East, you will take this shuttle bus at the end of your trek from Central Camp to the bus station, so you will need cash for this too.
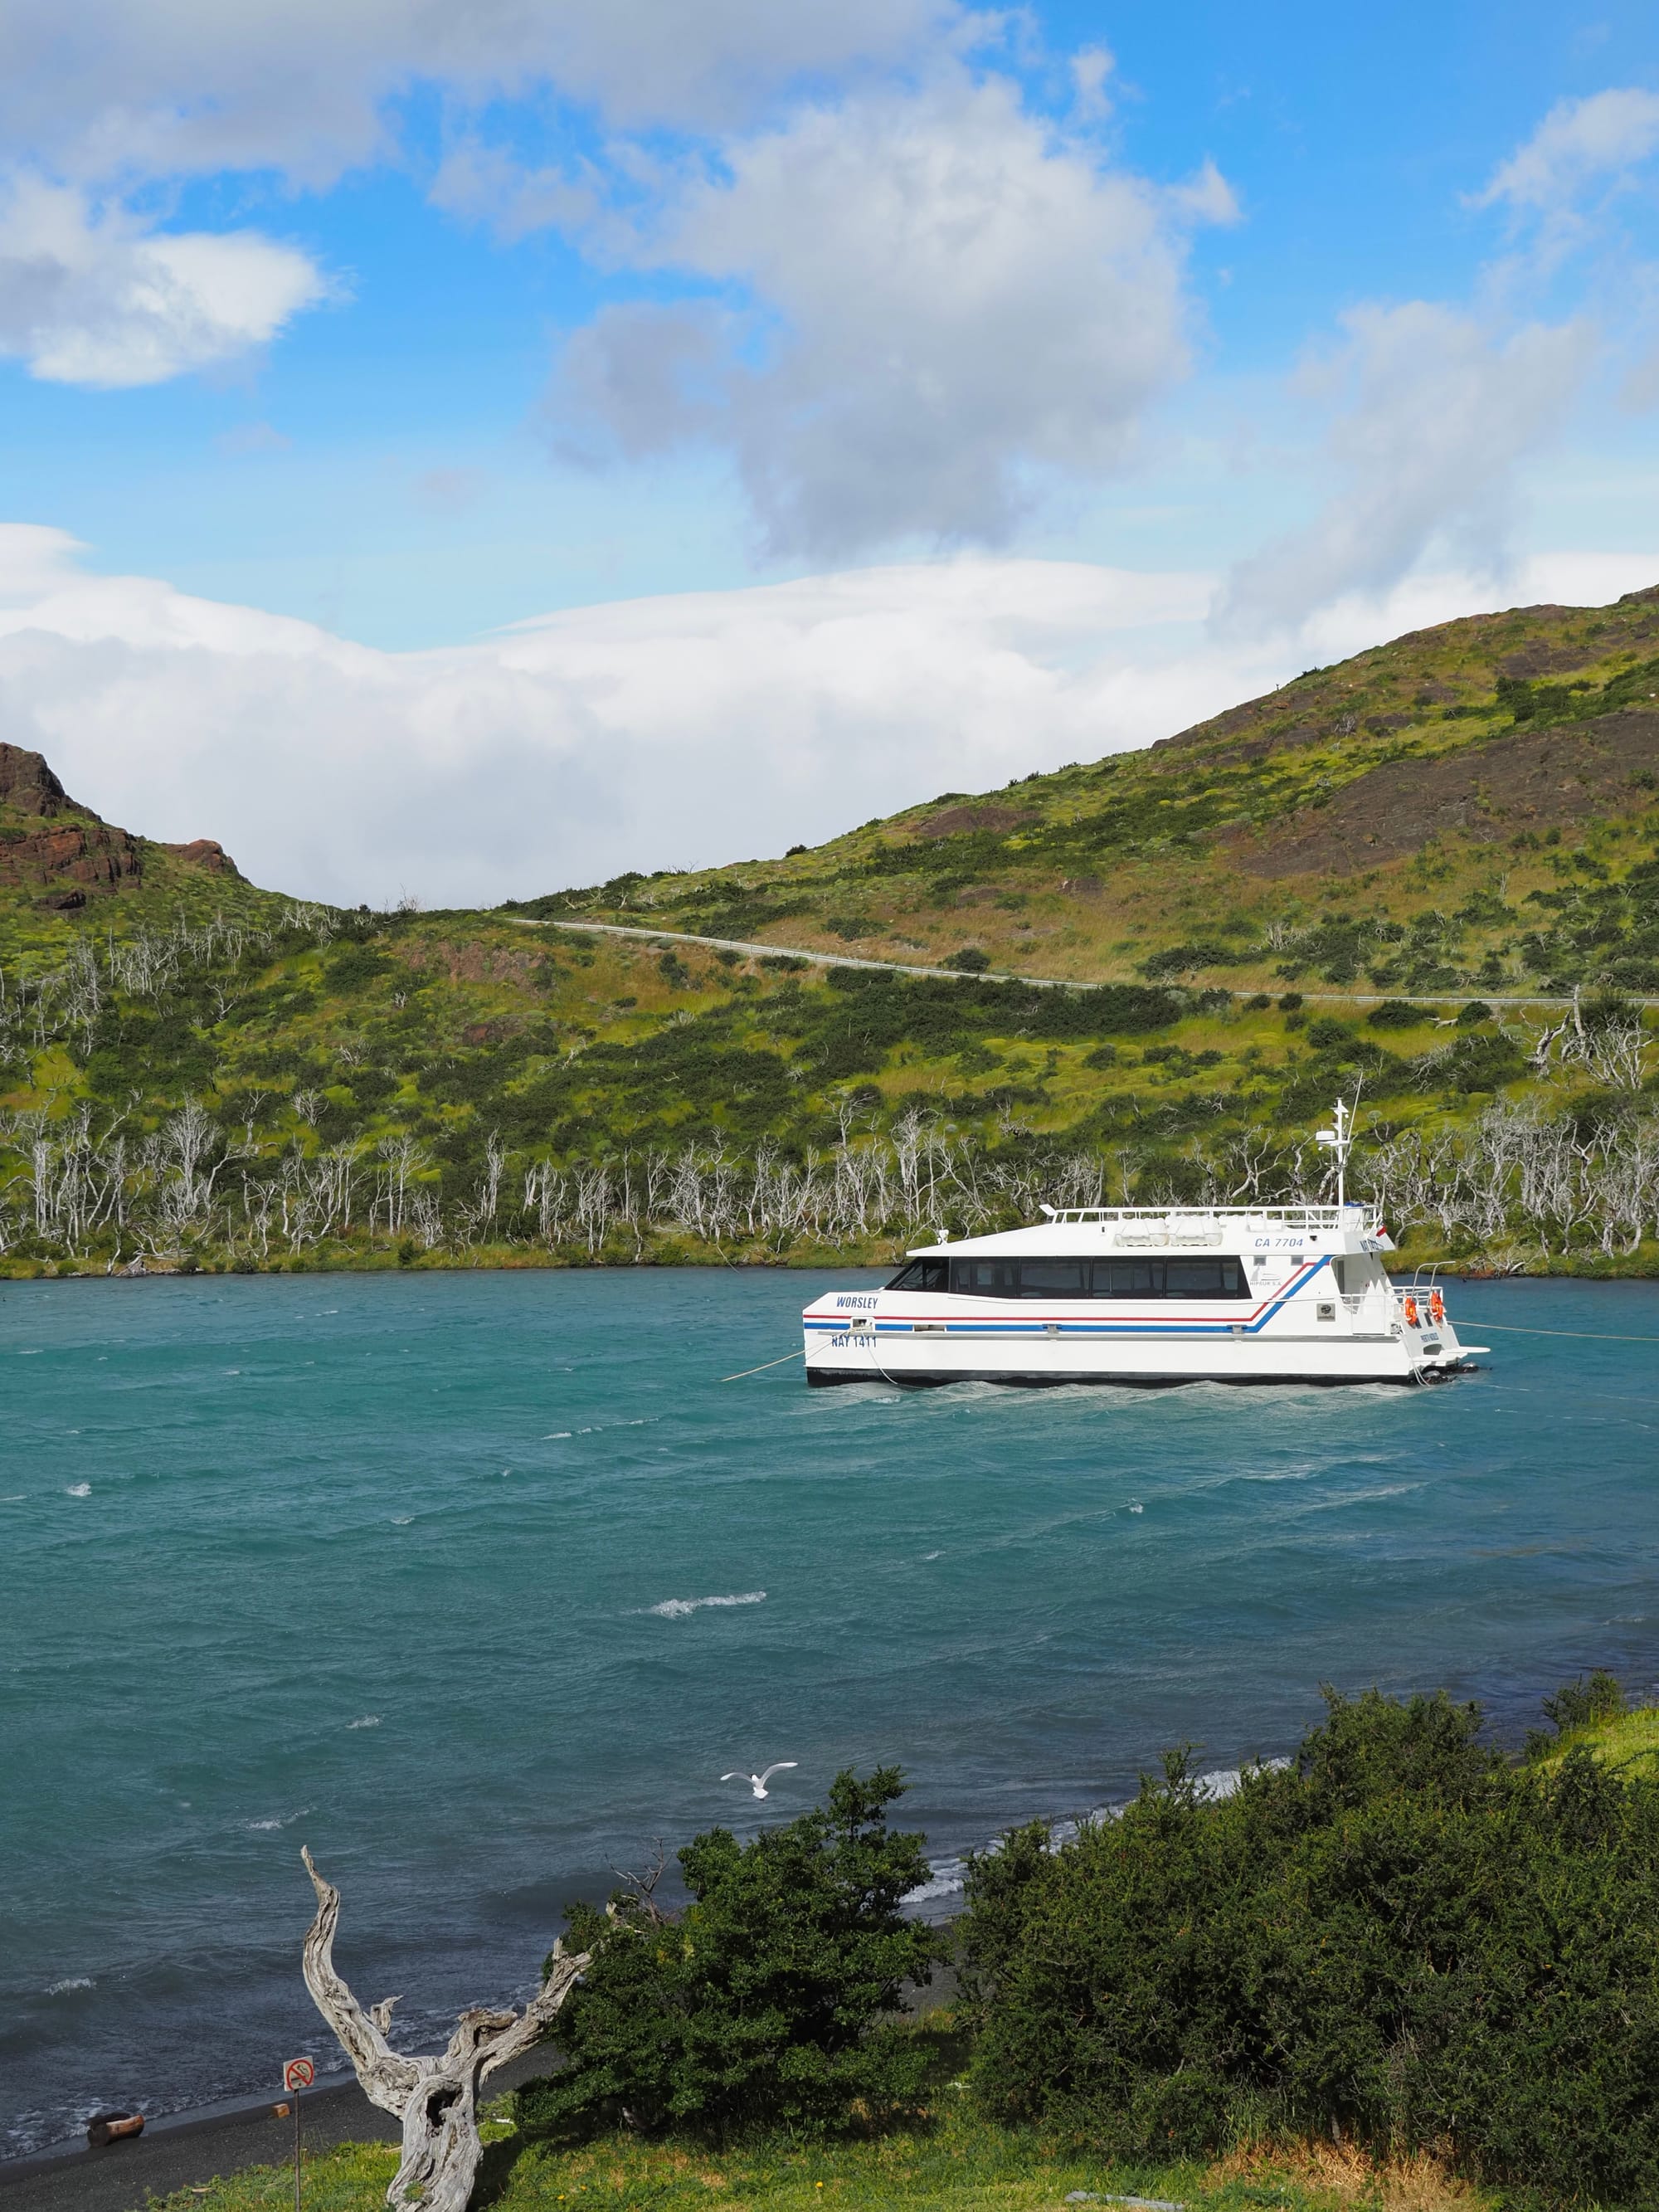
Lastly, if you are starting the trek West to East, you will need to book at ticket for the catamaran from Estancia Pudeto to Paine Grande. When booking the catamaran, take into account when you are meant to arrive on the bus from Puerto Natales. We allowed an extra hour after the bus was meant to arrive before getting the boat, just in case anything delayed us. This is how much the additional transport for the trek costs, for two people:
- Bus Puerto Natales to Torres Del Paine = 28,000 CLP
- Bus Torres Del Paine to Puerto Natales = 30,000 CLP
- Shuttle Bus Central Camp to Bus Station = 9,000 CLP
- Catamaran Estancia Pudeto to Paine Grande = 57,451 CLP including Service Fee
Total cost = 124,451 CLP ($138.27 USD)
TOTAL COST - FOR 5 DAYS
Overall, a rough idea of what we spent on this five day trek is broken down to the below, which is for two people:
- All Transport: 124,451 CLP ($138.27 USD)
- Hire Equipment: $250 USD + $33 USD (walking poles) $283 USD
- Accommodation: $180 USD
- Food: 74,240 CLP ($84 USD)
- National Parks Pass: 92,400 CLP ($101 USD)
Total: $786.27 USD
PACKING LIST
It can depend on what time of year you do this trek. We went in December, which is meant to be Chilean summer, however, we had a couple days of rain and wind. The below is a rough idea of what I packed and it was enough for me. I didn’t necessarily travel light, as I wanted to be safe than sorry, so if you can do lighter, definitely pack less:
- Passports and PDI (Immigration document) You MUST bring both with you to check into your campsites.
- Clothes: (3x sports vests, 1x under layer, 1x fleece, 1x down jacket, 1x rain jacket, 3x socks, 1x thermal leggings, 1x shorts, 1x rainproof trousers, 1x Solomon shoes, 1x crocs, 1x beanie/cap, 1x gloves).
- Miscellaneous: (small bag/day backpack, 2x water bottles, painkillers, blisters and plasters, hand sanitiser, lip balm, sun cream, small travel toiletries, glasses/contacts/sunnies).
- Electronics: (adapter, phone, camera, portable chargers, headphones).
OUR 5 DAY ITINERARY
Day 1 - Pudeto to Paine Grande Camp
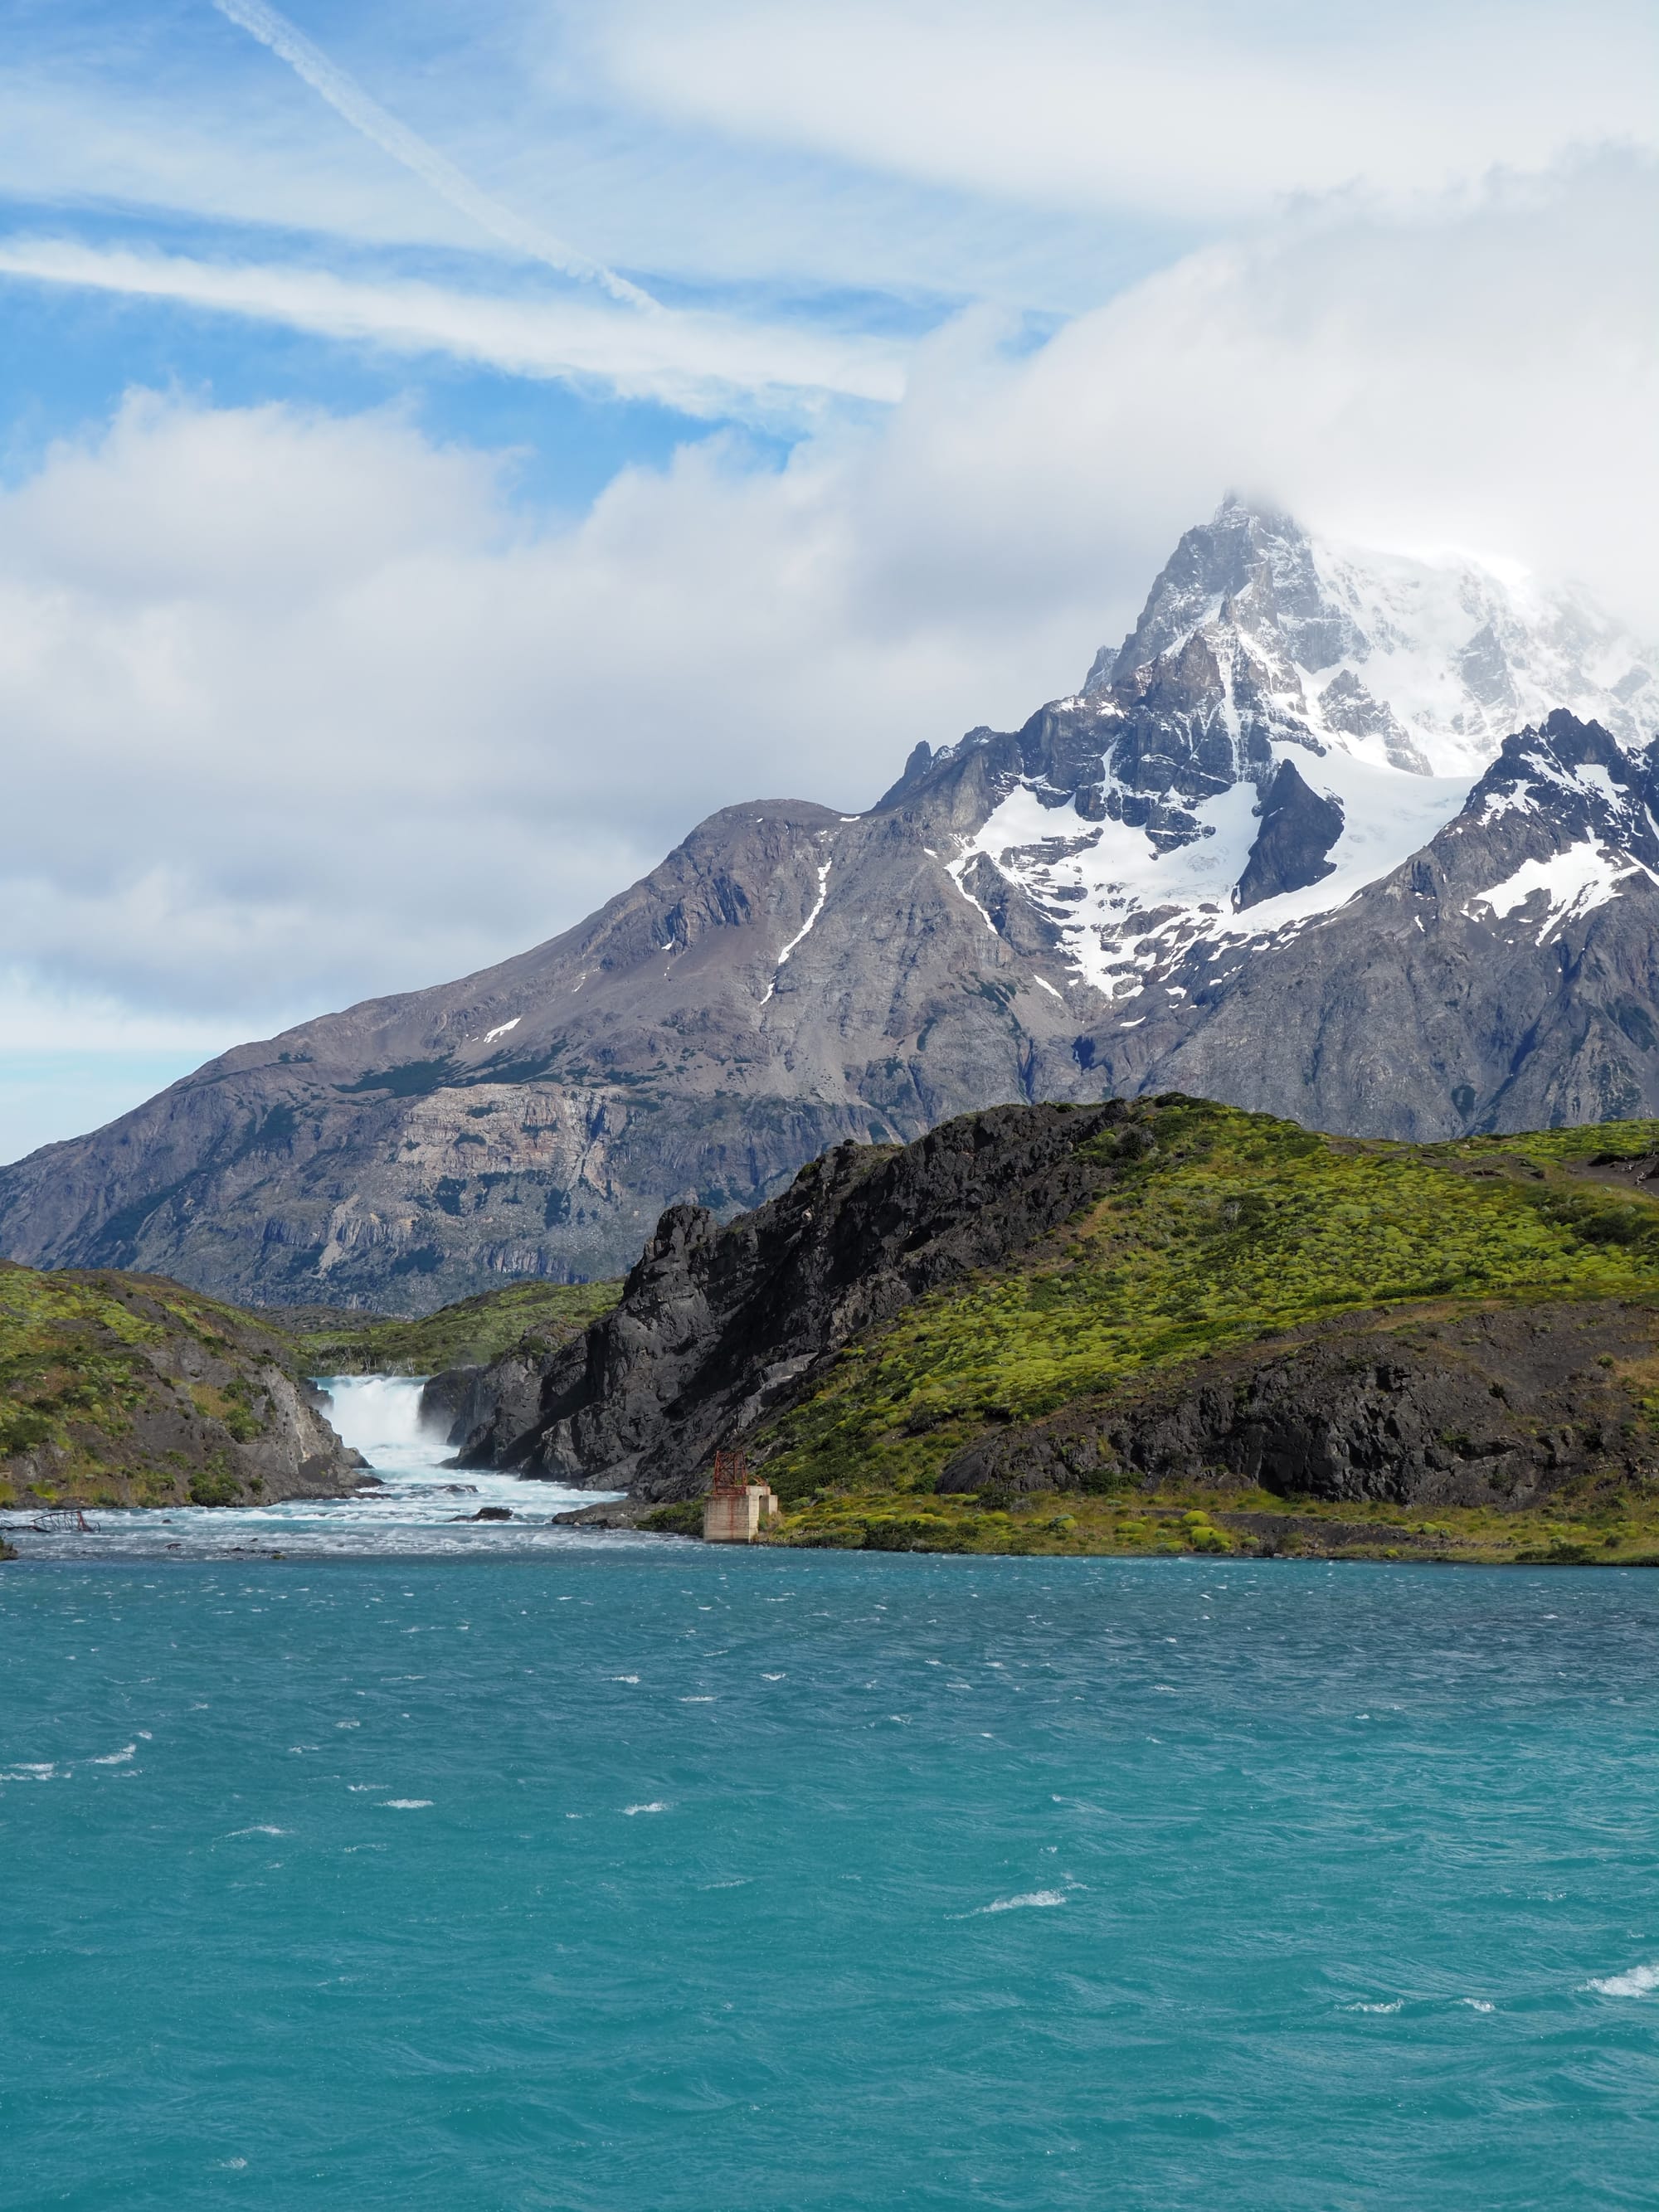
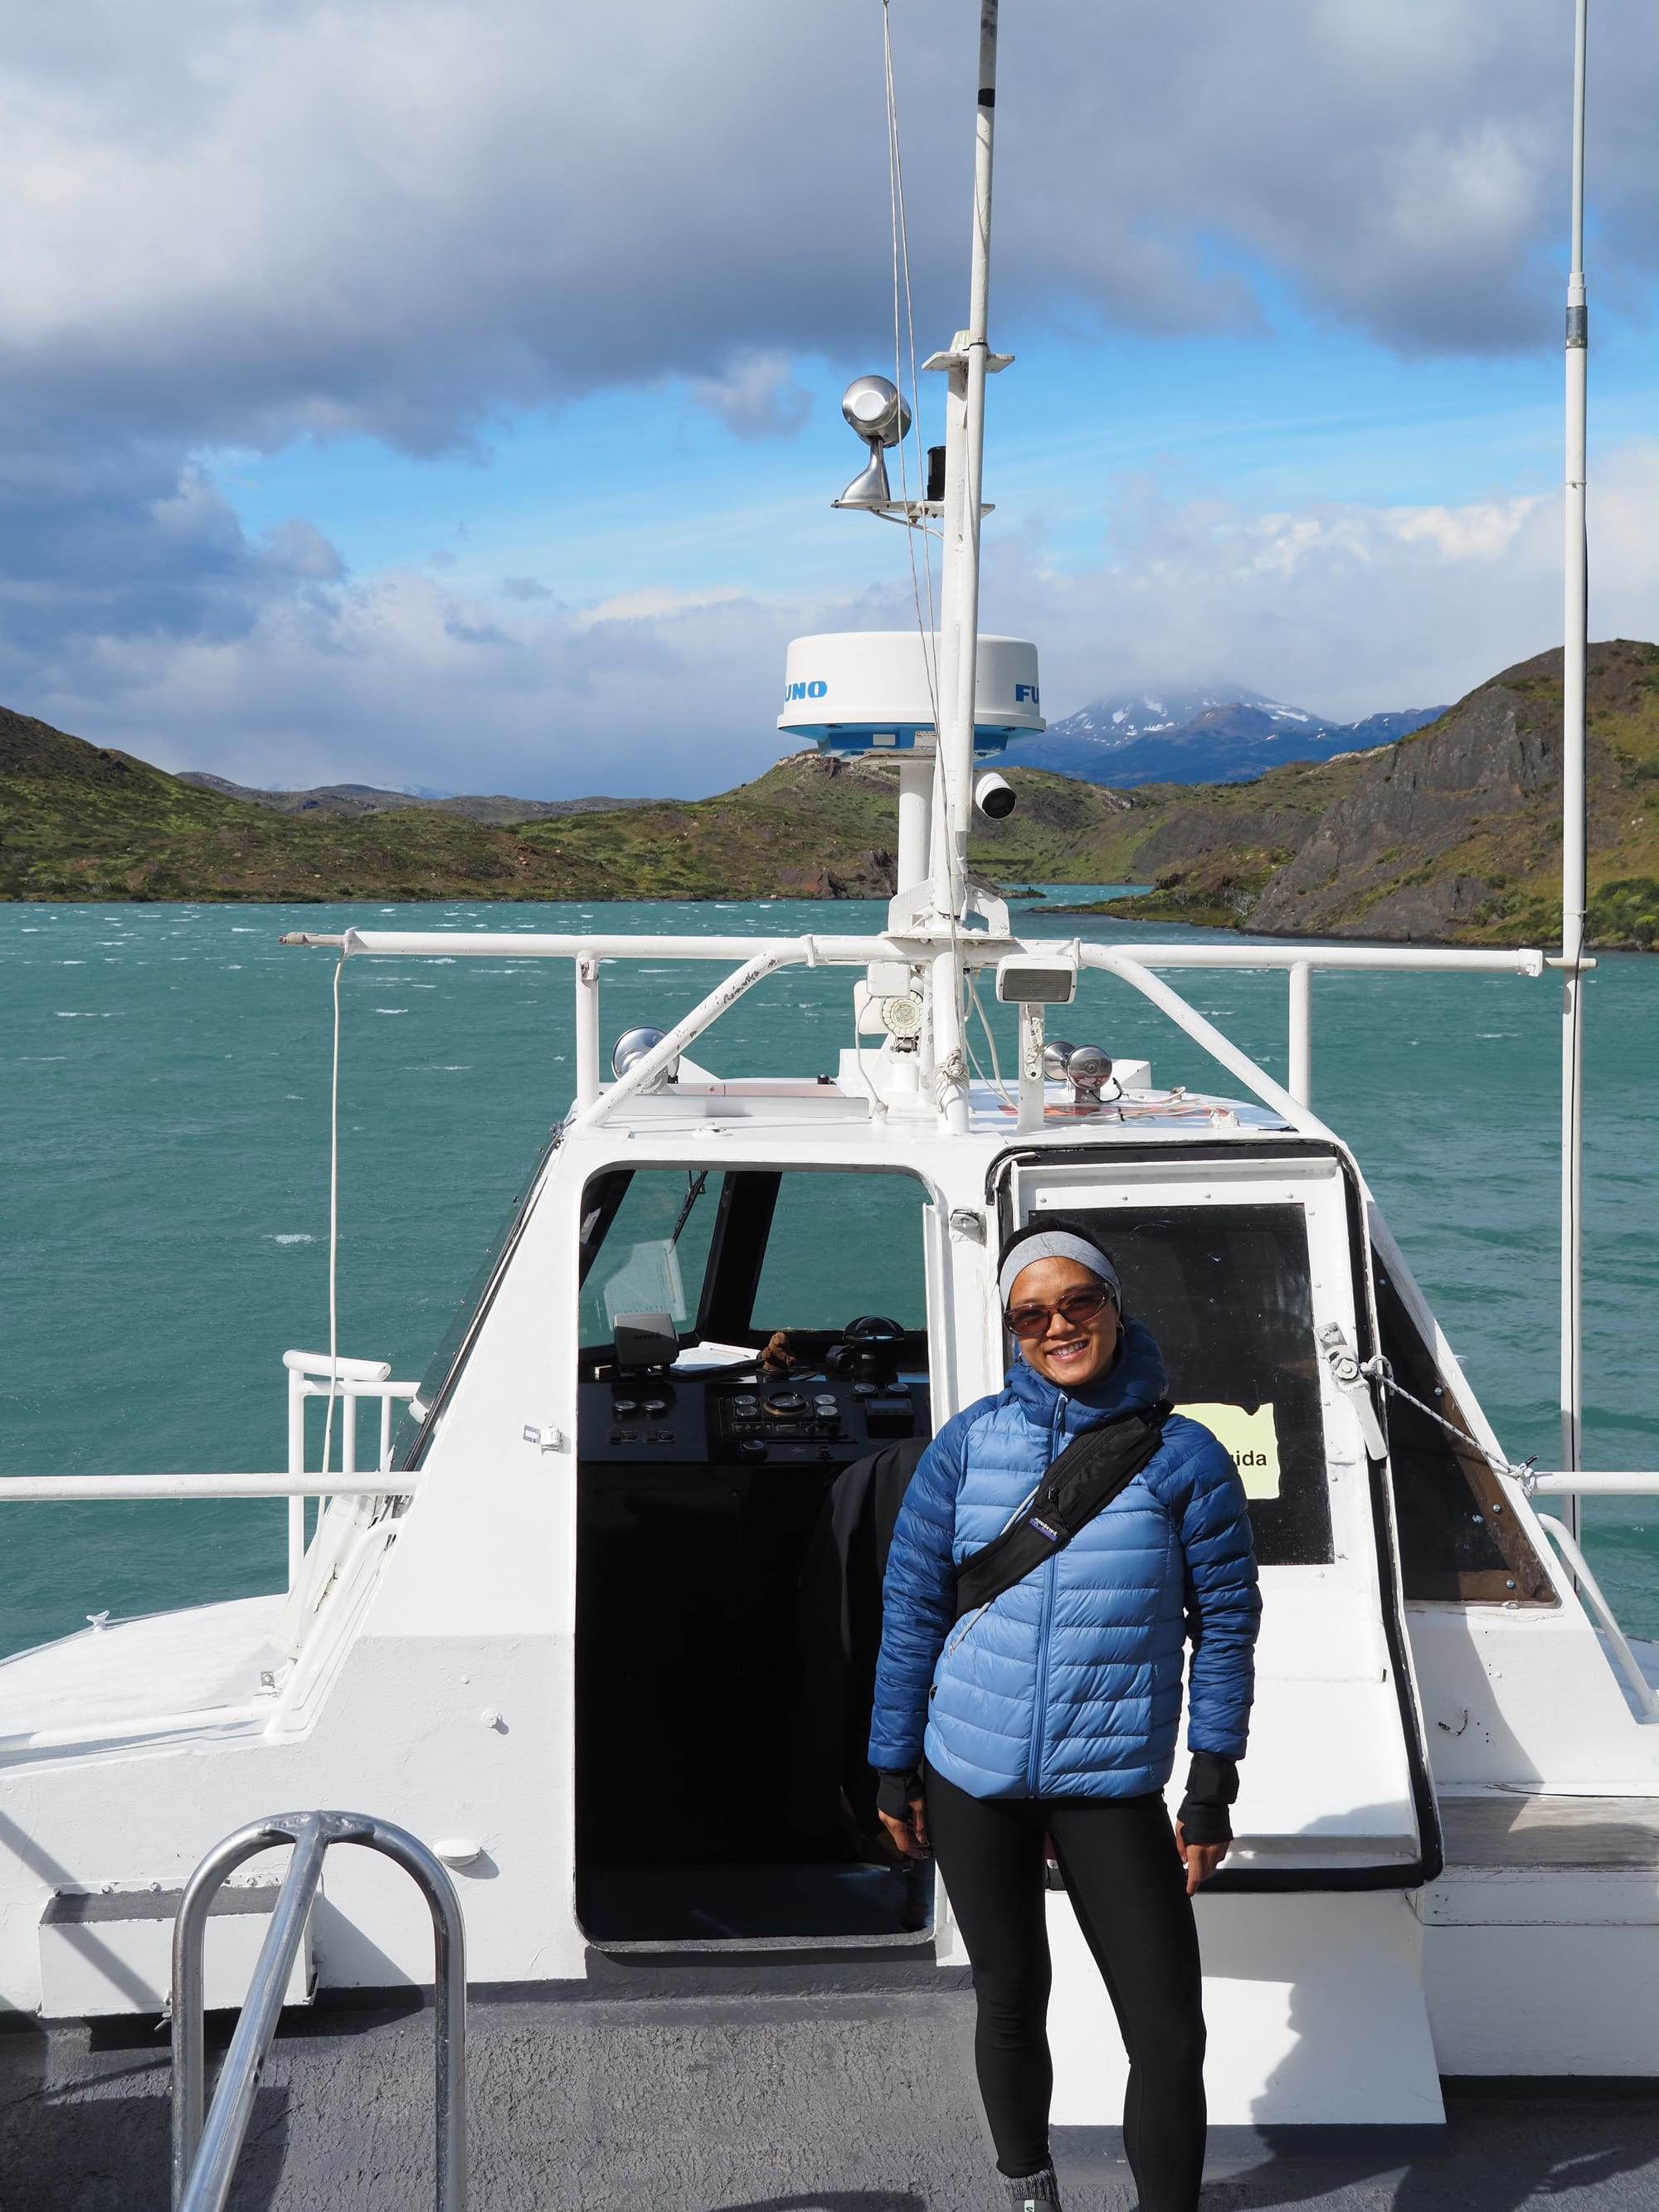
Our first day consisted of an early start at 5:30am to catch our bus from Puerto Natales to Pudeto at 6:30am. The bus took just under 3 hours to get to Pudeto, where we then took a catamaran to Paine Grande camp. The boat took around 45 minutes to get to the starting point and was a highlight of our trip. The weather was really good, allowing us to see all the incredible surrounding views of Patagonia.
Paine Grande Camp to Grey Glacier
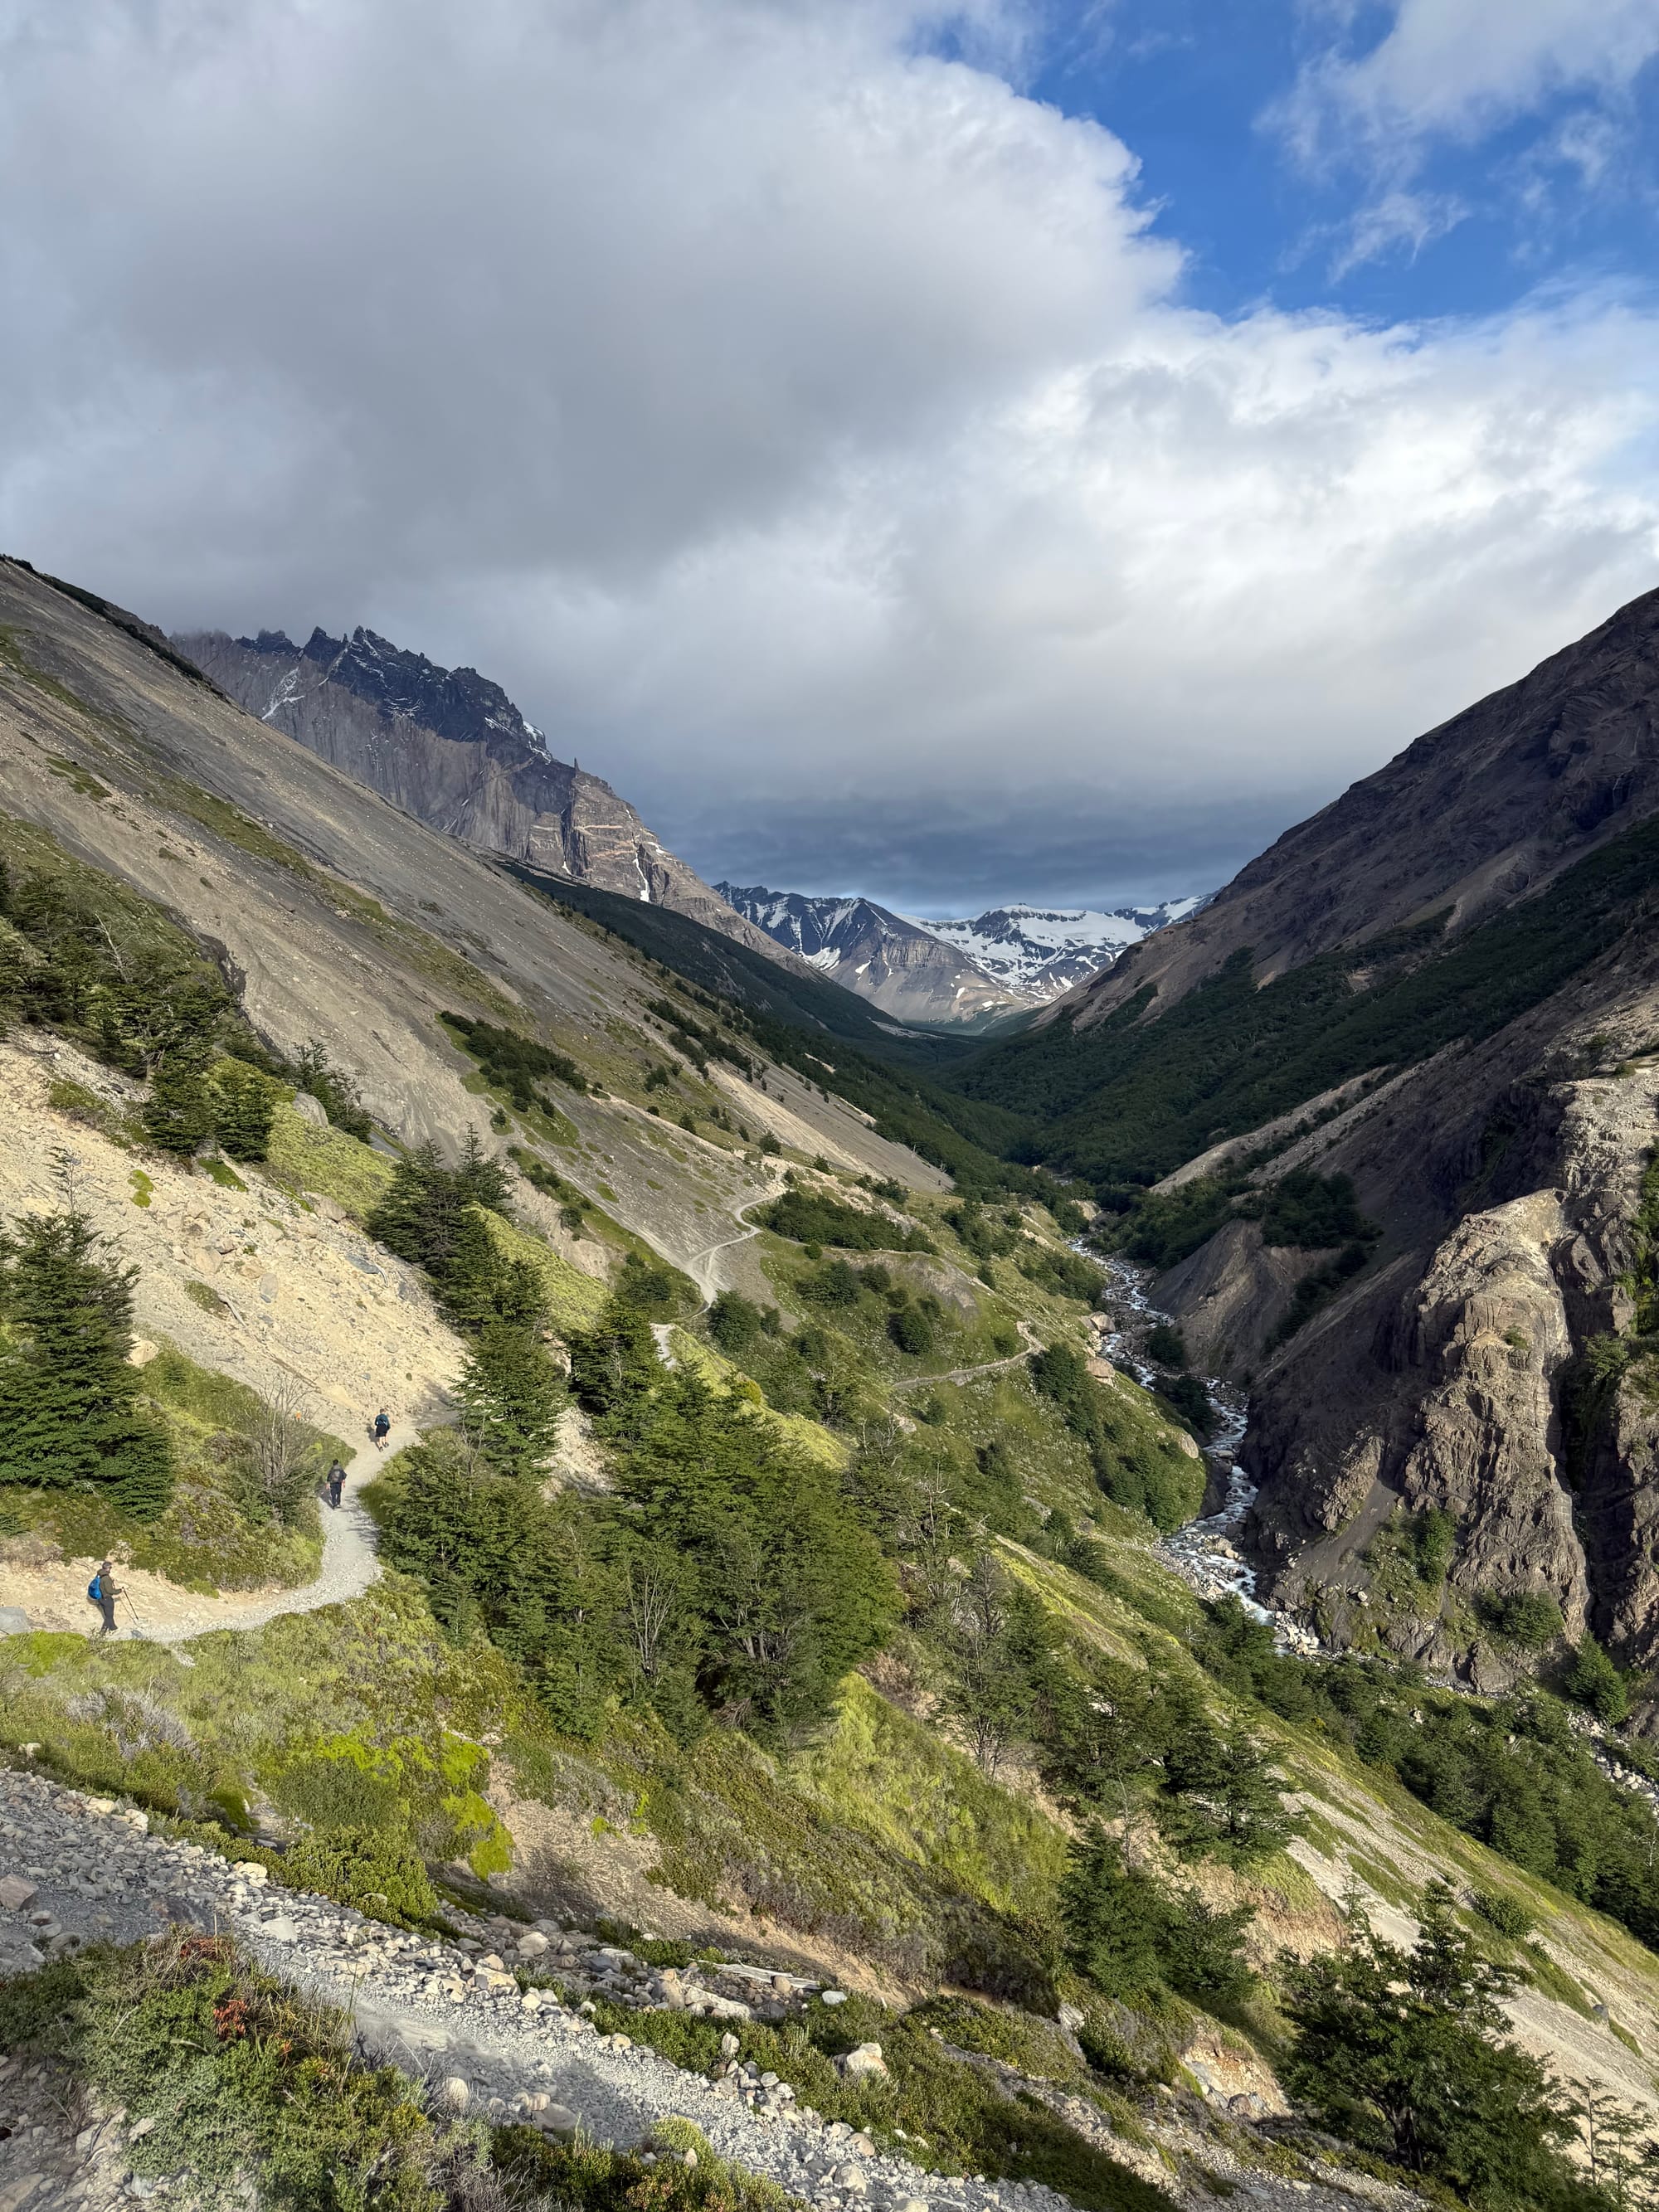
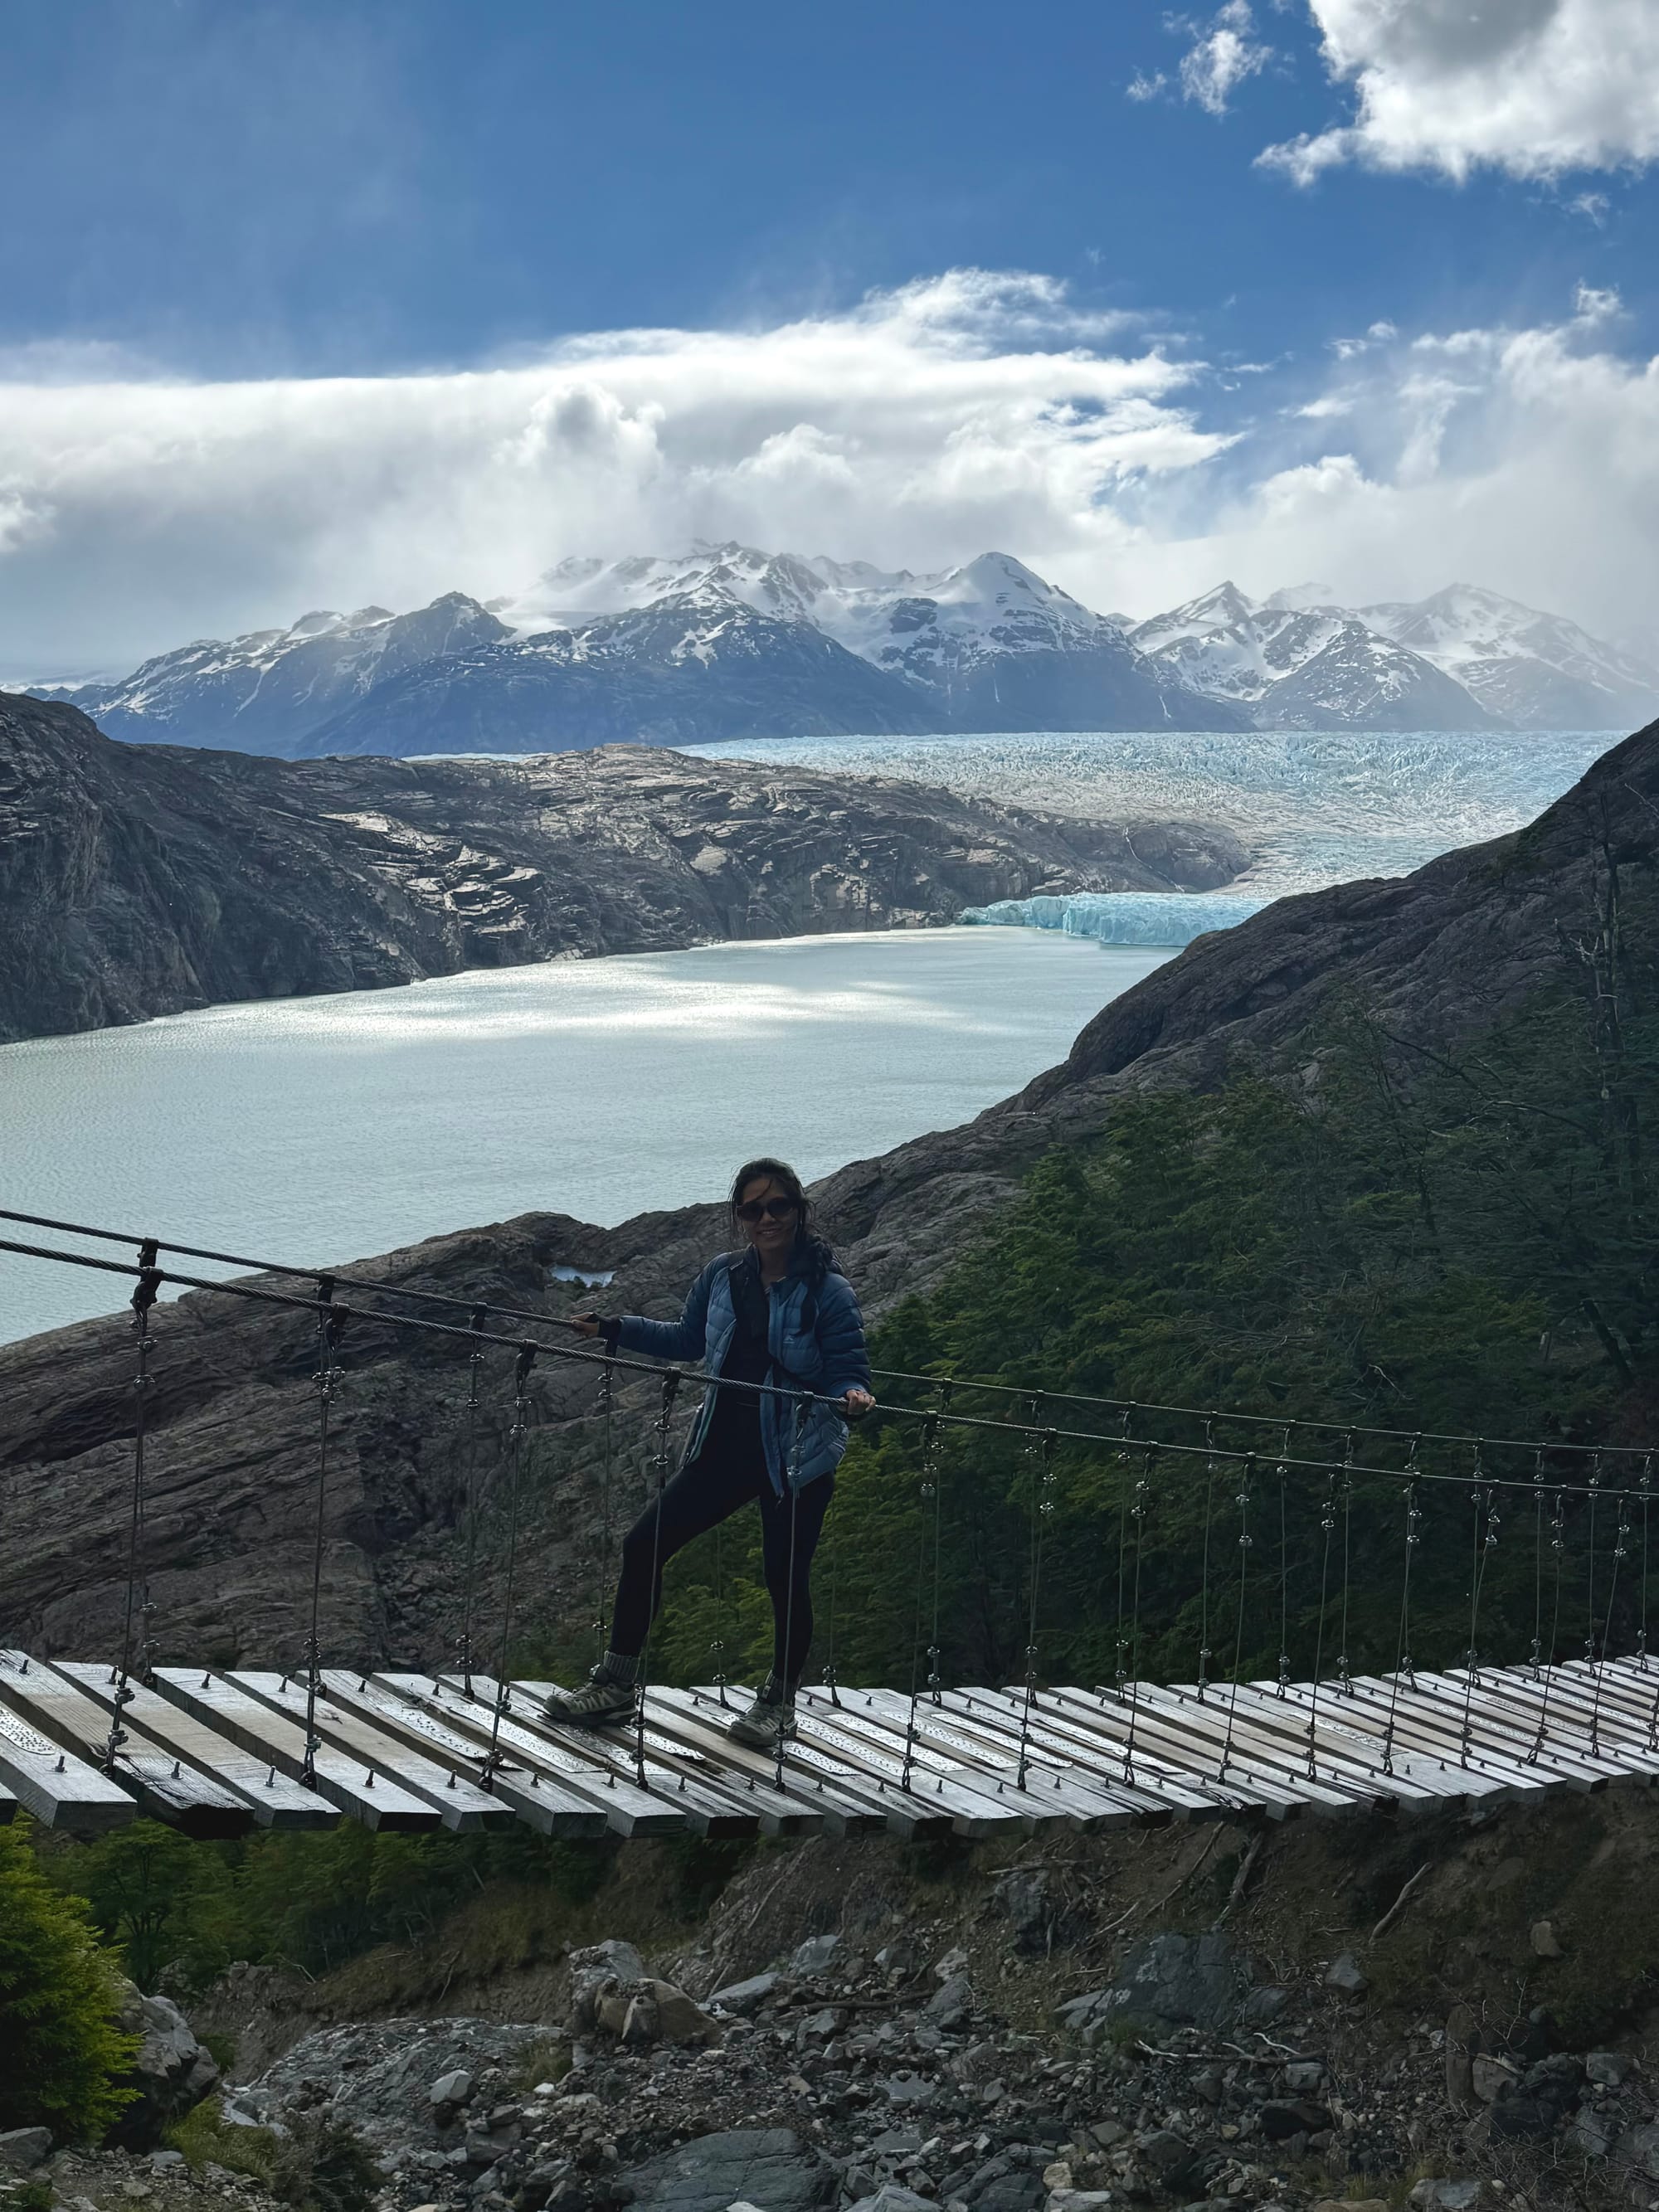
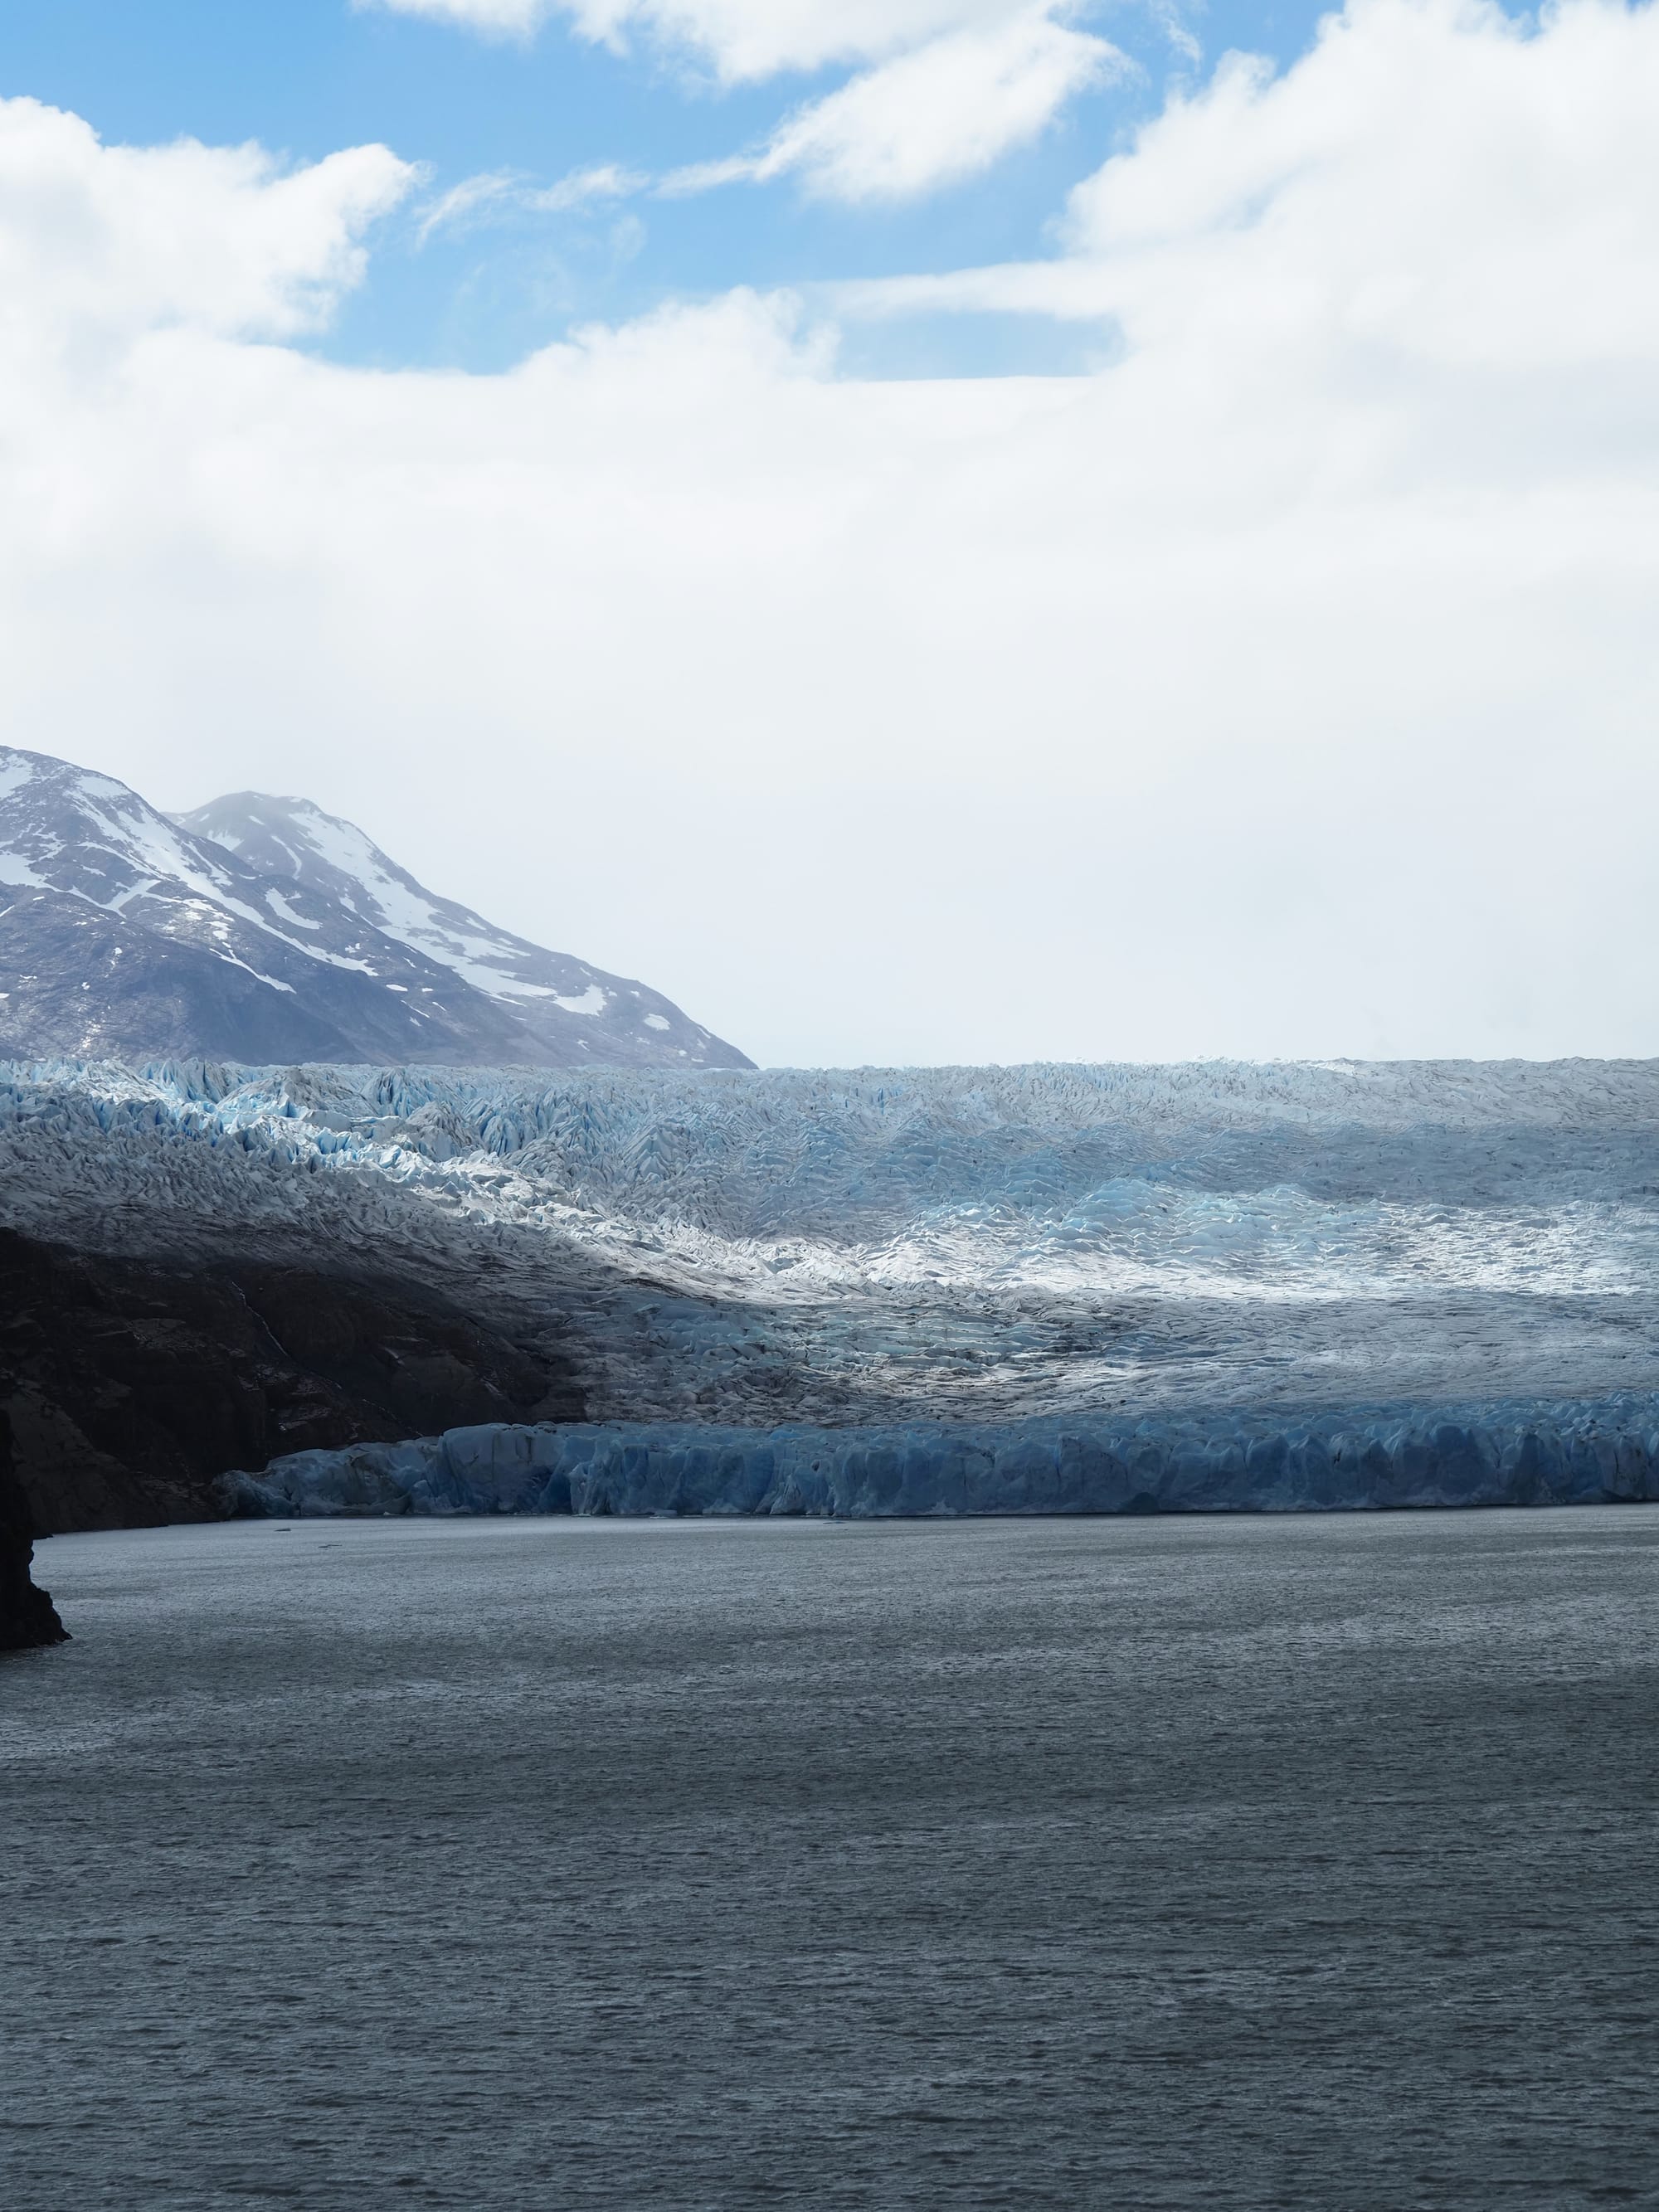
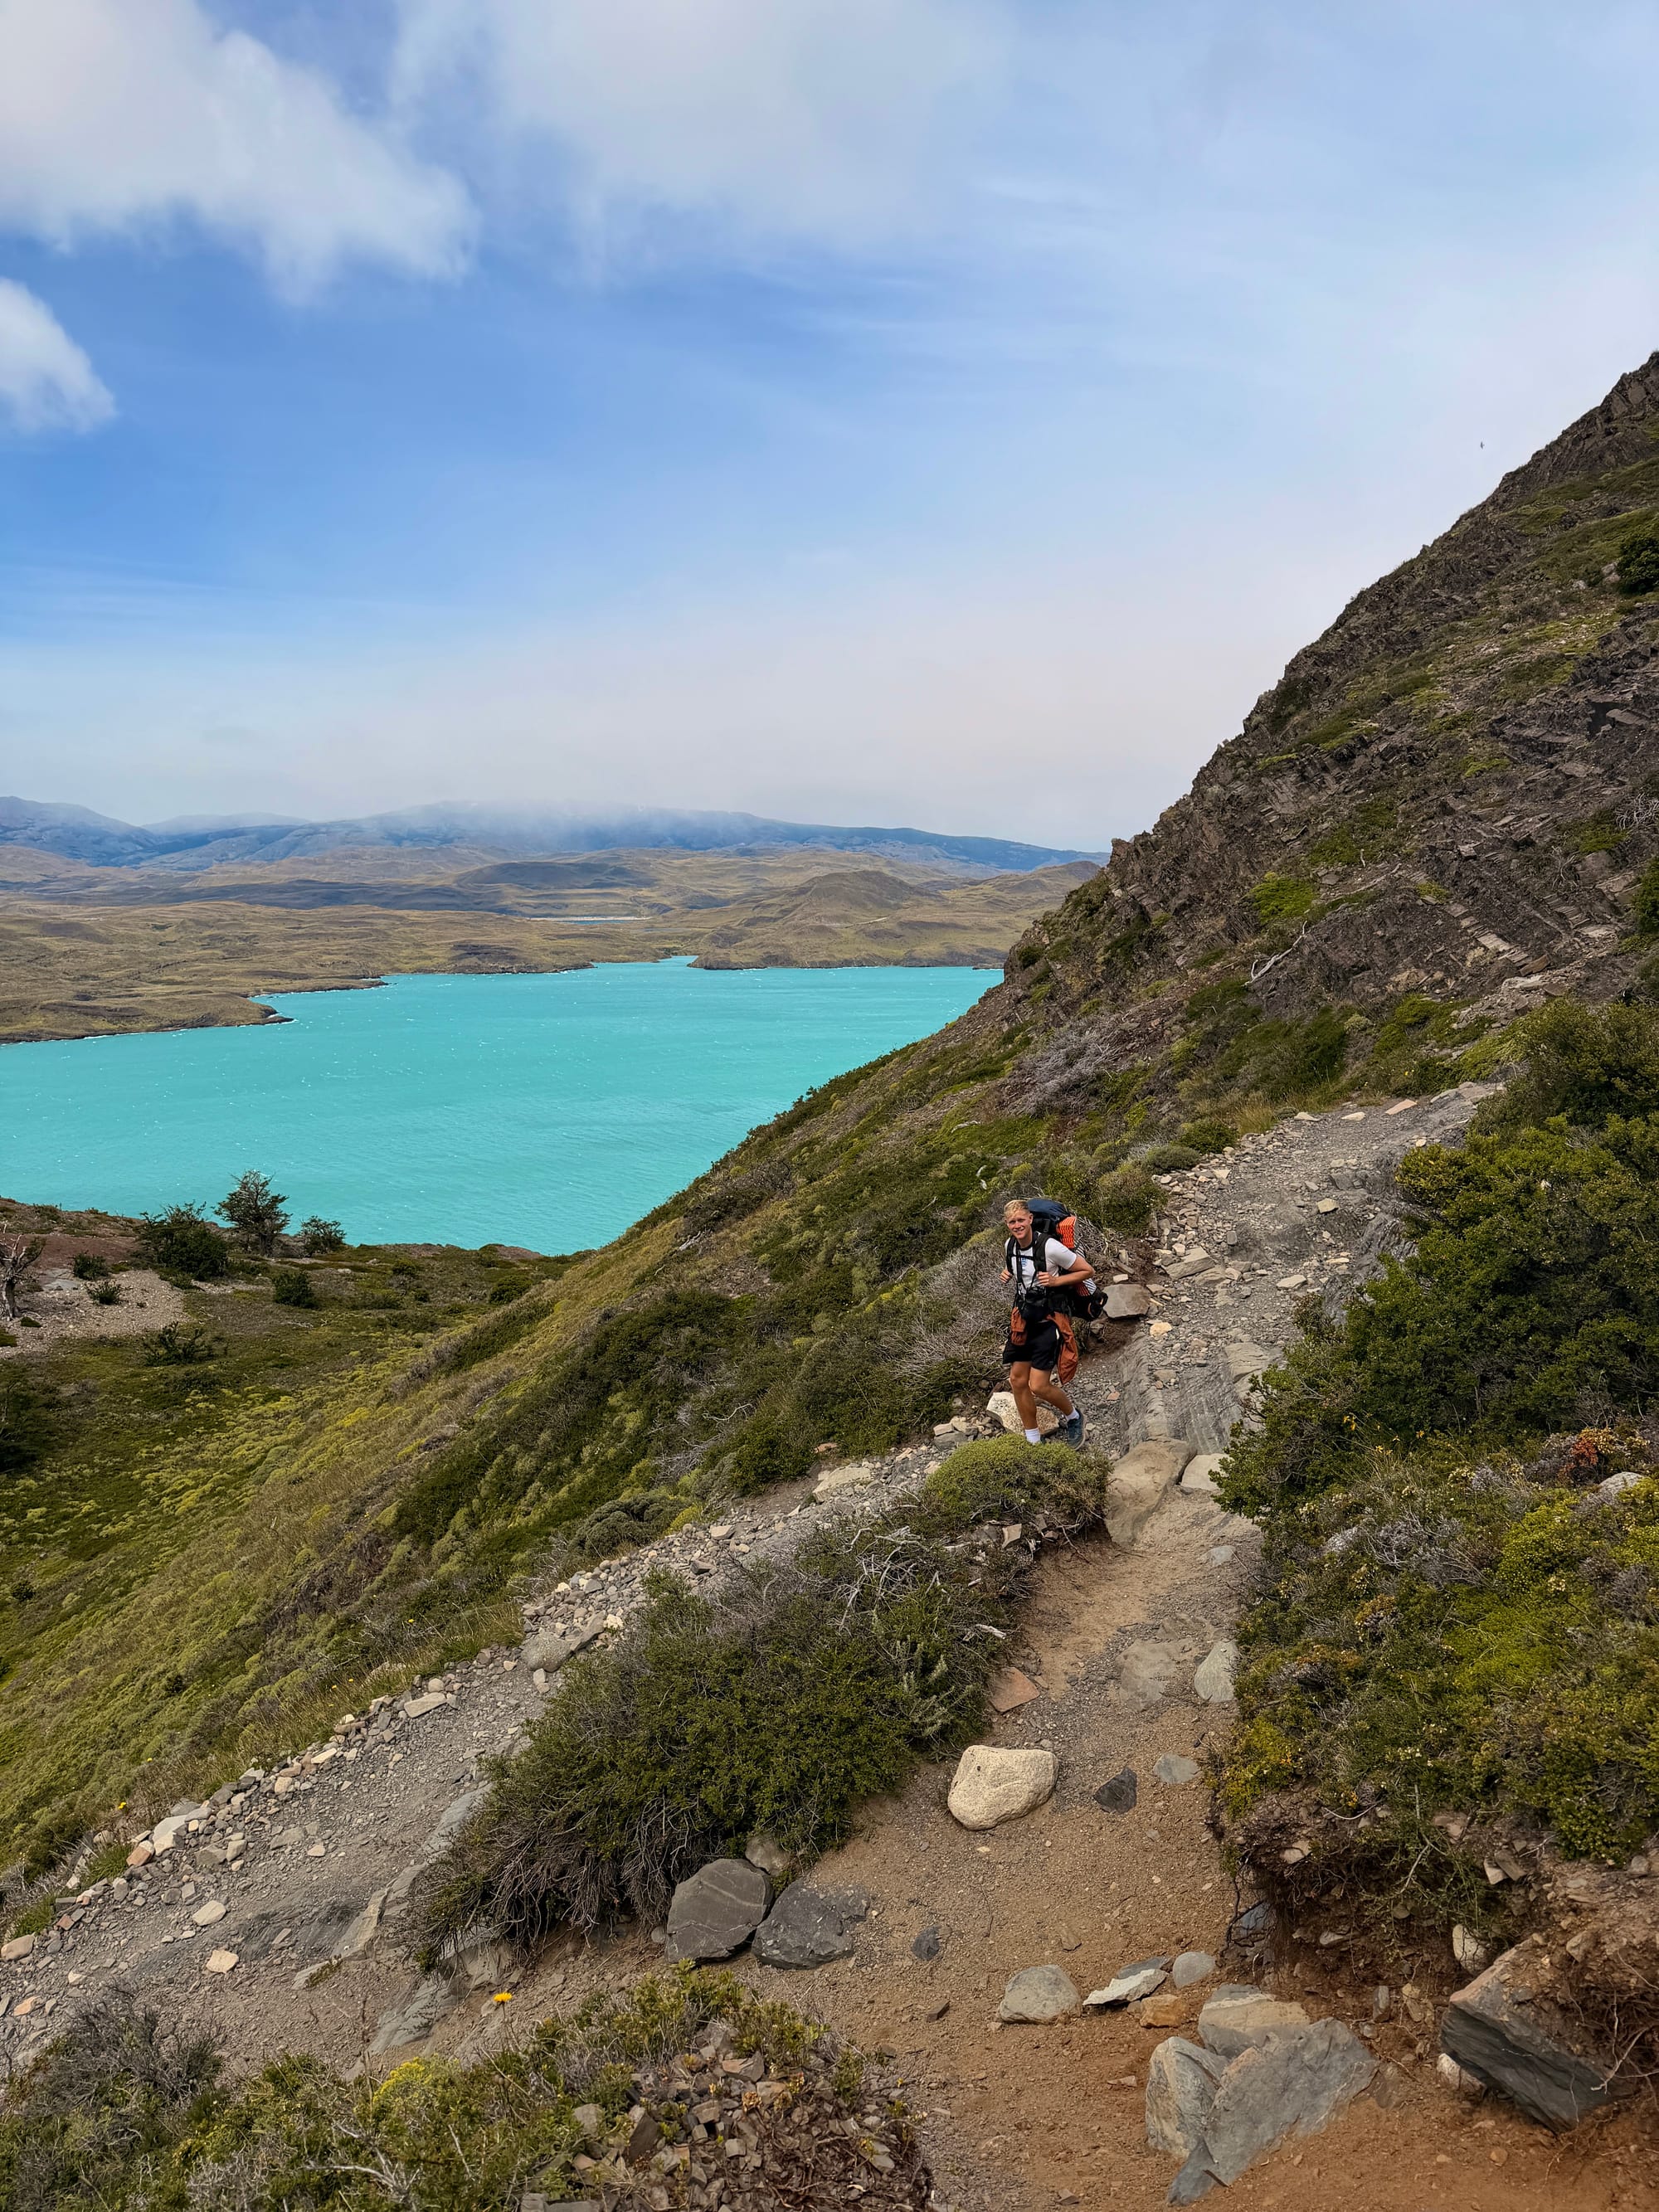
Once we arrived at Paine Grande, we started our first hike up to Refugio Grey, where our first nights stay was. It is 11km up to Grey, but we stopped off at Mirador Grey Lookout at 5.7km for a break and to see the gorgeous view of the glacier from afar. As our first hike of the trek, it wasn’t bad at all! There were quite a few steep parts, a lot of steps, and it was pretty windy, however, we were incredibly lucky with the weather! Even though it wasn’t clear blue skies, and there were a few clouds, when the sun shone through, it lit up the whole landscape and made the surrounding mountains and glacier shine. It took us around 4.5 hours to get to Grey, with a few snack breaks and lunch in between.
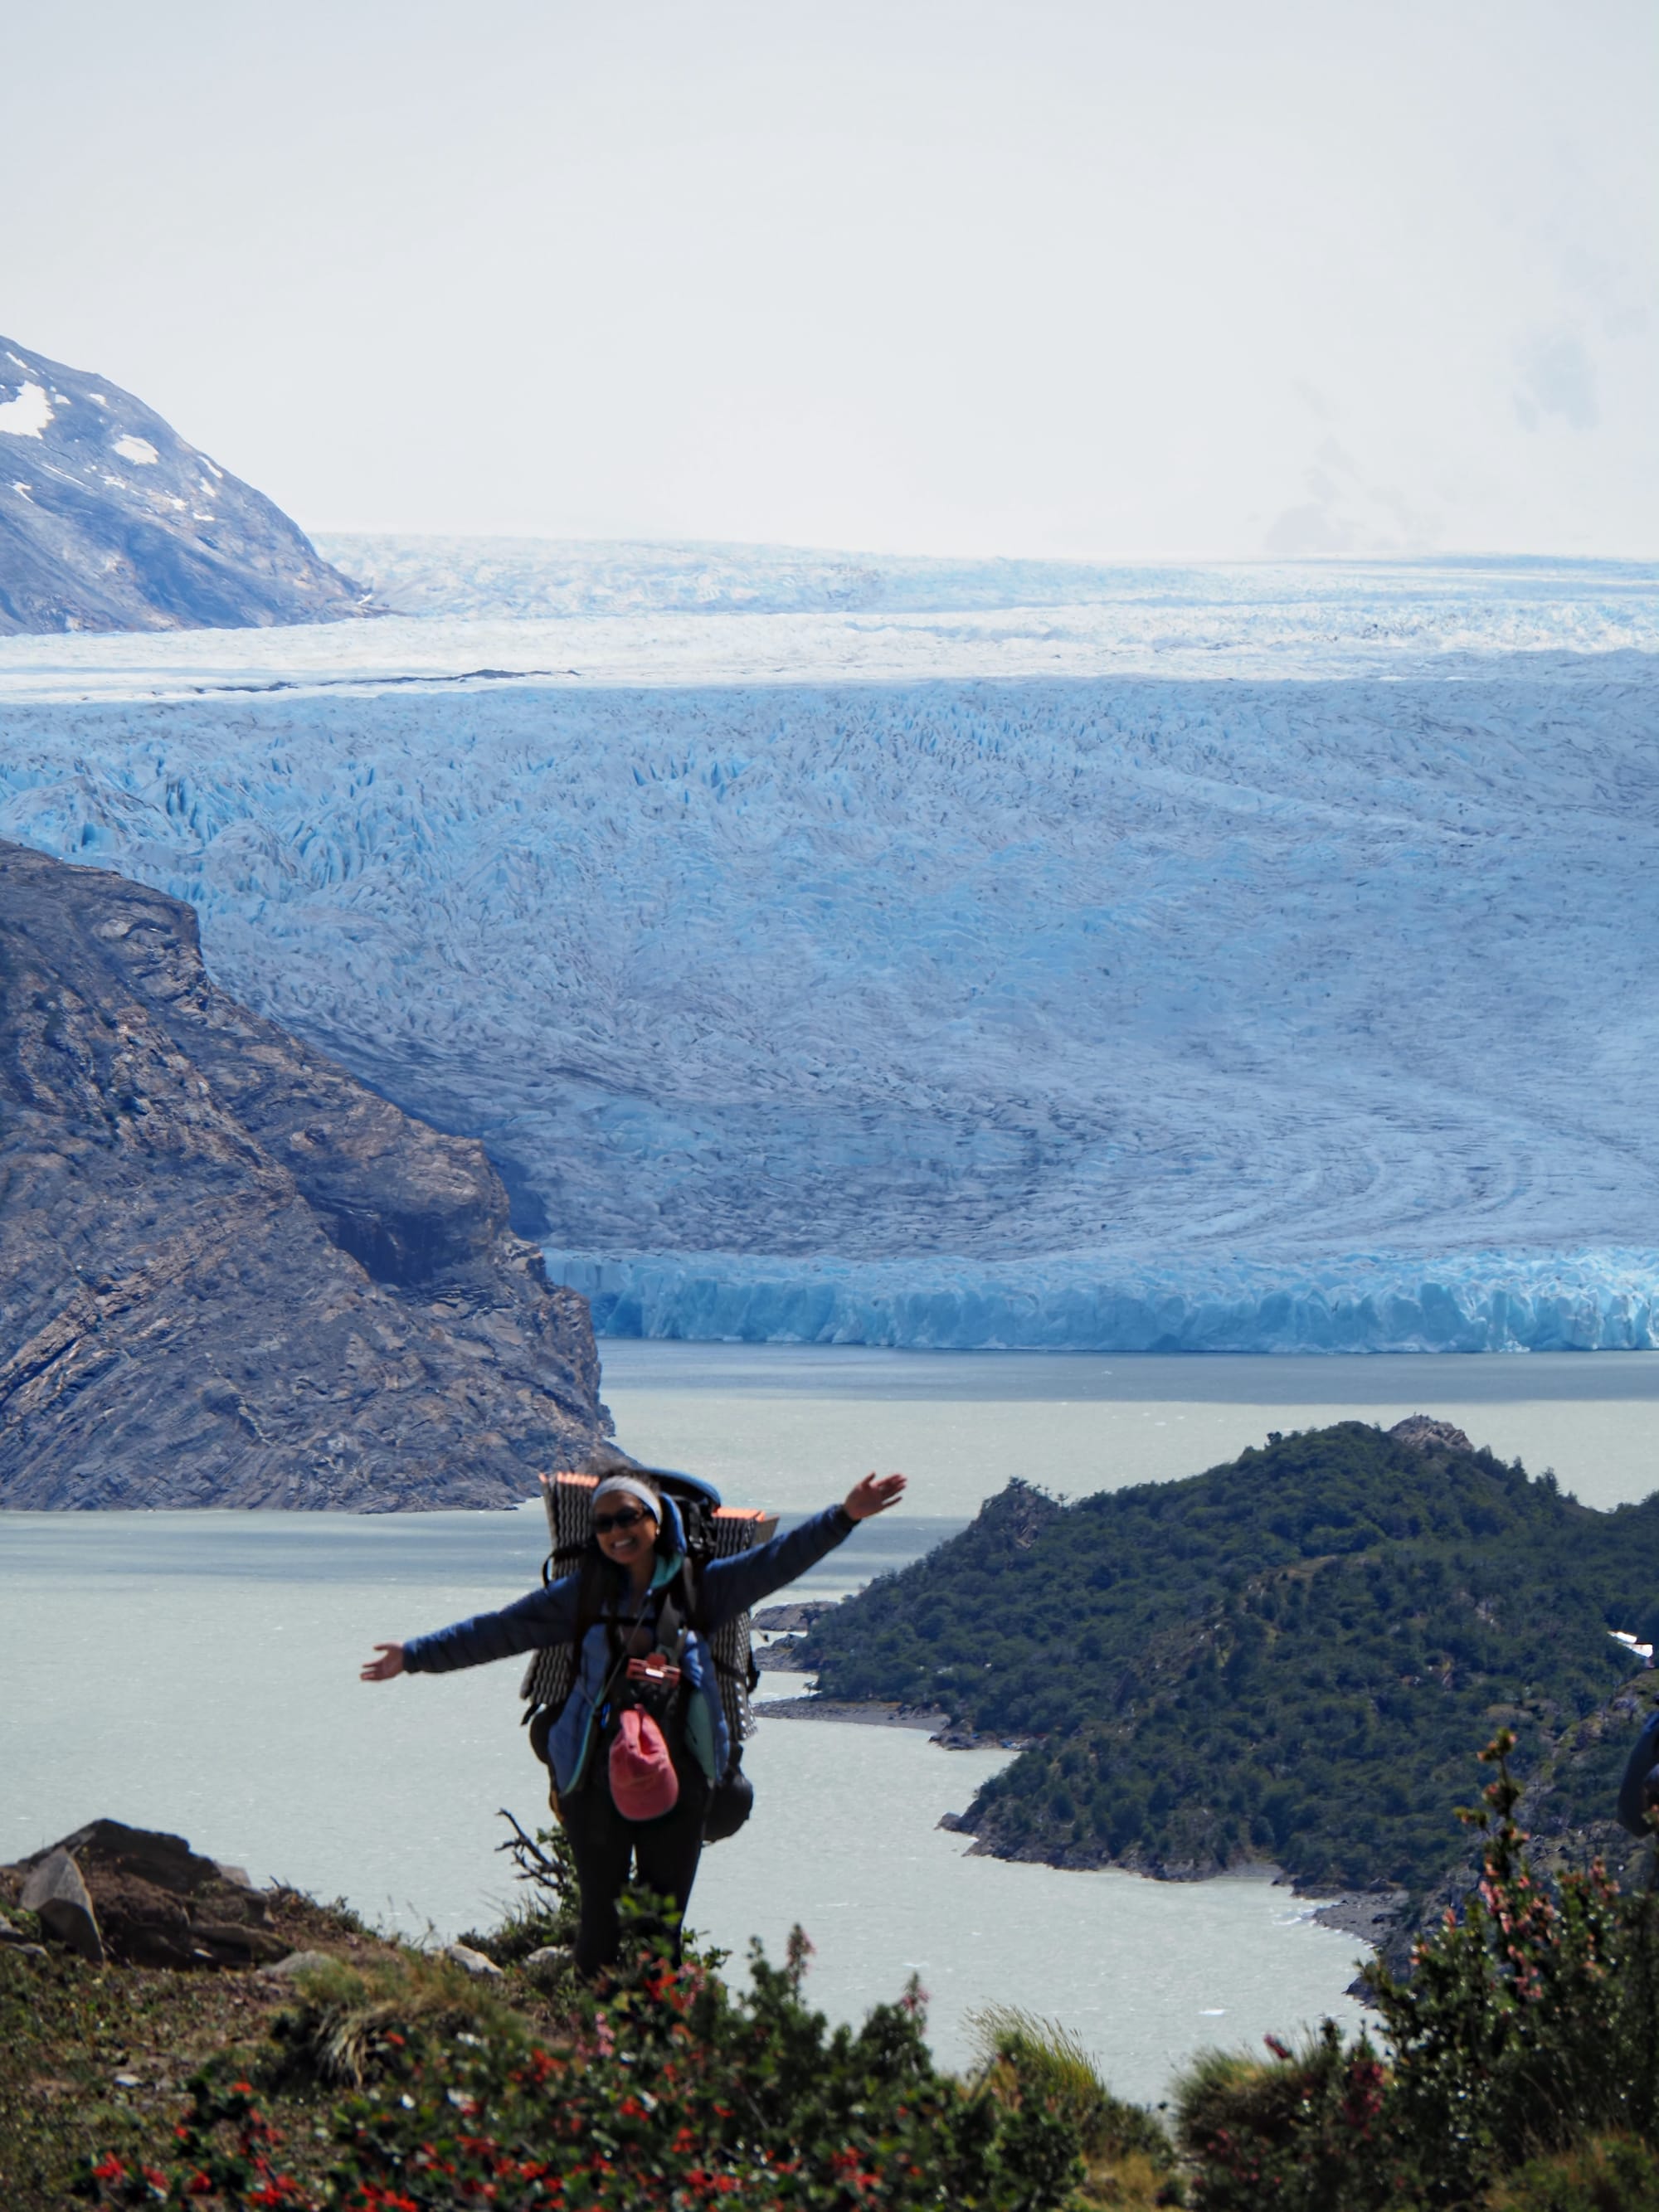

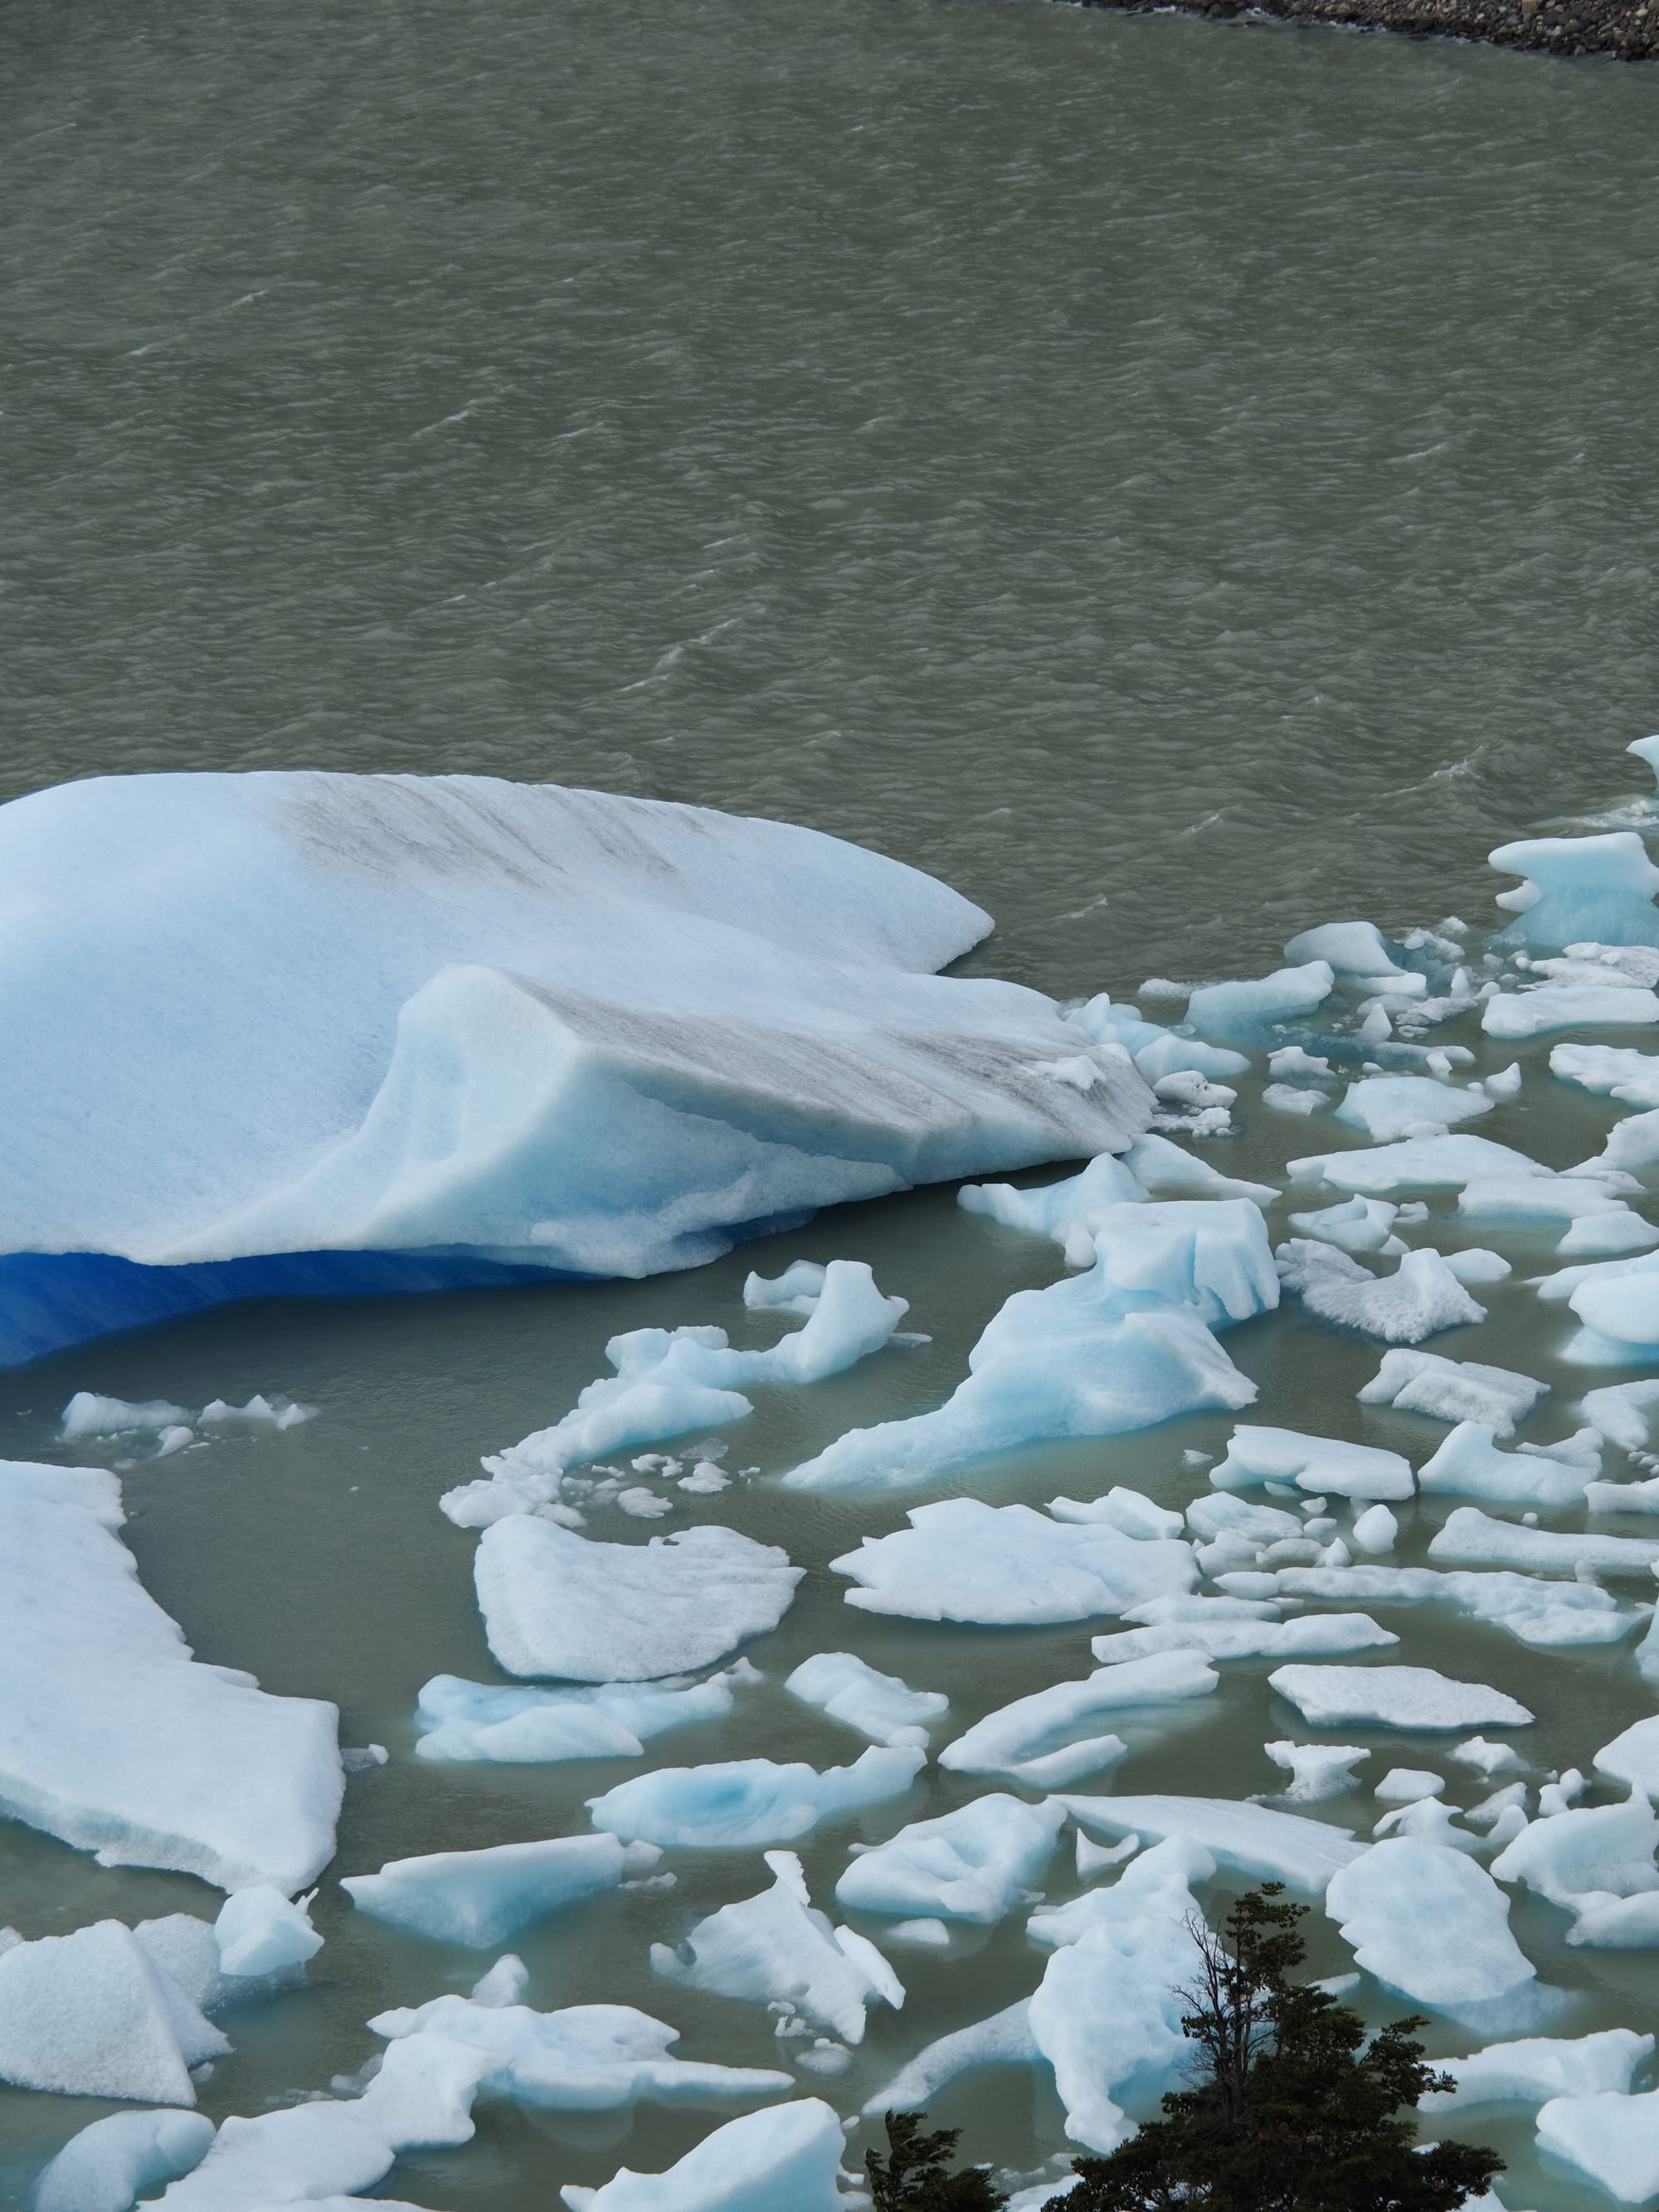
Once we got to camp, we checked in and set up our tent before going on an additional 5km hike to the Mirador Glacier Grey and the John Garner Suspension Bridge. Both viewpoints gave us the opportunity to get closer to the Glacier.
Day 2 - Grey Glacier back to Paine Grande Camp
Day two was a pretty chilled day for us, as we just had to do the same hike from Grey back down to Paine Grande, which is where we were staying for the next two nights. We planned to have a bit of a lie in, however, it started raining in the morning, so we wanted to pack our tent up, before it got too wet. The whole day was cloudy with rainy patches and wind. You could still see the view of the glacier pretty clearly, however, there was no sunshine until the end of the day. We were very lucky in this instance, as we got to see the beautiful views during the hike the day before, whereas, the people doing it that day couldn’t see a lot of the surrounding views.

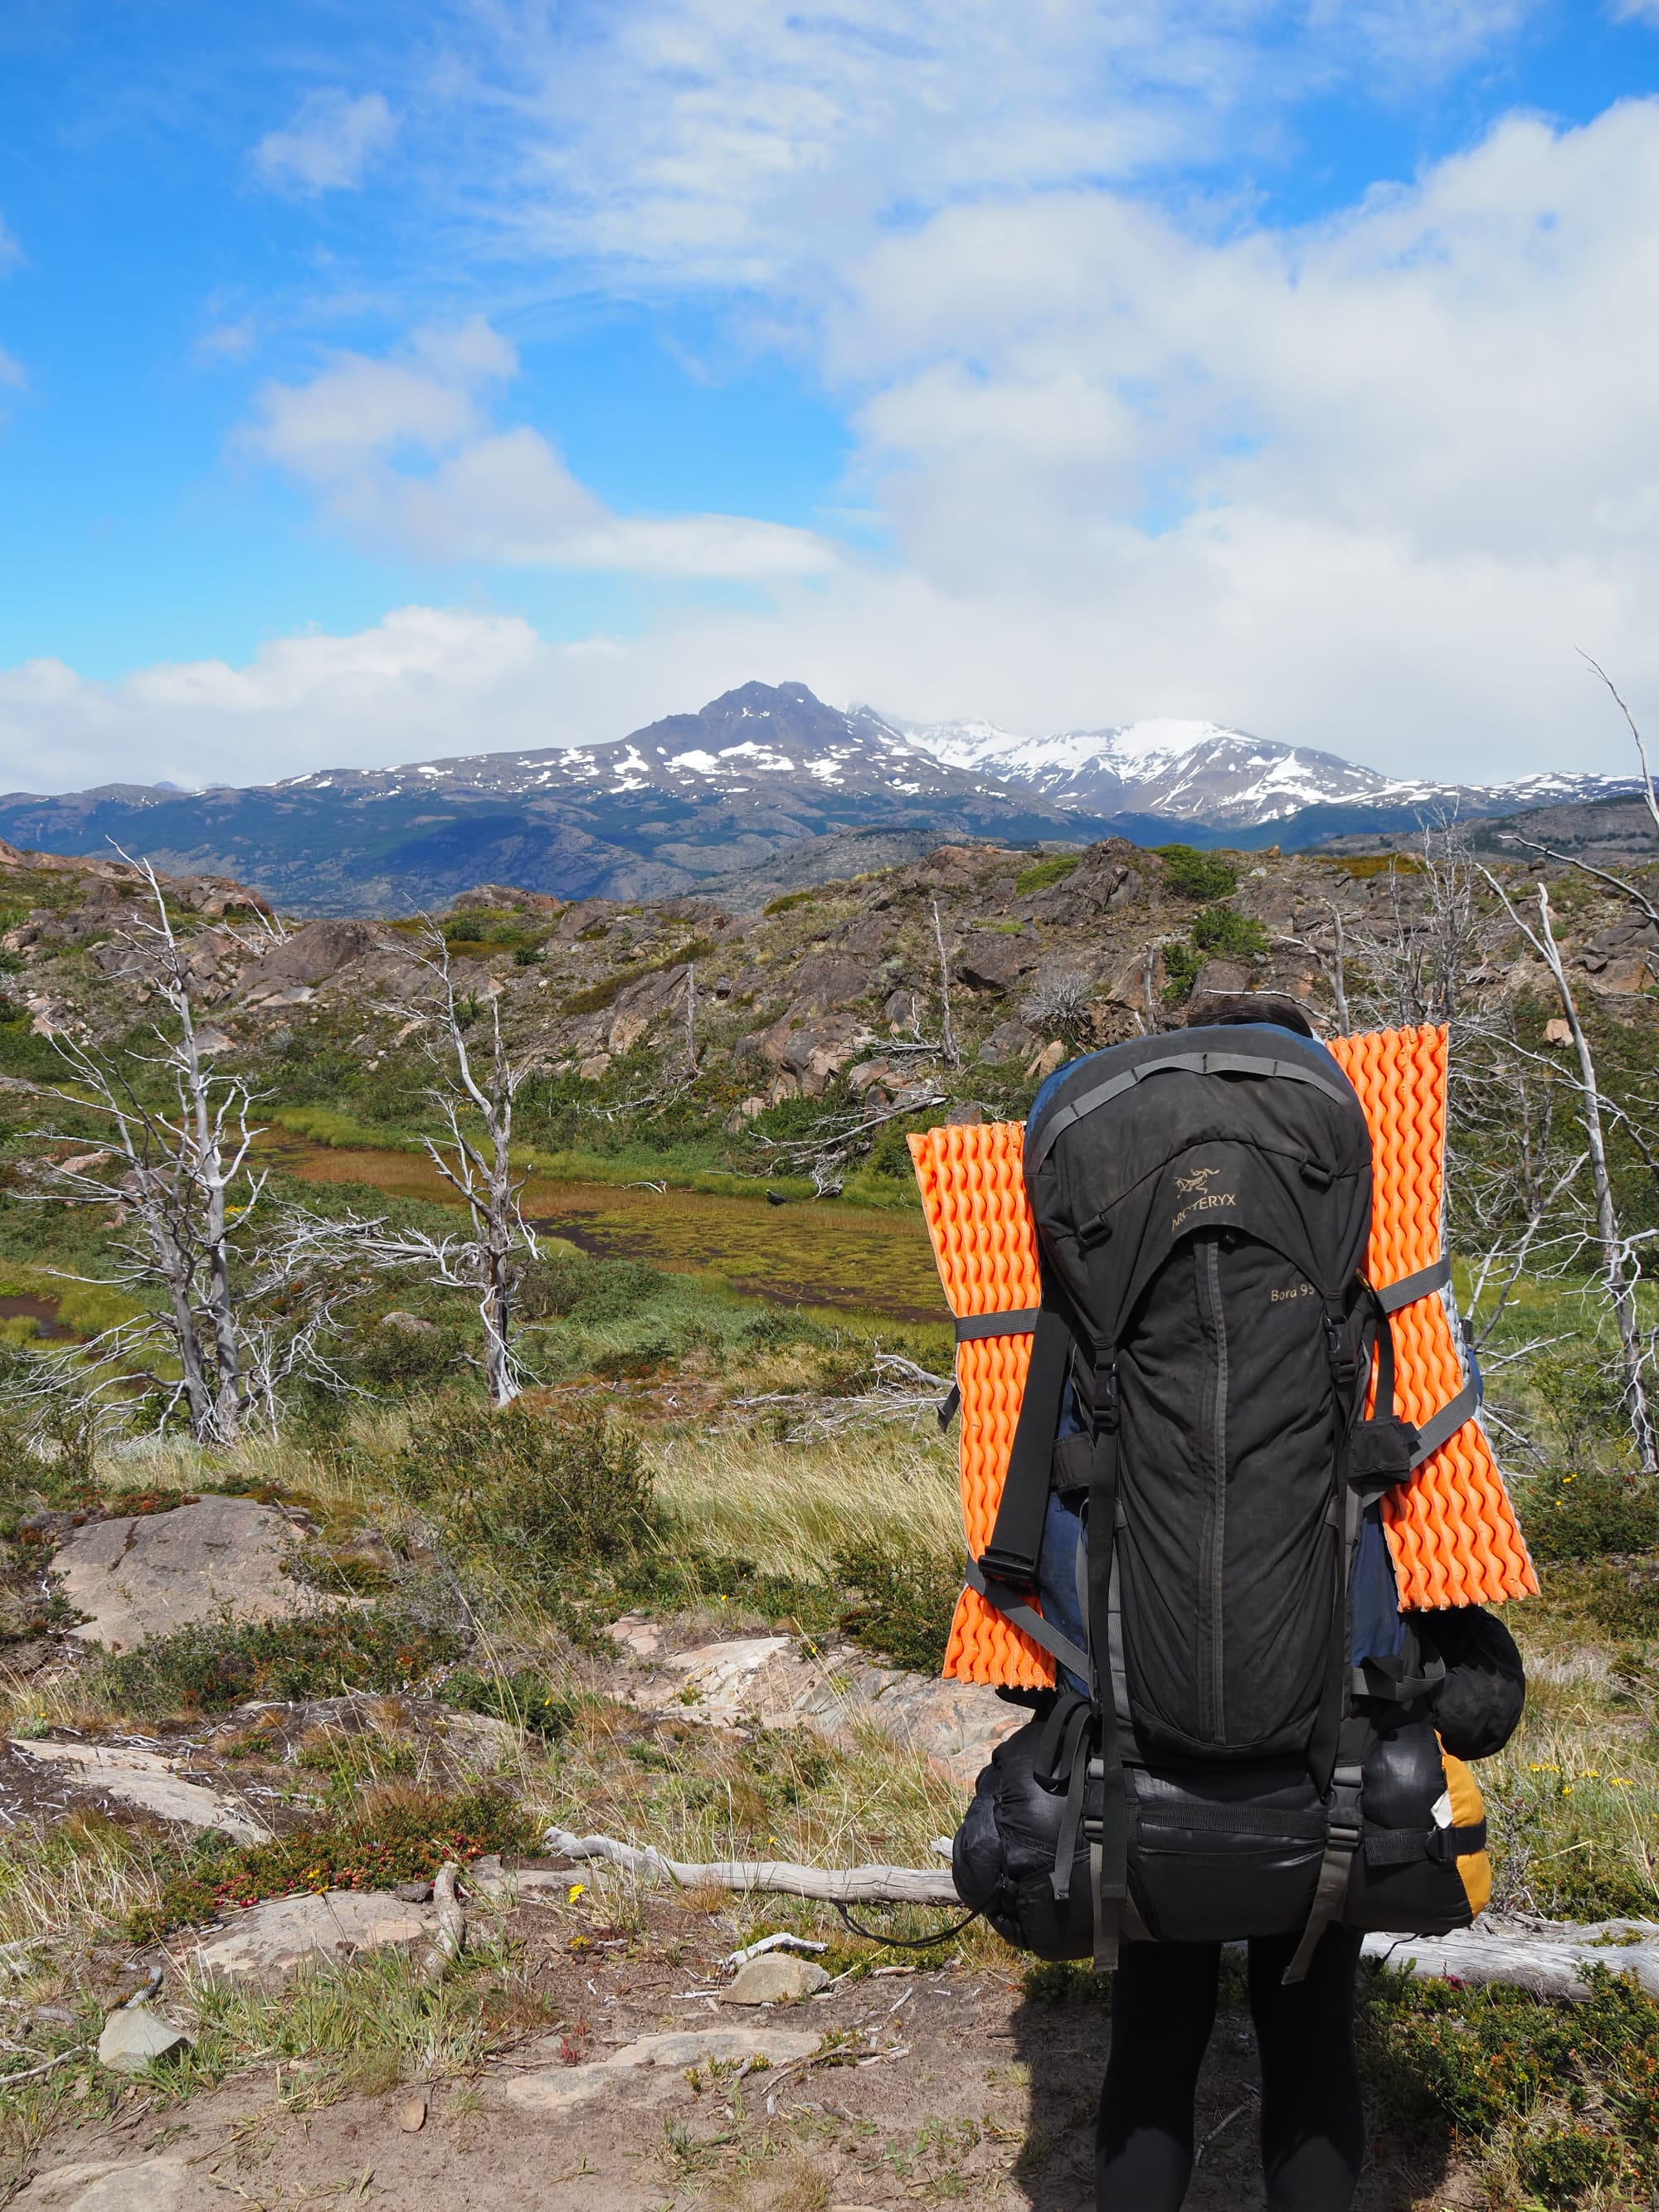
Day 3 - Paine Grande to Británico Viewpoint and back
Our third day was the longest day of our trek, walking 28km. We had to do a day trip to Británico Viewpoint and back to Paine Grande, because there were no availability in the two camps by Británico.
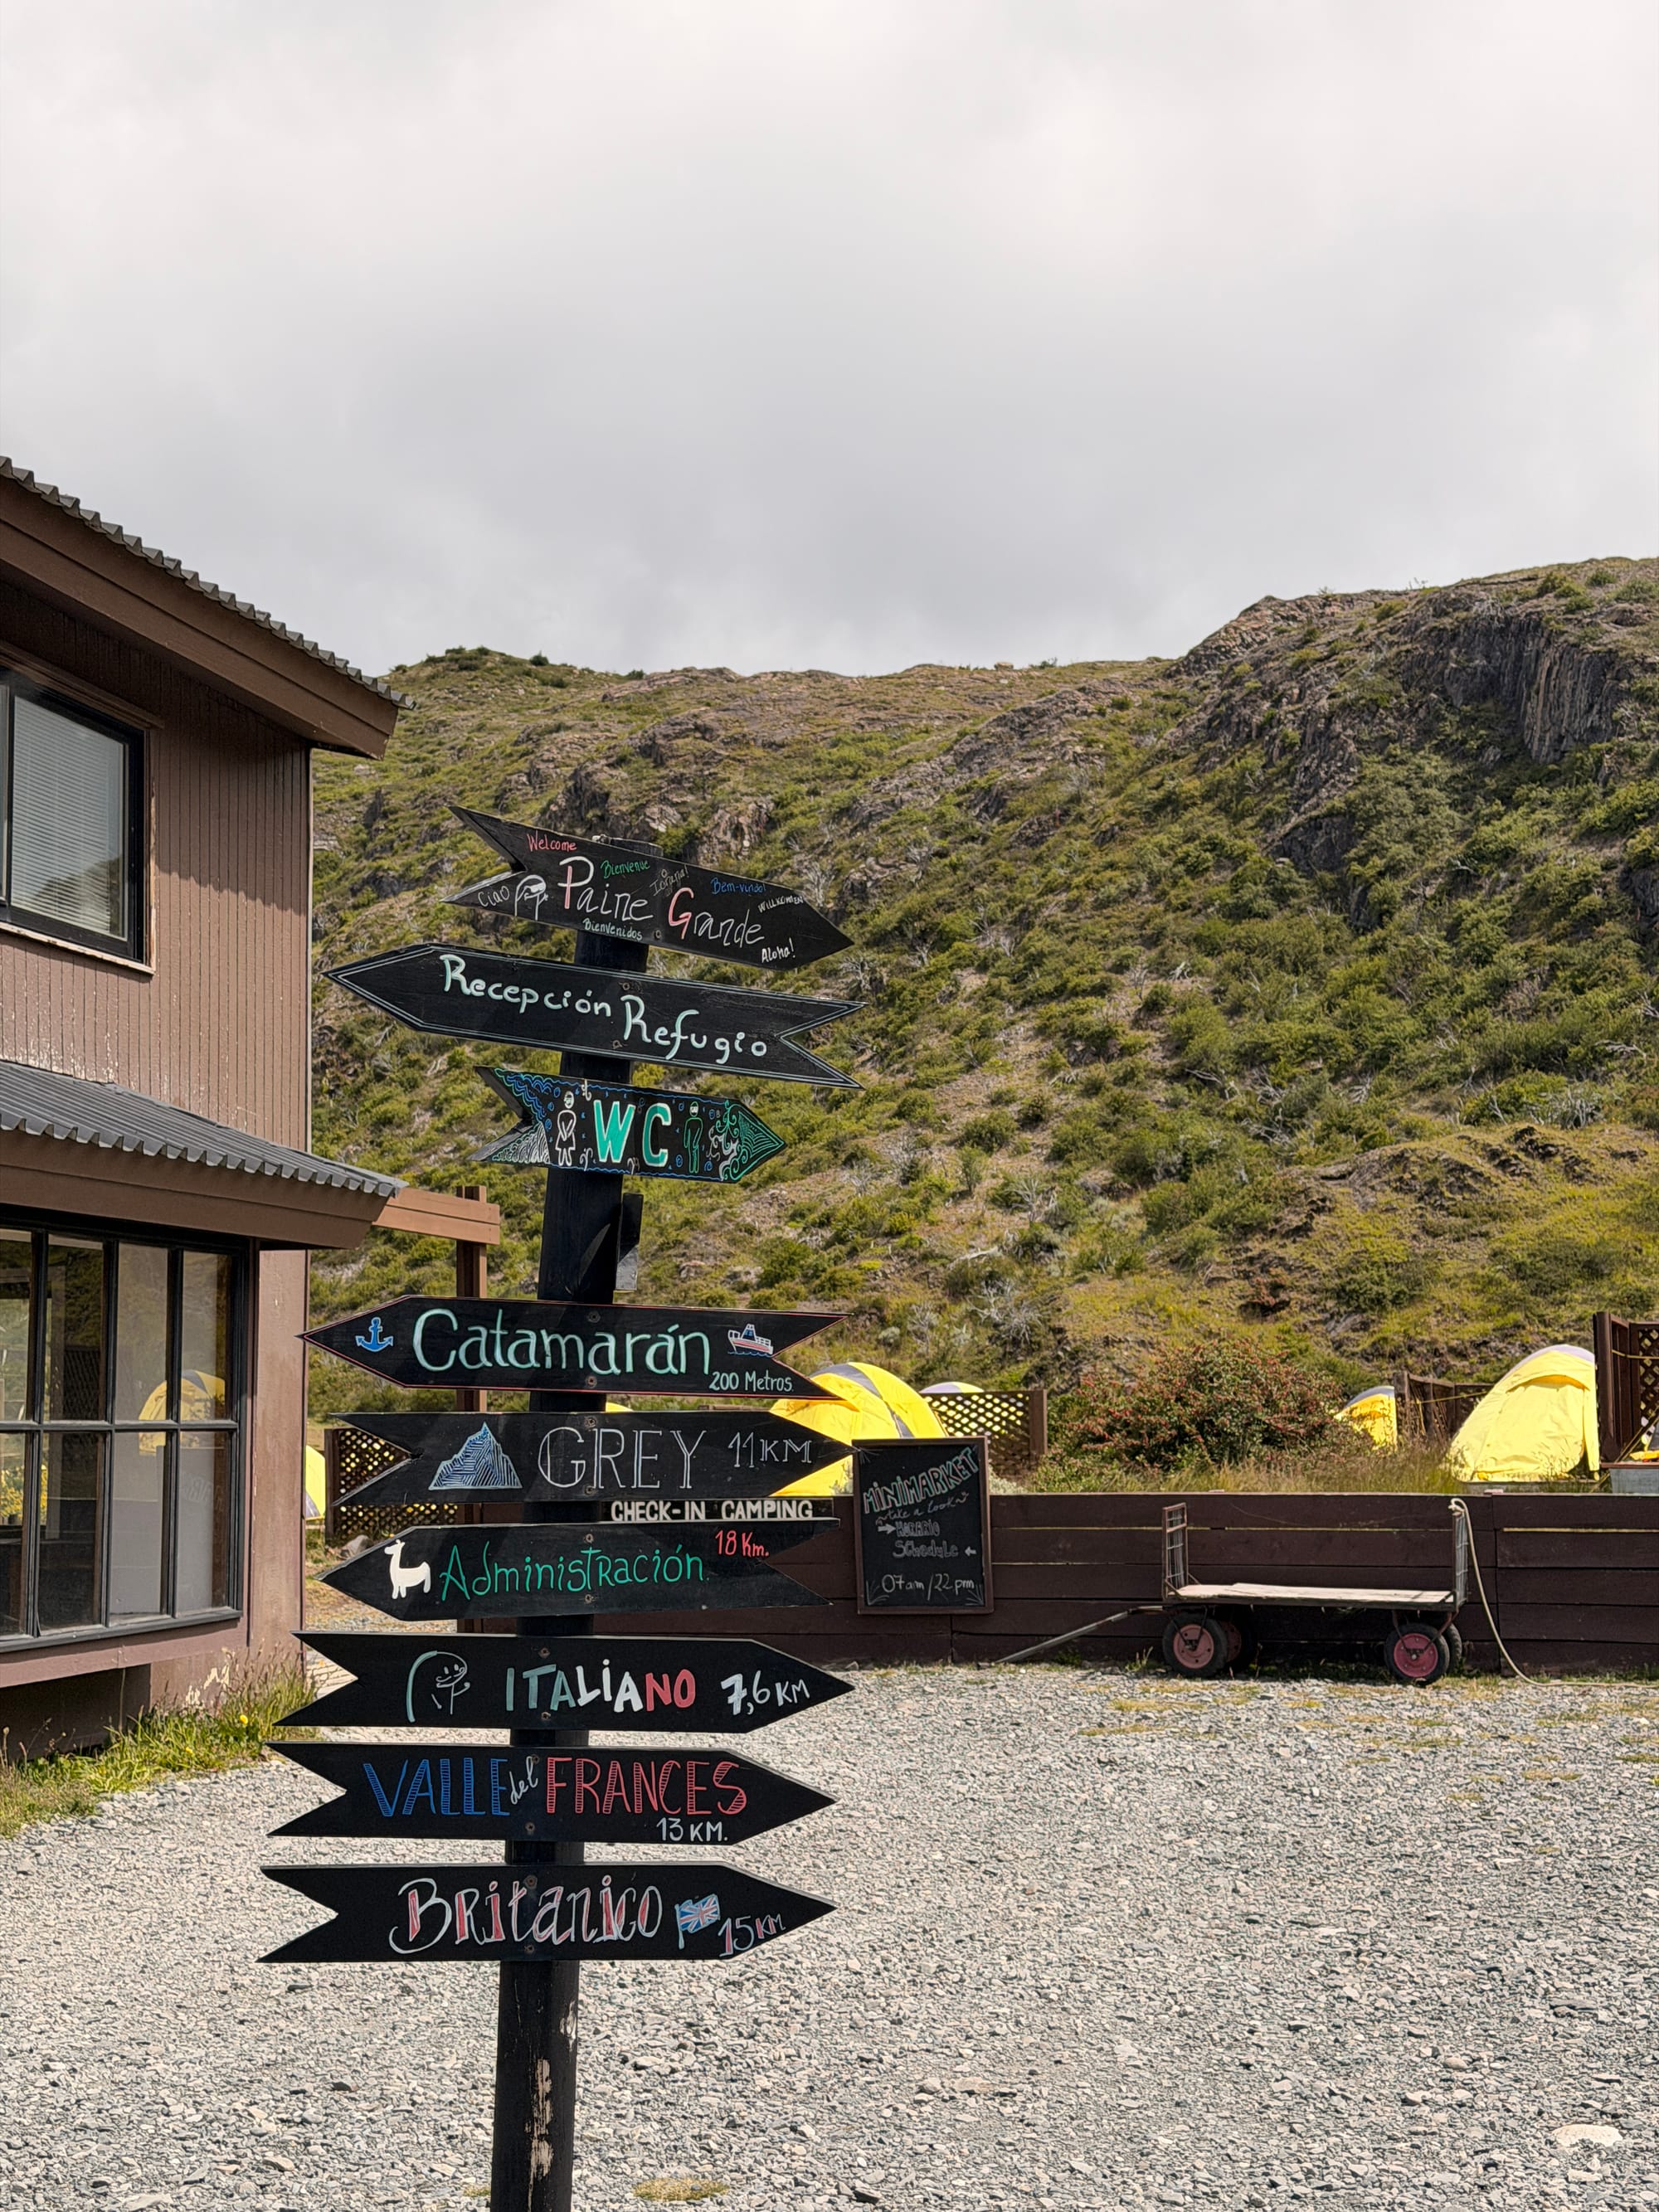
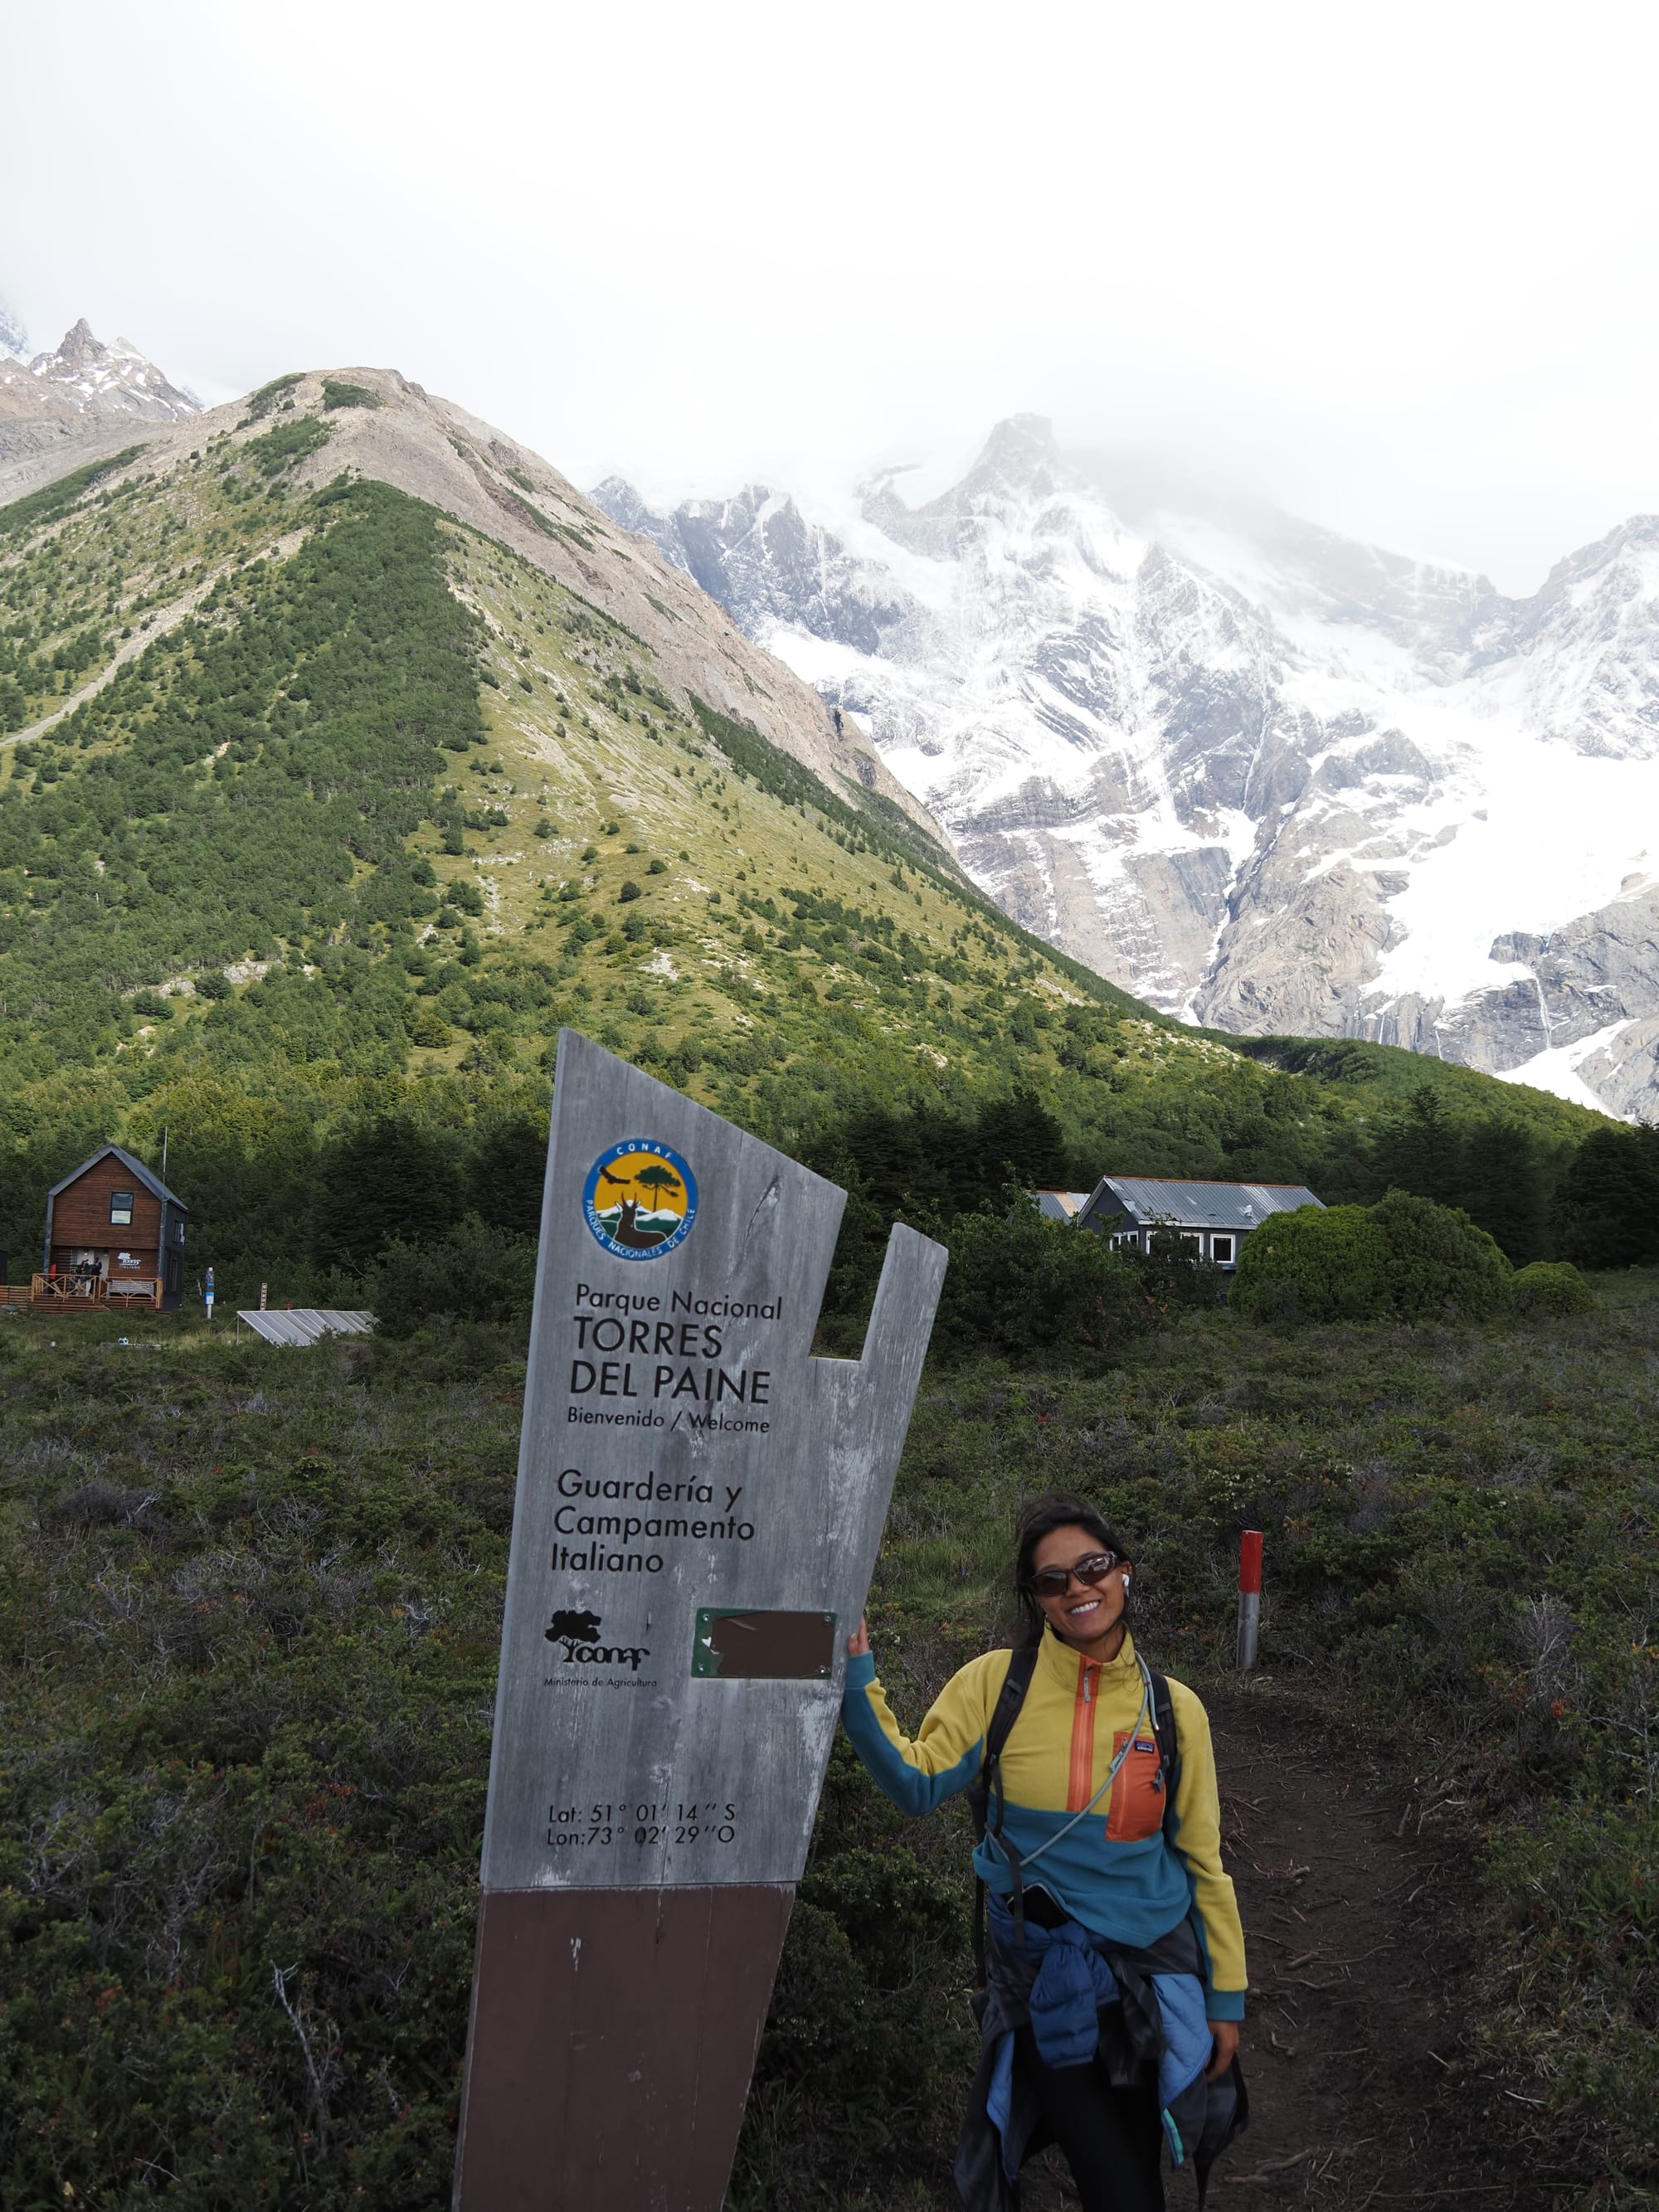
We got up early, met our friend Matt, and started the hike at 7:30am. It was a pretty flat start, with amazing views of the surrounding lakes and mountains. From Paine Grande you hike to Italiano, which is around 7.5km. It took us 2 hours to get to Italiano, which is where you can drop your big bags off. They let you store your bags there, as the hike up to Británico is very steep and hard, so you don’t want to be doing it with a heavy bag.
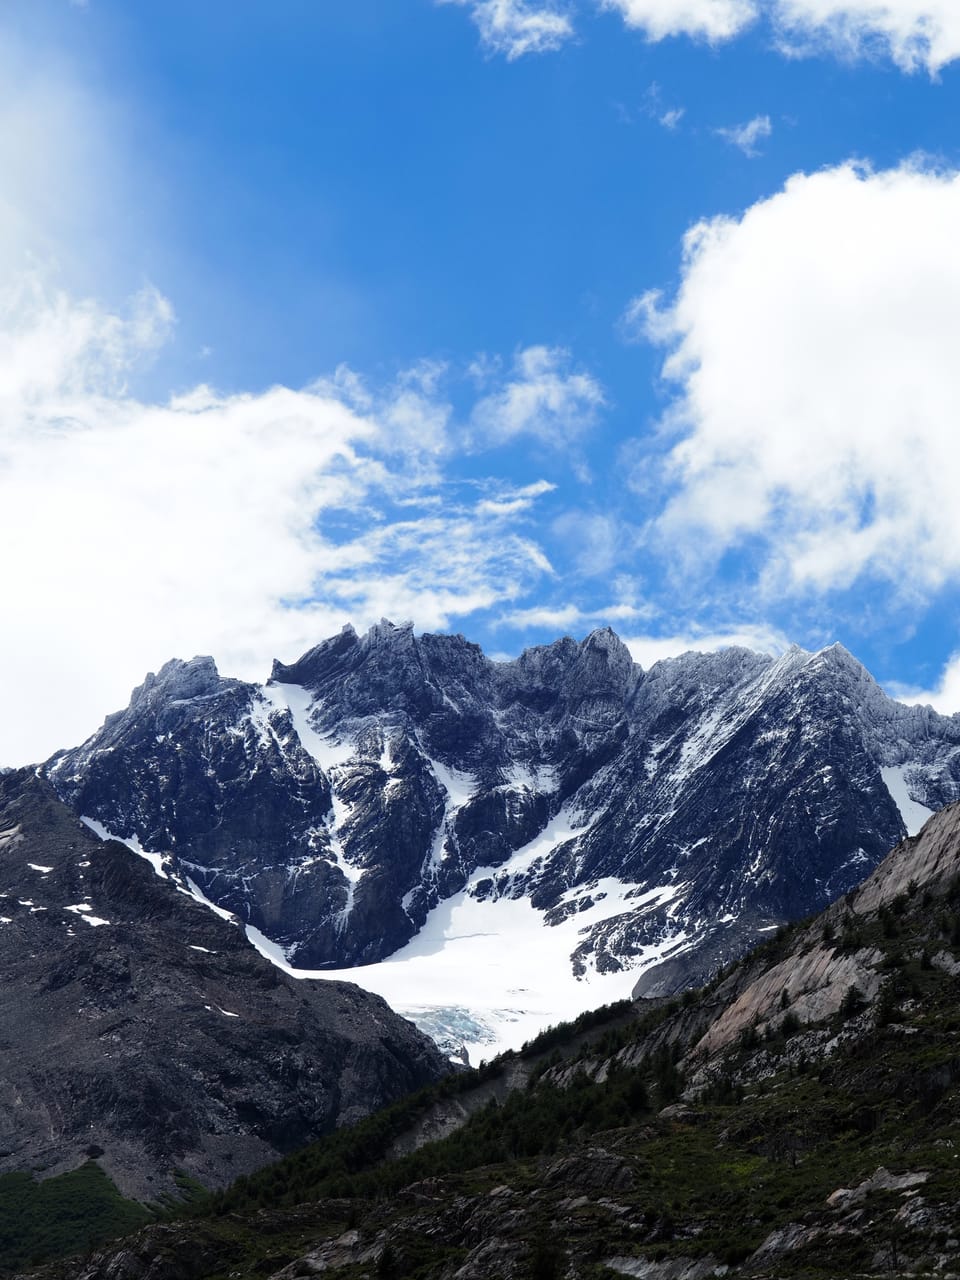
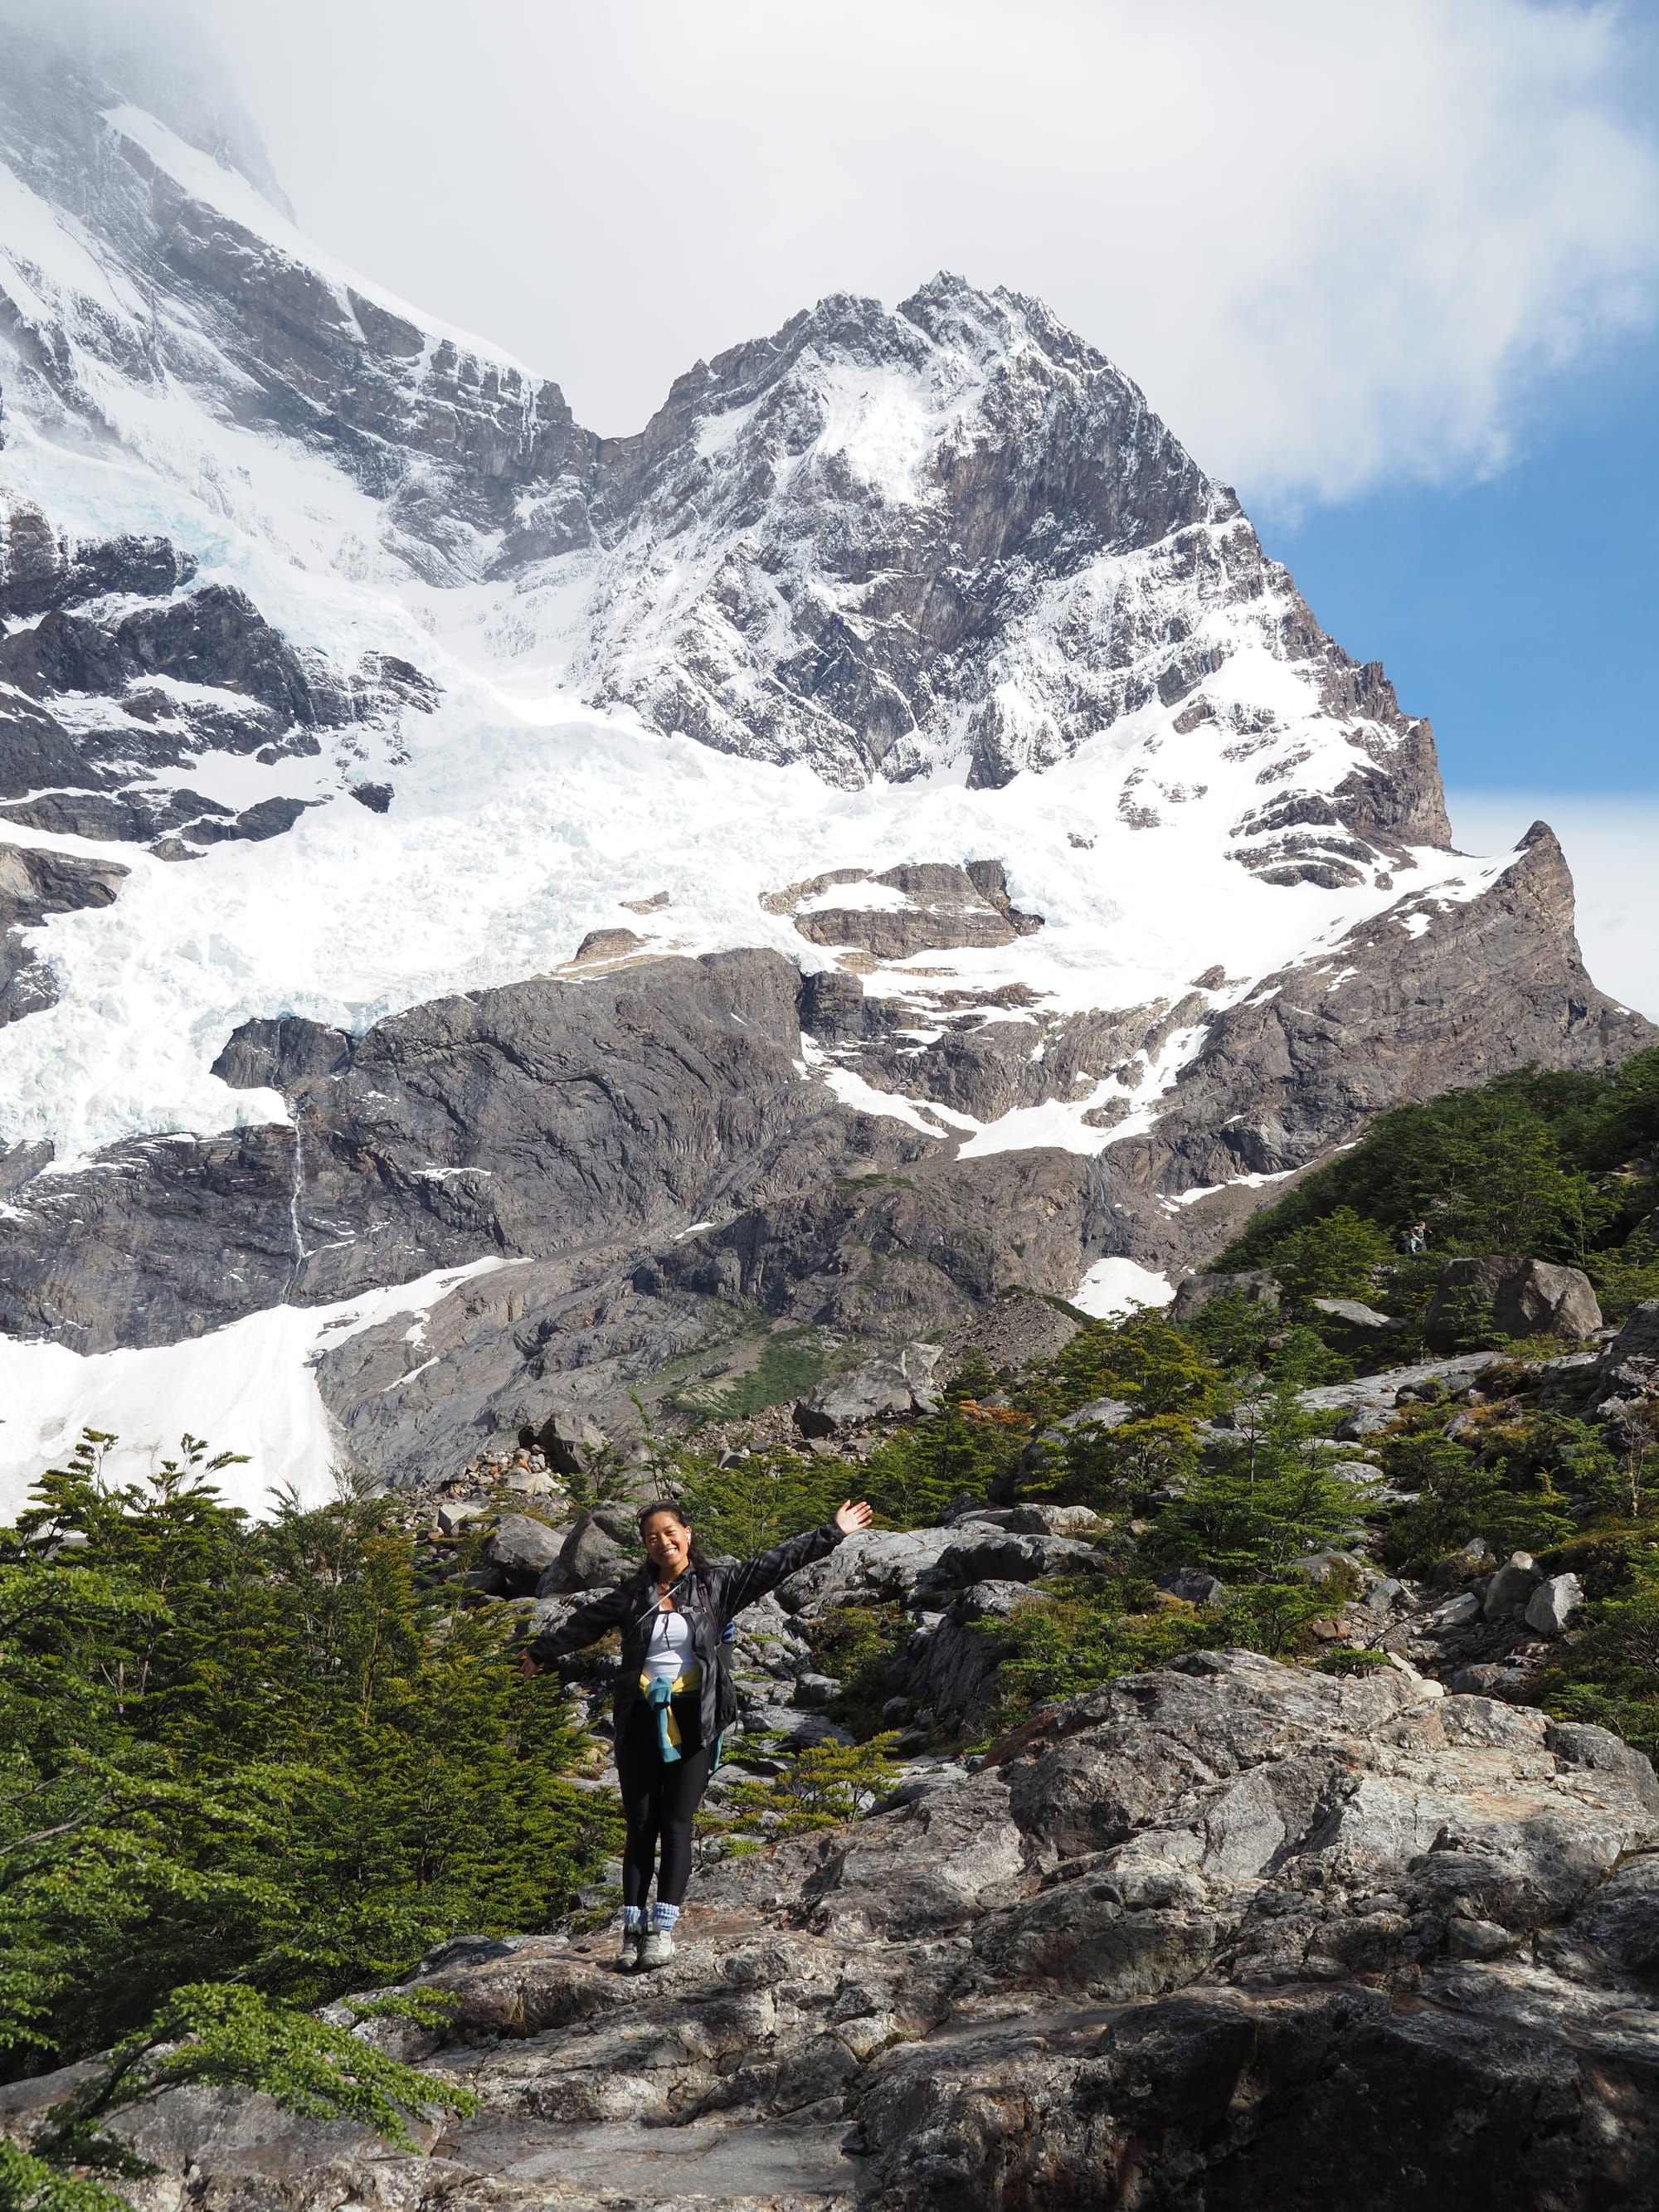
From Italiano to Británico it is another 6km and took us around 2.5 hours to get to the top. We thought the trail was never ending, as the signs are totally misleading, however, the pain was completely worth it! The views at the top are insane, you are basically in this bowl surrounded by mountains.
We had a lunch break at the top before making our way back down. Once we were back at Italiano, Matt got his bag and made his way to Cuernos Camp, which was another 5km East, and we made our way back to Paine Grande. A very long day for us, but we knew we wanted to do the viewpoint, so we pushed through the pain!
Day 4 - Paine Grande to Central Camp
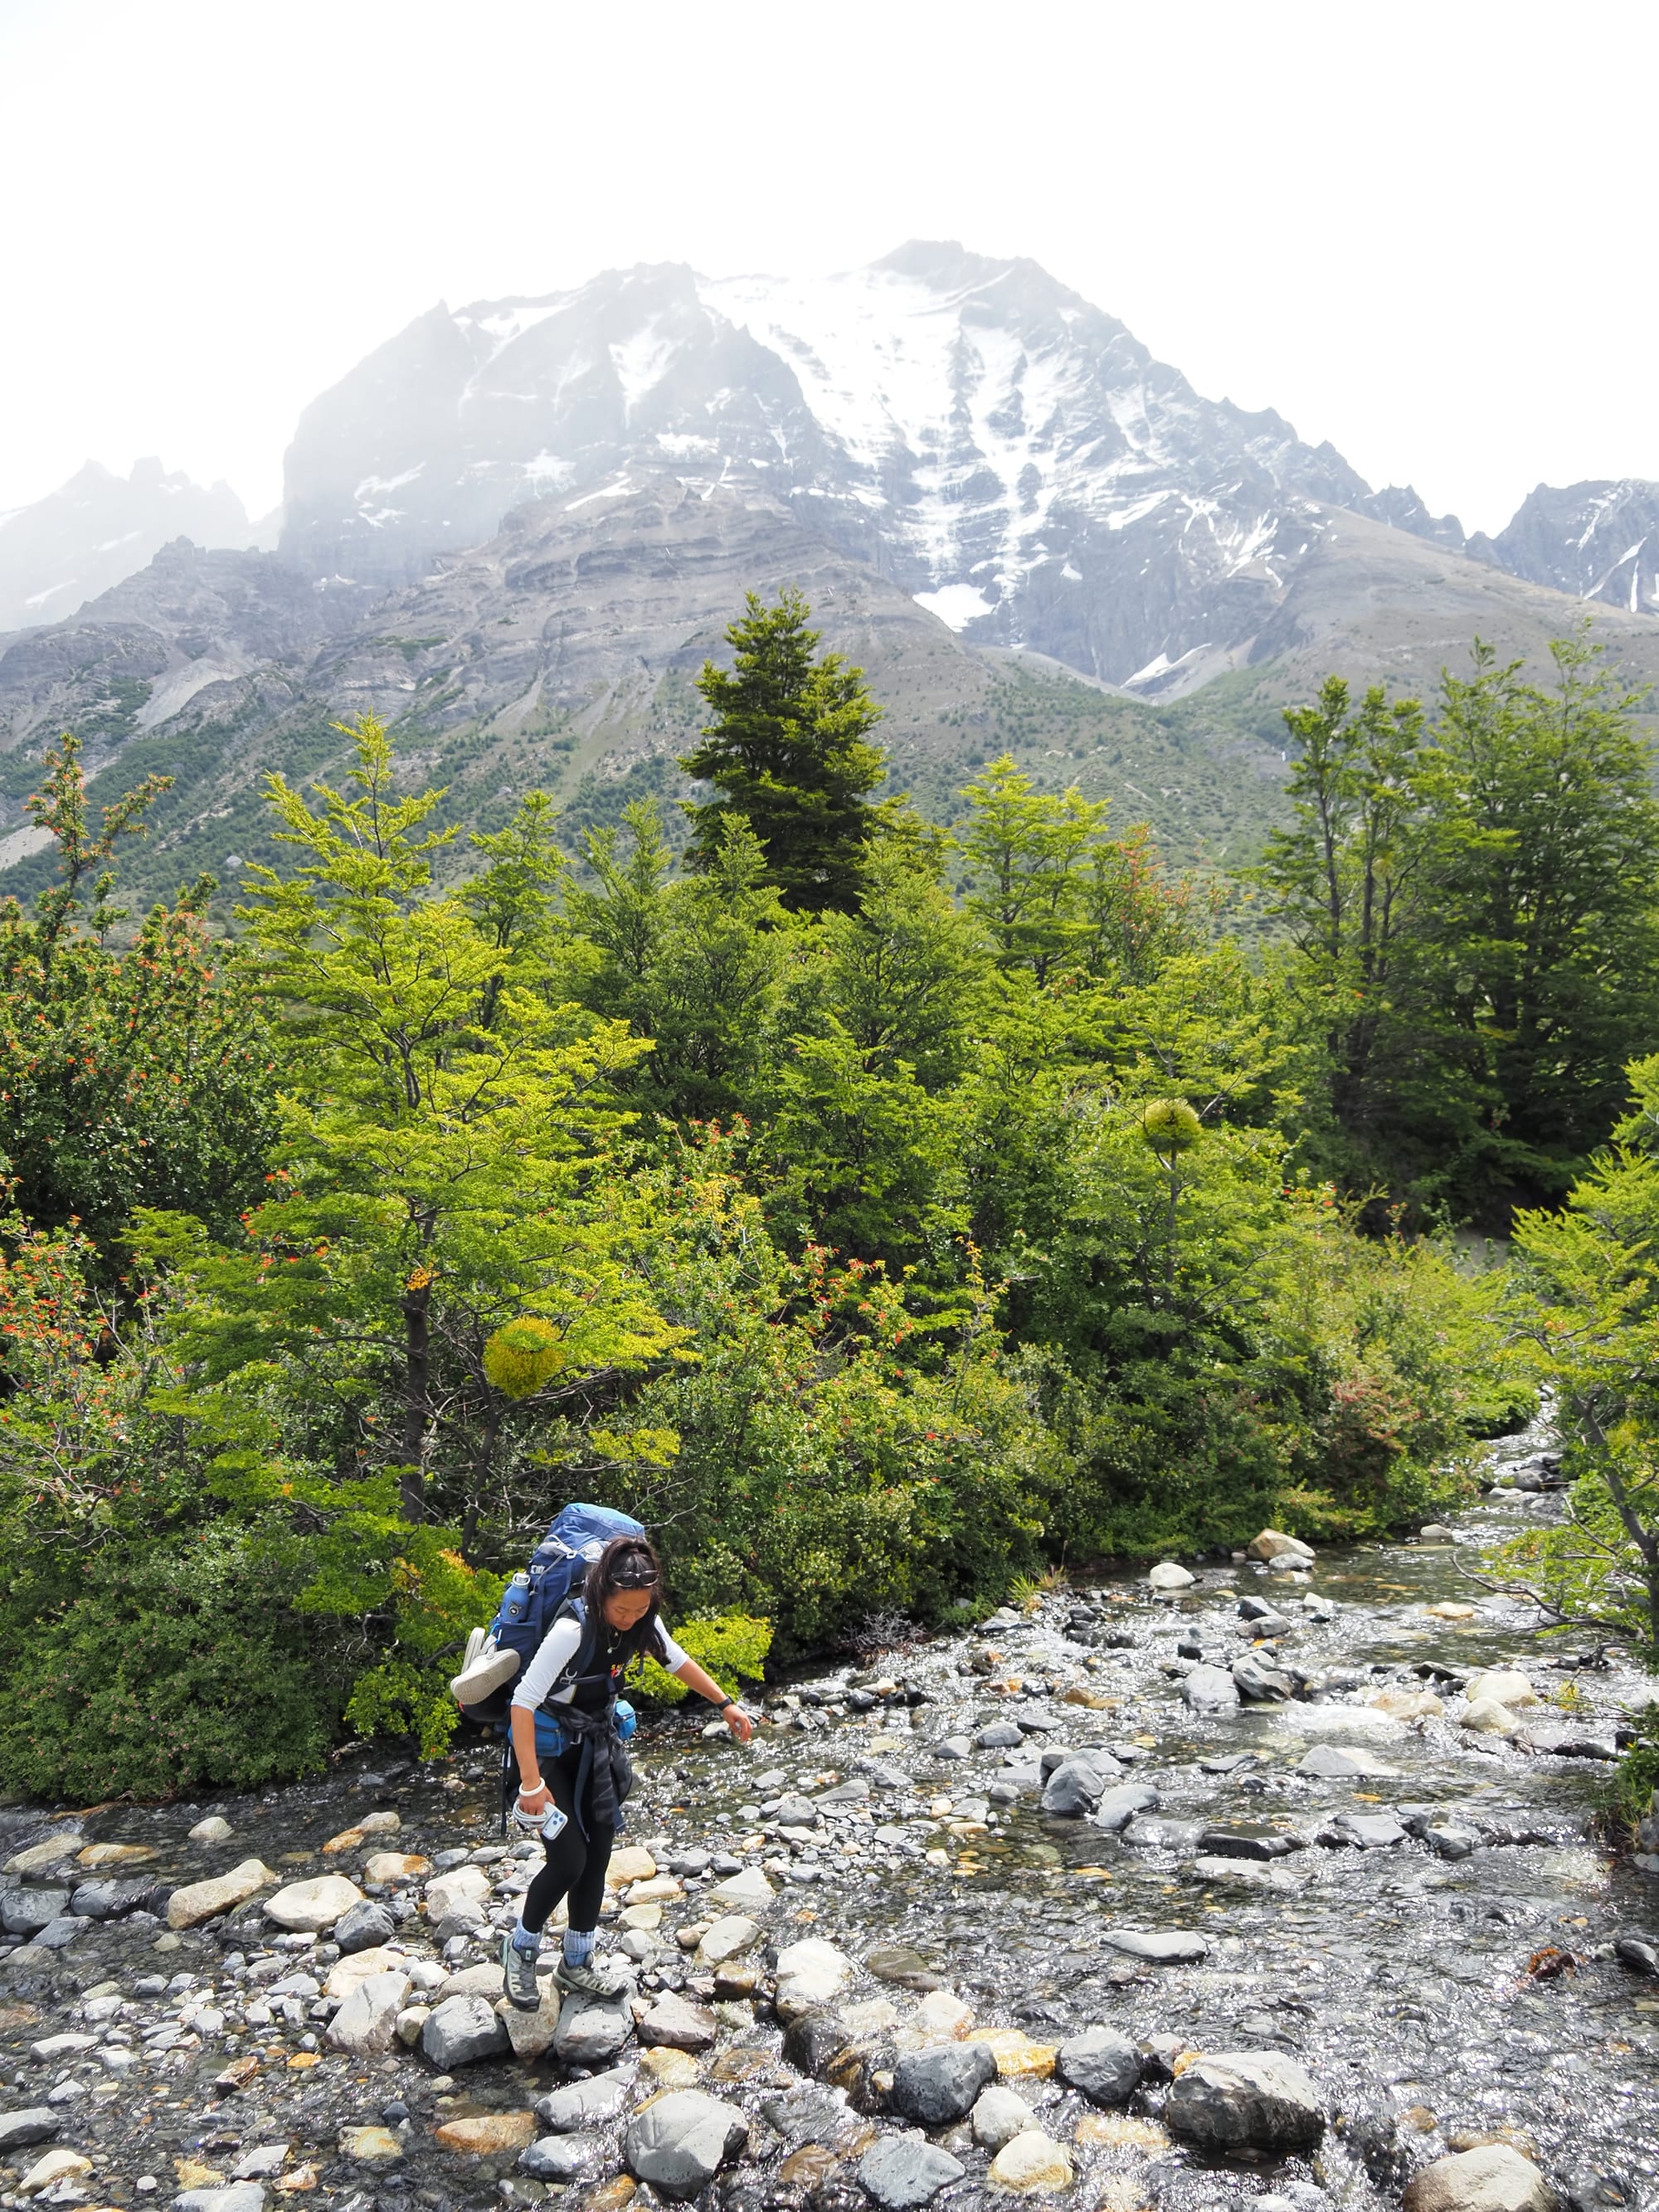
Day four was another long day for us, as we had to get from Paine Grande to Central Camp (roughly 25km). We set off at 8am with the aim to get to Italiano for our first break. This 7.5km took just over 2 hours this time, as we had to lug our big bags with us. It was also awful weather with it raining the first few hours. Luckily, we had seen all the amazing views to Italiano the day before.
After a short break at Italiano, we made our way to Cuernos Camp, which was another 5km and where we had our lunch. By then the weather had done a complete 180 and was sunny with blue skies for the rest of the day.
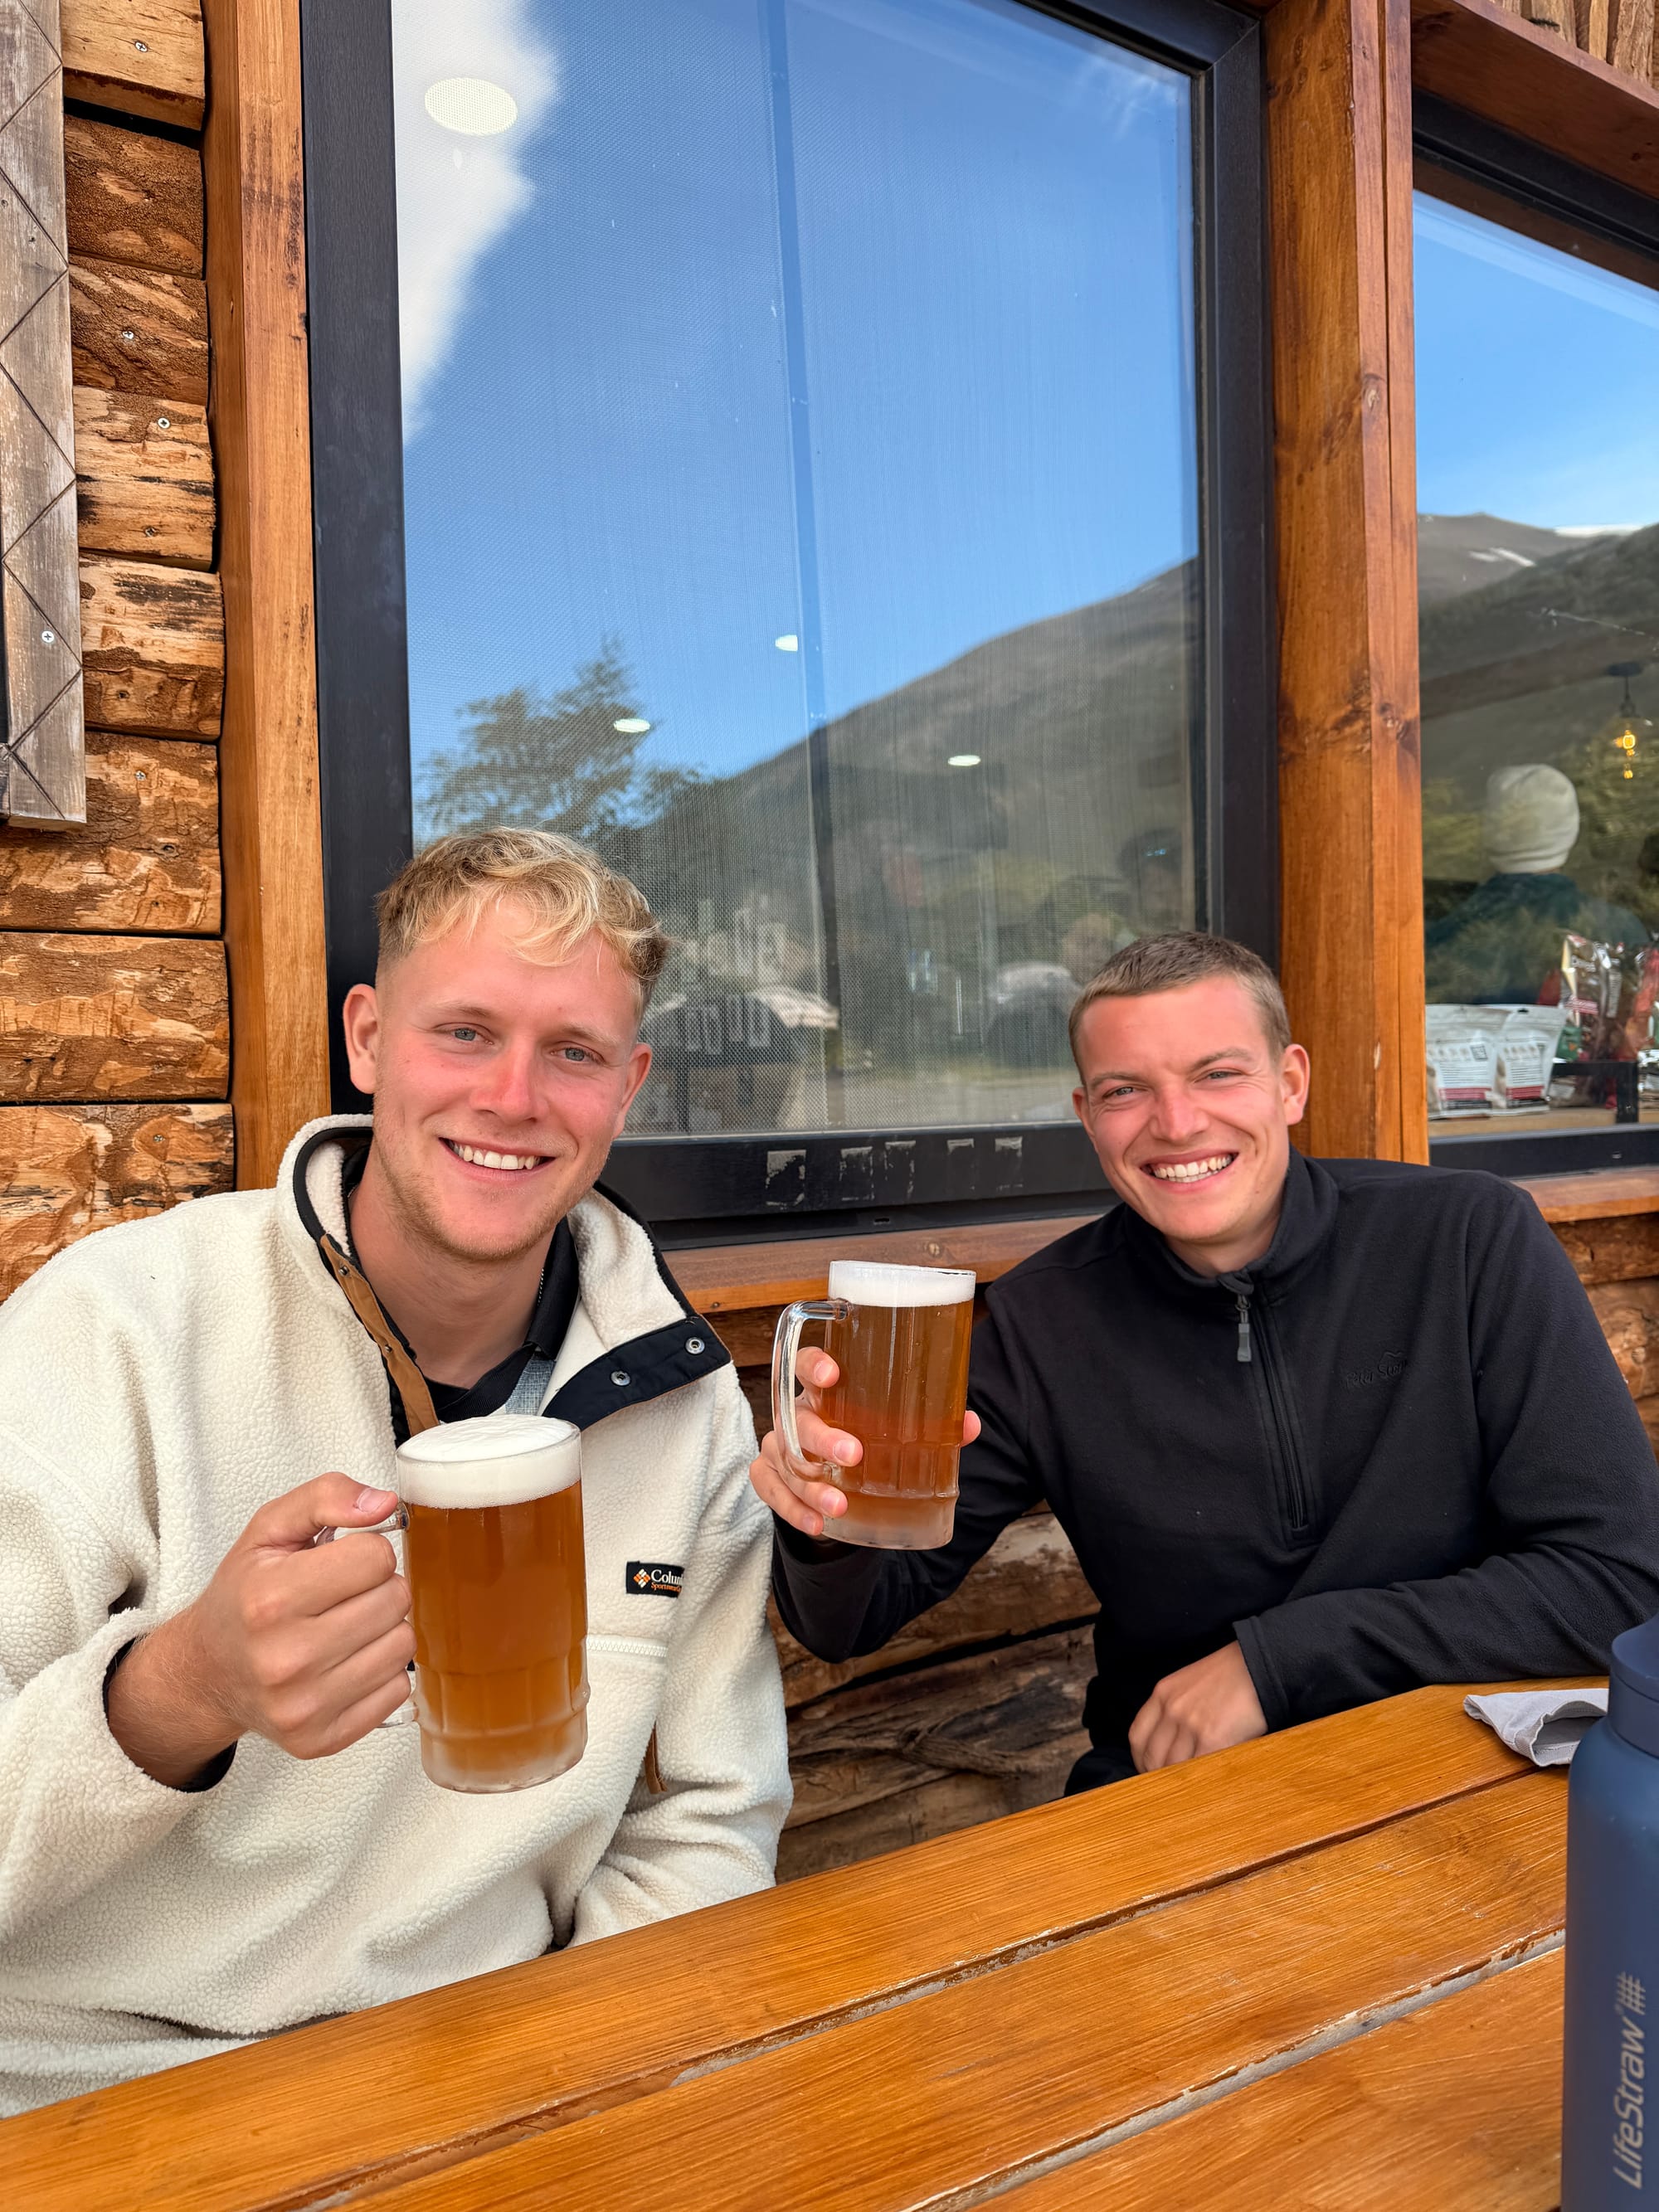
After lunch we started heading to Central, which was a further 13km hike. 10km in I started hitting a wall and I struggled a lot for the last 3km, as my feet started blistering. However, as soon as we got to camp, I was so proud of us for doing it! The views were also pretty insane on the way. At Central, we had a well-deserved drink; the perfect way to spend Christmas Eve!
Day 5 - Central Camp to Base Torres del Paine
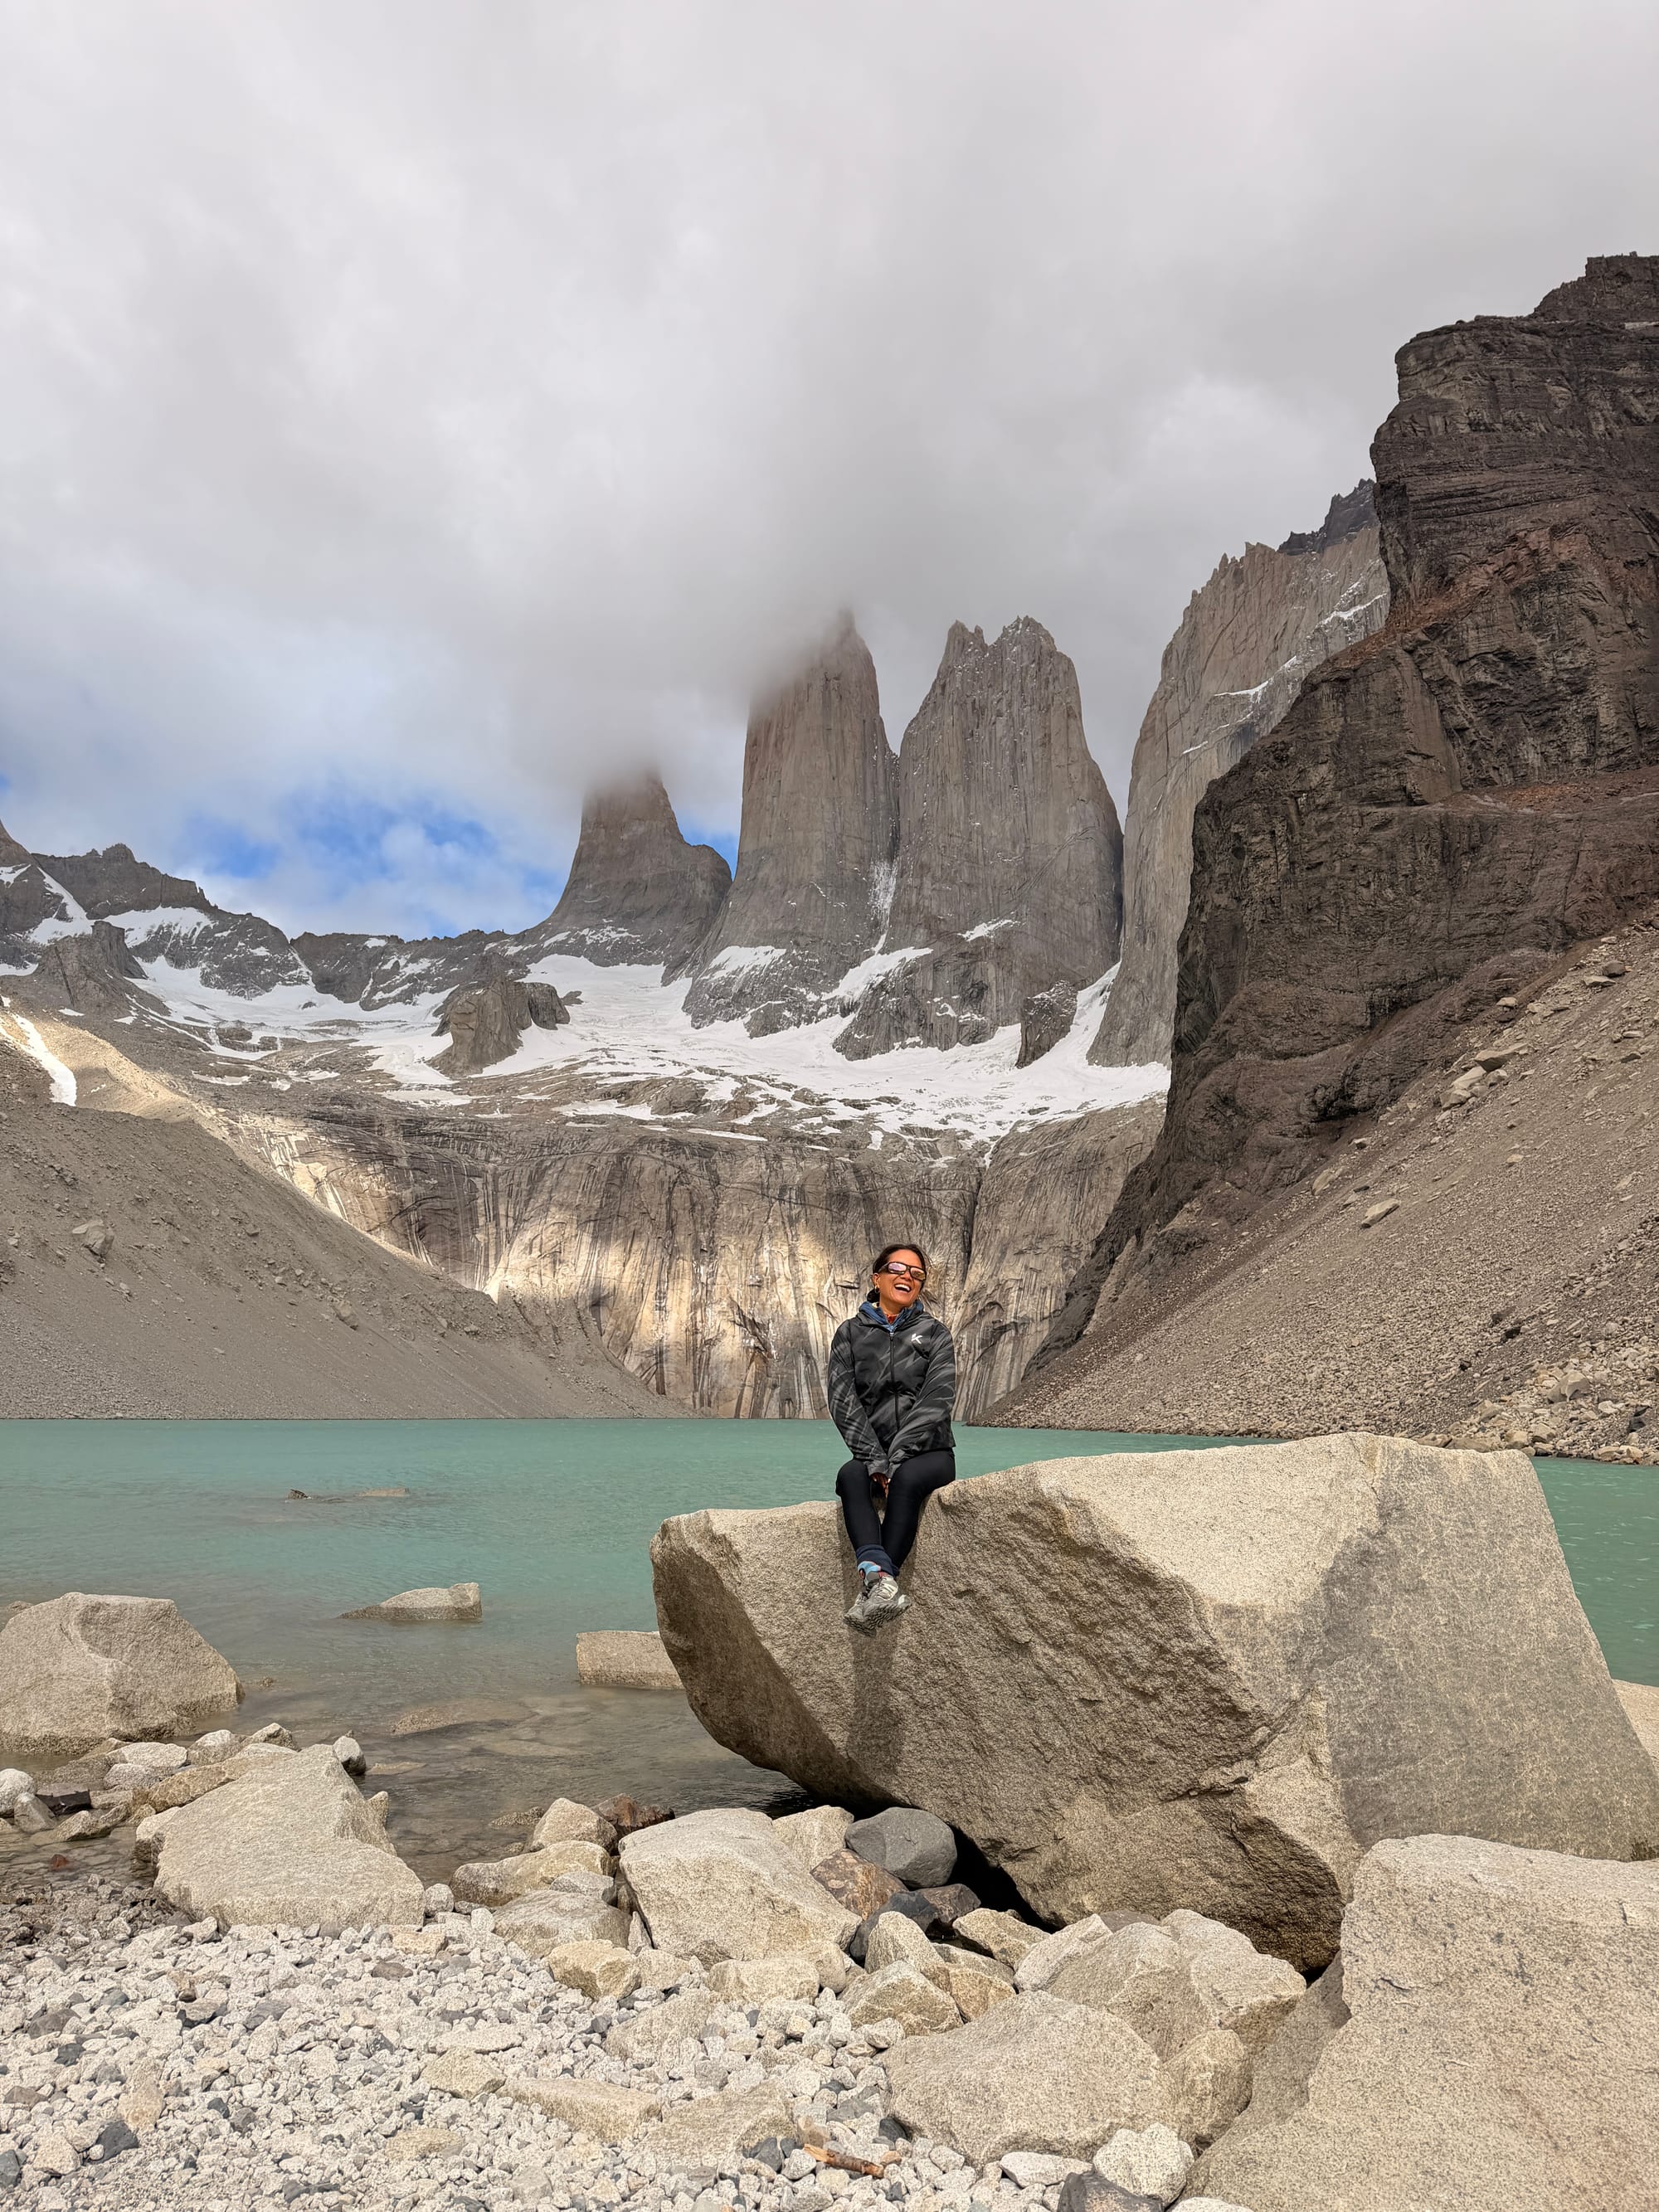
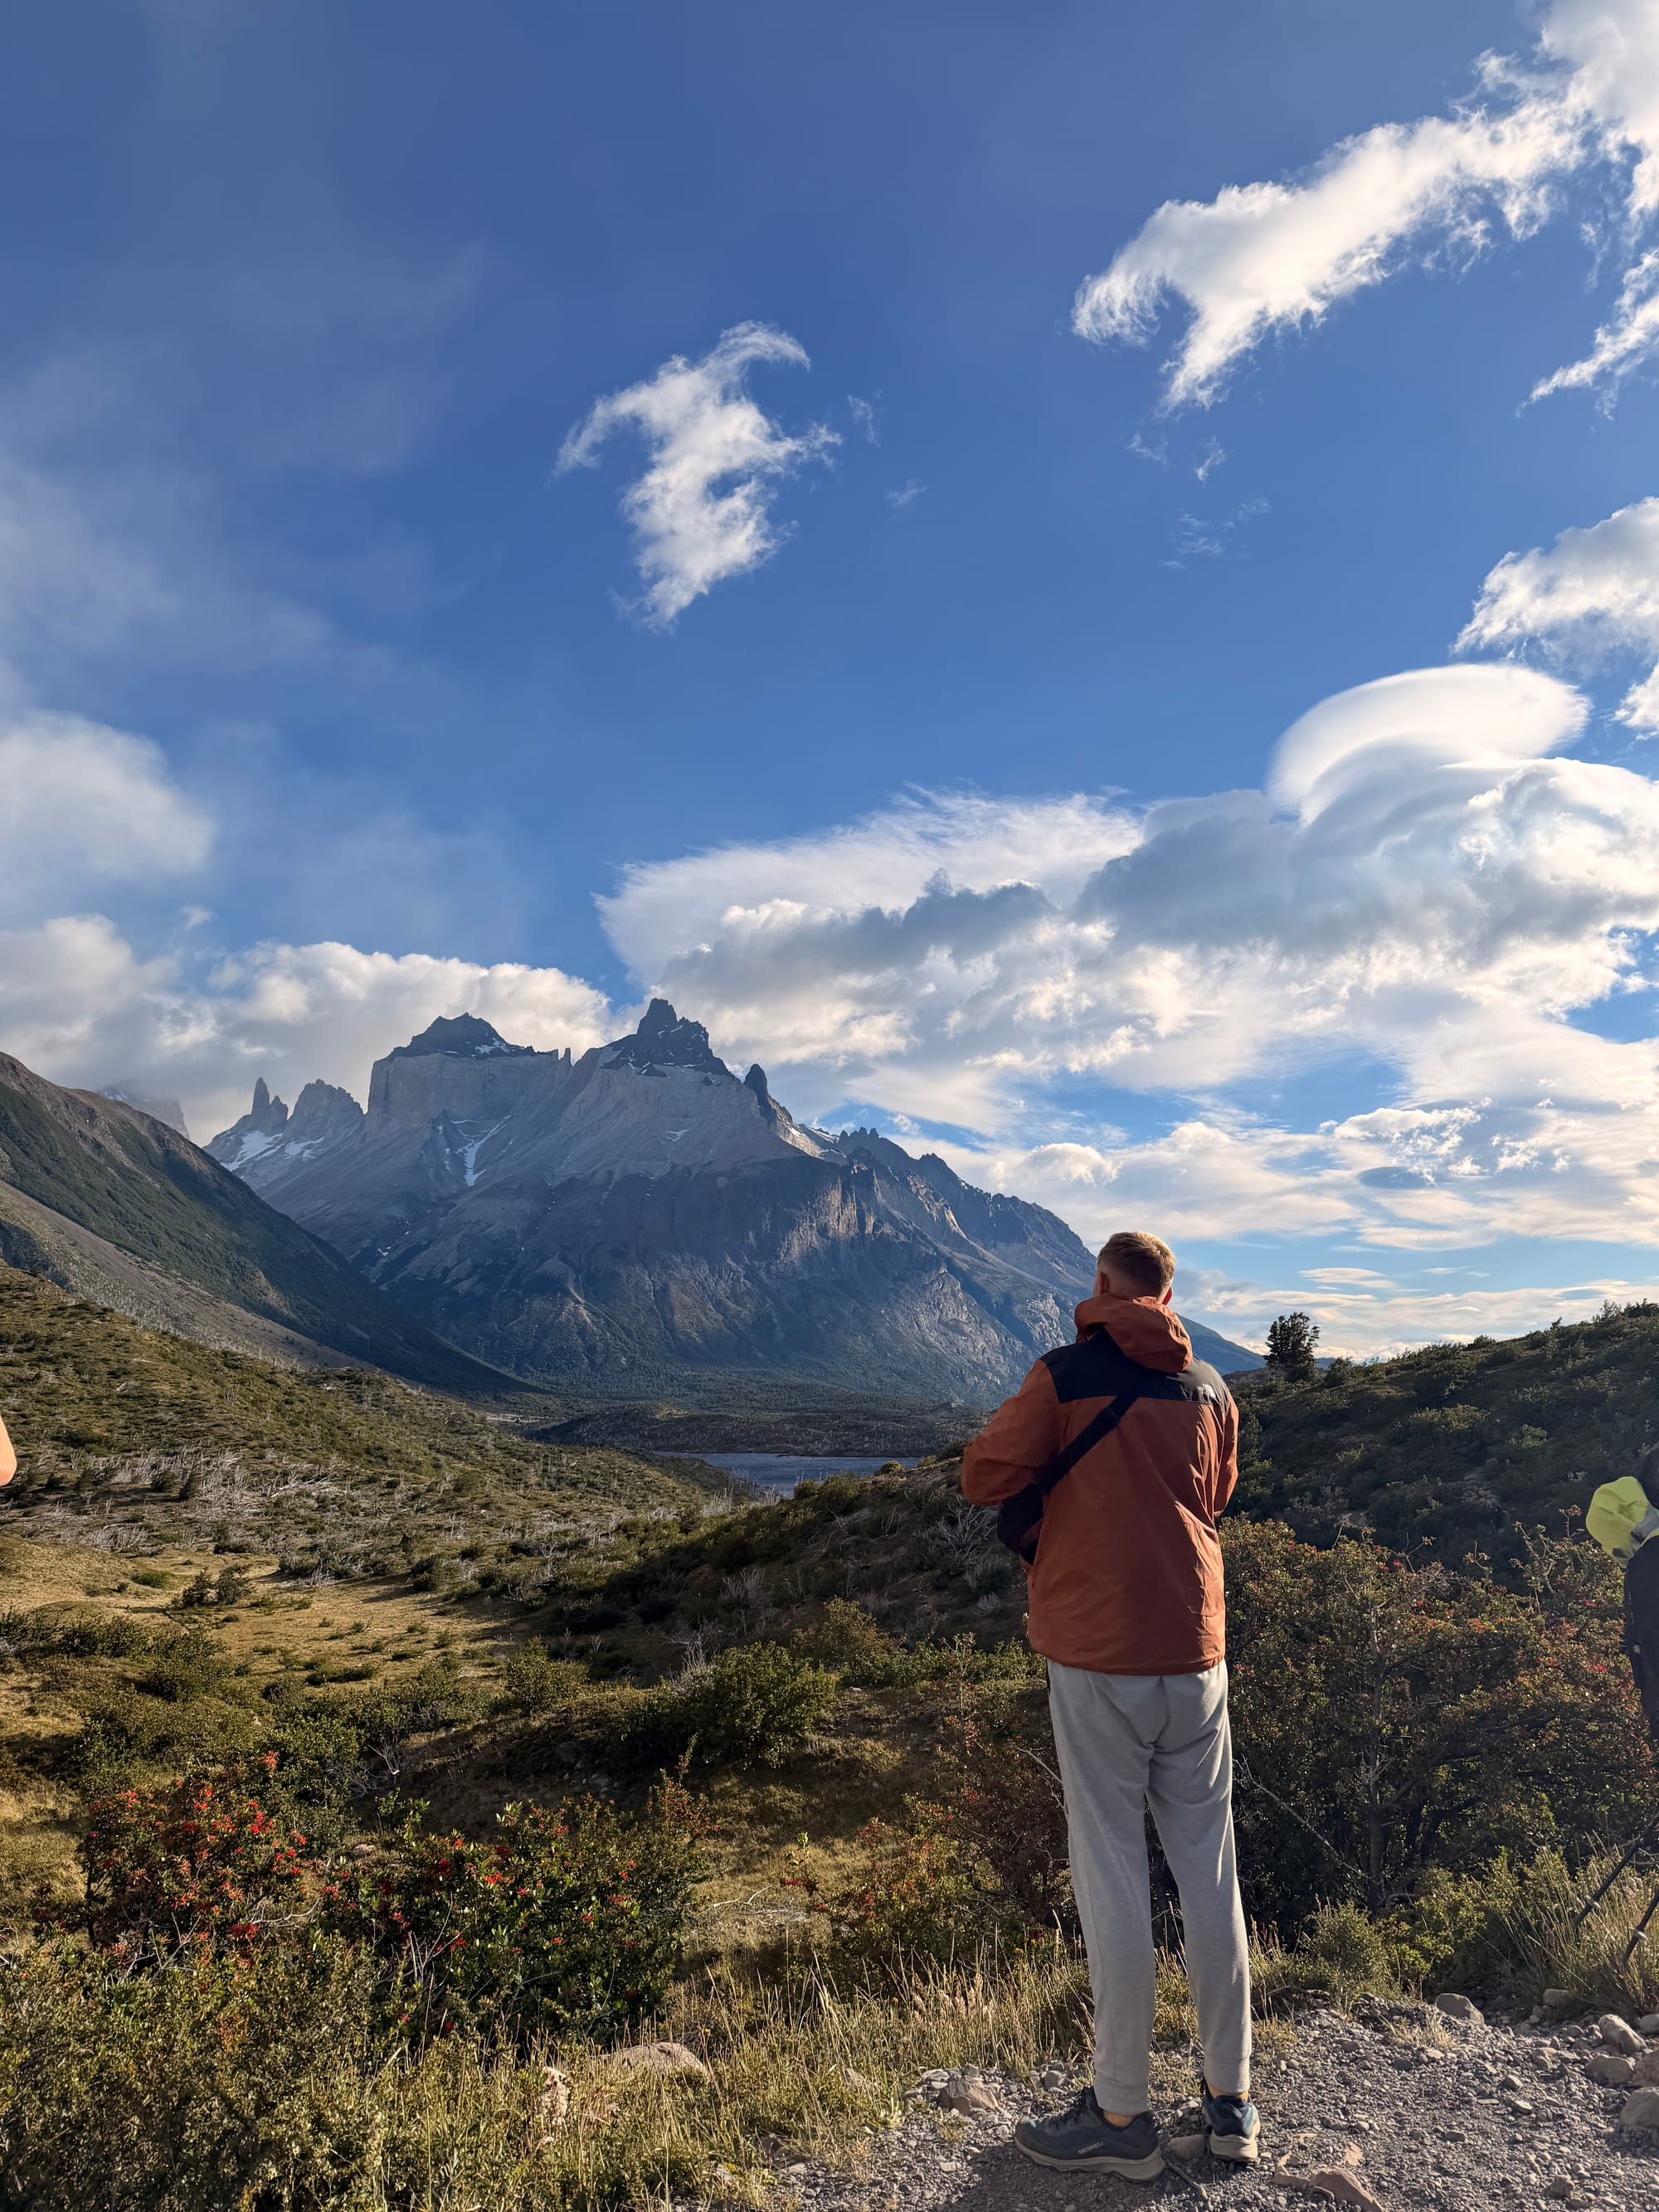
Christmas Day! What a unique way to spend this years Christmas, it was so cool! You can choose to do The Towers viewpoint for sunrise, however, we chose to just go early in the morning instead. We left at 7am and made our way to the Towers. The earlier you go the better, as you can dodge the daytrip tour groups. We also had to be back at Central by 1:30pm to catch the shuttle bus to the Bus Station, so going earlier was a must for us.
It took us just under 3 hours to get to the top and the weather as a whole was great, but there were still clouds surrounding the tip of The Towers. However, it was still an incredible view and such a pinch me moment for finishing this trek on Christmas Day. Once we made it back to Central, we got our things ready to catch the Shuttle Bus.
There are ONLY three shuttle buses a day, so plan your hike accordingly! They are at 9am, 2pm or 7pm. The 9am shuttle works for those who do the hike for sunrise. Make sure to book your bus back to Puerto Natales around a similar time, to avoid long waits after your shuttle. We wanted to catch the 2pm shuttle as we wanted to be back in Puerto Natales early to celebrate Christmas at the hostel. This meant we had to rush on the way back down so we didn’t have to wait for the 7pm shuttle. If you miss the last shuttle you will have to walk the 5km to the Bus Station, not much fun after 5 days of hiking!
Once we were back in Puerto Natales, we enjoyed a greasy sit down meal before having some drinks and celebrating Christmas at our hostel.